|
|
New Tricks for Old Dogs
 |
New Tricks for Old Dogs
Moving from Flames Of War to Team Yankee
With Phil Yates
This document outlines the main differences in play between Flames Of War and Team Yankee.
Movement
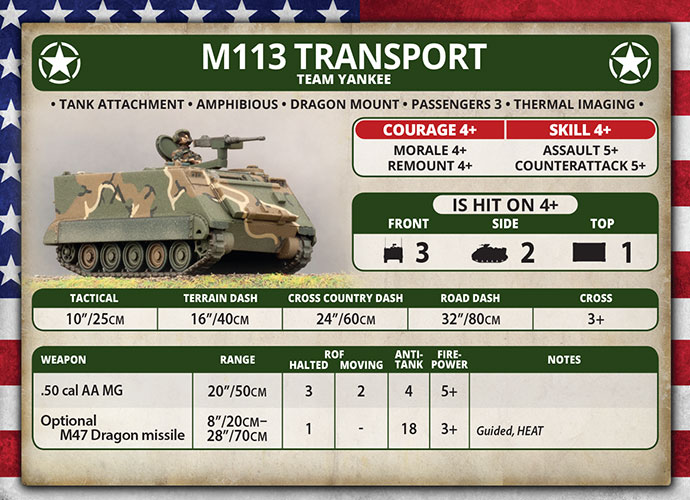
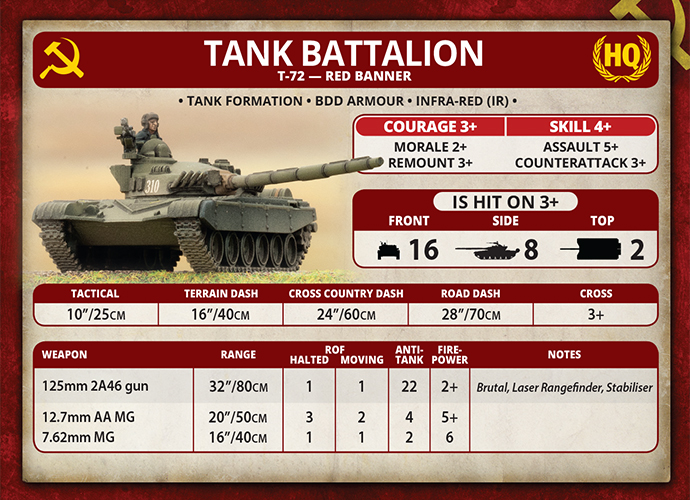
You have four movement rates: Tactical, Terrain Dash, Cross-country Dash, and Road Dash.
Tactical speed allows you to shoot effectively (usually from short halts). For most tanks that is 10”/25cm, although this varies, for instance the M1 Abrams has superb stabilisers that allow it to move 14”/35cm at Tactical speed.
|
|
Dash speed is faster, but prevents you from shooting. Unlike Flames Of War’s At the Double, teams making a Dash move are no more vulnerable to enemy fire.
- Terrain Dash is used for crossing terrain.
- Cross-country Dash is used in the open.
- Road Dash is used on roads.
|
| Each tank has an individual Cross number that it needs to meet to avoid bogging down in Difficult Going (there is no Very Difficult Going). This is usually higher than Flames Of War’s 2+, but teams are automatically freed at the start of their next turn. Note: bogging down doesn’t necessarily mean literally getting stuck, rather it’s an indication that the team didn’t move through the terrain as fast as expected. |
|
In Command
To be in command you need to either end your move within 6”/15cm of the unit leader, or within 16”/40cm and in line abreast. The line abreast option allows large Soviet units to form line and advance on the enemy while bringing all of their guns to bear.
The only penalties for being out of command are that you can’t dash (unless it’s back into command) and if you move you’ll need an extra +1 to hit.
|
|
Movement Orders
Movement Orders replace special rules like Stormtroopers and Avanti. Any unit may use these orders if they pass the required test (but suffer a penalty for failure).
- Blitz Move requires a Skill test and allows teams to move 4”/10cm before their normal movement. If they don’t move further, then they can shoot at their halted ROF. If they fail, they are all out of command and moving, so get a +1 to hit.
- Follow Me requires a Courage test and allows teams to move an additional 4”/10cm after their additional movement, but can’t shoot. If they fail, the unit leader dashes on ahead and they still can’t shoot.
- Shoot and Scoot requires a Skill test and allows teams that did not move to move 4”/10cm instead of assaulting.
- Cross Here improves a units Cross number by 1, but prevents them from shooting.
- Dig In allows a unit to dig in on a Skill test.
|
|
What can shoot
Each Infantry team can shoot with one of its weapons. Each Tank or Aircraft can shoot with its all of its machine-guns or one other weapon.
Line of Sight & Concealment
Terrain is now rated as Tall or Short. Tall terrain blocks LOS, short terrain doesn’t. Teams must be entirely in or behind terrain or more than half behind a building to be concealed.
Teams within 2”/5cm of the far edge of terrain are not affected by it. Teams more than 2”/5cm into tall terrain cannot be seen from outside. Line of Sight through gaps now requires a ¾“/20mm corridor.
|
 |
|
Roll to Hit
You can now score a hit when you need a 7+ or 8+. A 7+ requires a 6 followed by a 5+, while an 8+ requires a 6 followed by a 6.
Assign Hits & Mistaken Target
The shooting player nominates the target and assigns additional hits to other teams in the unit that are within 6”/15cm. If the targeted player wishes, they can swap all of the hits between two valid targets on a roll of 3+. If they succeed, they can try again for another pair. Tanks within 8”/20cm or infantry within 4”/10cm are too close to be mistaken and cannot have hits swapped to or from them.
As you can automatically appoint a new unit leader (similar to Flames Of War’s Mission tactics rule), picking off unit leaders has little effect and players will not usually bother with Mistaken Target to avoid their loss.
Shooting at Aircraft
Aircraft are always visible from anywhere on the table, and can only be concealed by tall terrain within 4”/10cm of the ground team, which also conceals the ground team from the aircraft. Hunter-killer helicopters can also be concealed by tall terrain within 4”/10cm of themselves.
Anti-helicopter weapons, guided weapons, and infantry (except heavy weapons) can shoot at helicopters in addition to AA weapons. All bar anti-tank guided missiles can shoot in the enemy turn before the aircraft shoots, but that weapon cannot shoot next turn if it does so (other weapons on the team can though) and the team cannot assault.
AA and aircraft weapons shoot at aircraft with full rate of fire. All other weapons have ROF 1 (with an additional +1 if they are already ROF 1 – as all anti-tank guided missiles are). Aircraft are units, so are allocated hits like any other unit. Hit aircraft then roll their saves, and any failing their saves are subject to a Firepower test to kill. Infantry (apart from AA weapons) re-roll successful Firepower tests.
|
 |
|
Artillery
An artillery unit always uses the same size template, regardless of the number of guns firing. Normal artillery use a 6”/15cm Artillery template, while rockets and bomblets use a 10”/25cm Salvo template. The safety distance is 4”/10cm between friendly troops and an Artillery template or 6”/15cm to a Salvo template. Aside from this, you may centre the template anywhere in line of sight of the spotting team.
The roll to Range In is now an unmodified Skill test, and the Roll to Hit is based on the target team’s To Hit number. The modifiers are similar to shooting, but being concealed is of no benefit (although being gone to ground still is). On top of that teams out of line of sight (but still under the template also gain a +1 to be hit. The usual +1 for ranging in on the second attempt and +2 for the third attempt still apply.
As there are no staff teams, any artillery unit may repeat a bombardment on the same target. In addition, you may place your Ranged In marker before deployment to represent pre-planned bombardments.
A new addition for artillery is special minelet, bomblet and laser-guided projectiles.
|
|
Assault
The biggest difference in assaults is that teams must be directly in contact with the enemy to be involved in the fight (aside from defensive fire). So if a team cannot get into contact (or if infantry into contact with another infantry team that is in direct contact), it can’t charge. Also teams cannot move more than 10”/25cm and still assault.
A new introduction is the Assault X rating on some infantry teams. This gives them a different Assault rating from the rest of the unit. An example of this would be a small anti-tank team. With very few men, they are less likely to score a hit in assaults than a full fire team.
Infantry that score a hit can either use their normal Anti-tank rating against a tank’s Side armour, or Anti-tank 2 against its Top armour (not very useful against most tanks as they have Top armour 2).
Break Off is now the minimum move to get 4”/10cm away from the enemy, while consolidating teams cannot approach within 2”/5cm of the enemy.
|
|
Morale
Units
are now in good spirits (and therefore don’t test morale) if they have two
tanks or aircraft or three infantry teams operational within 6”/15cm of the
unit leader. This is regardless of unit size, so big units are very robust.
Formations are in good spirits (and therefore don’t need test morale) if they have at least one unit in good spirits, and your force will fight on as long as it has at least one formation in good spitirts.
|
|
Smoke
Direct-fire smoke adds +1 to hit for teams shooting under it or through it (unless the shooting team has Thermal Imaging gear).
Artillery smoke bombardments place a line 4”/10cm long for each weapon firing and 2”/5cm wide starting at the aiming point and running in any direction. Artillery batteries can only fire a single smoke bombardment per game. These smoke screens block line of sight at ranges over 6”/15cm and add +1 to hit like direct fire smoke.
|
|
Night
The biggest change to night fighting is that night does not provide concealment, rather it adds a separate +1 to hit. This is penalty is negated by Thermal Imaging equipment. Teams with Infra-red or Thermal imaging equipment roll two dice on the Night Vision table and take the best.
|
|
Minefields
Minefields are now indicated by a small token. Teams moving within 2”/5cm of the token enter the minefield. Missions like No Retreat give the defender minefields. US artillery can purchase minelet ammunition to lay an additional minefield during the game.
|
|
Making a Force
The Force, Formation, and Unit cards give you everything you need to make your force. A Force has one or more Formations and Support units. These Support Units operate as normal, but as they aren’t part of any Formation, they don’t help for Formation Morale Checks.
Each Formation has a Formation card showing its HQ and the Units that make it up. Each unit card has the structure of the Unit and its points cost on the back.
Infantry Units have attached transport units (M113 APCs or BMP IFVs). These deploy with the infantry, but move and fight as a separate unit. If the infantry fail a Unit Morale Check, the transports leave as well, however the infantry will fight on without their transports if necessary.
|
 |
 |
|
Missions
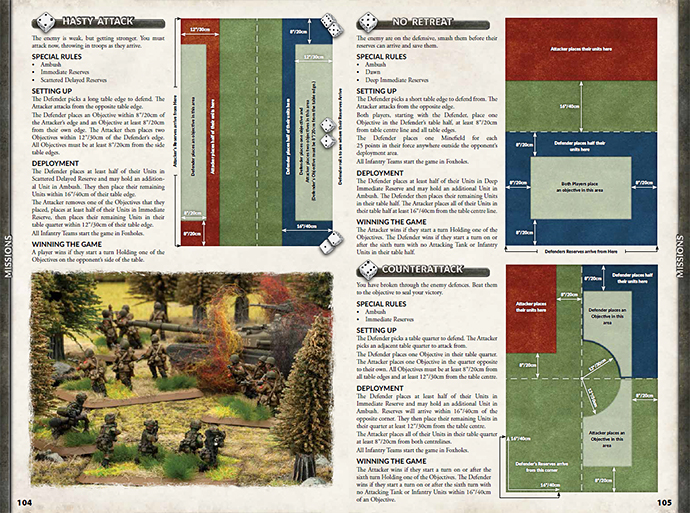
The six missions in the rule book are similar to the Flames Of War missions, but have a few improvements. Read through the mission rules carefully the first time you play each mission.
|
 |
| One big change is in determining who attacks and who defends. The players each elect to attack or defend, with a dice off if they choose the same option. You should think carefully before electing to defend in No Retreat, as the mission’s Deep reserves rule means the defender will only have one of their battle tank or aircraft units on the table at the start of the game. Infantry forces will want to defend, but tank forces may want to attack. |
Last Updated On Saturday, December 12, 2015 by James at Battlefront
|
|
|
 |
|