|
|
 |
|
|
Israeli M113 Assembly (TIBX03)
|
Description of Components
|
|
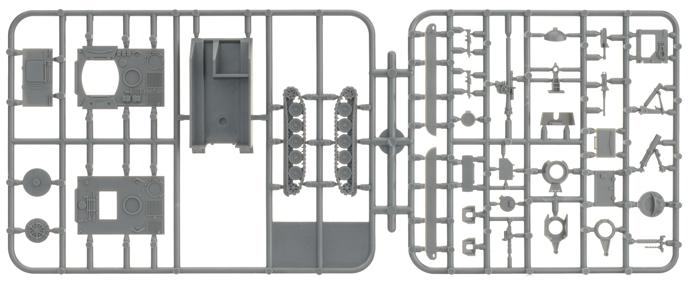
M113/M106 Sprue (x4)
|
Assembling The Basic M113 Hull
To assemble the M113, there are a number of components that are common to all of the variants of the M113 that can be constructed using the box set; the hull being case in point.
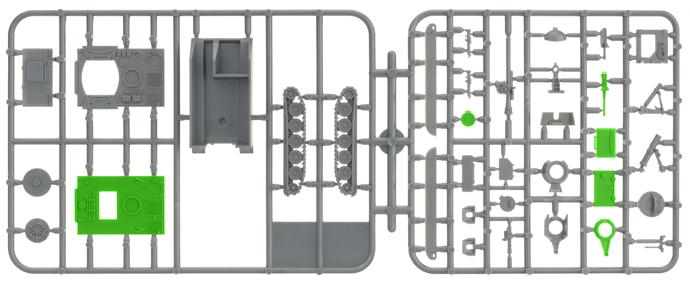
The components seen on the plastic spures below highlighted in green are used to construct all of the M113 variants. The components highlighted in red are optional and can be included if you so choose.
|
Assembly of the Basic M113 Hull
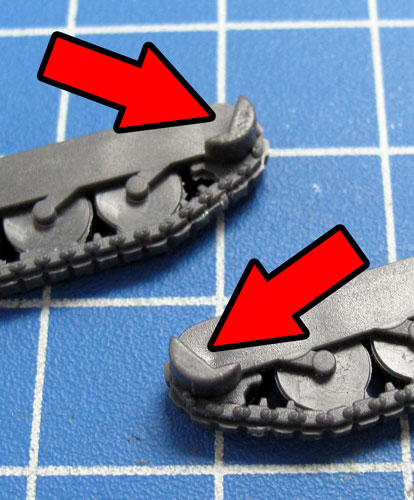
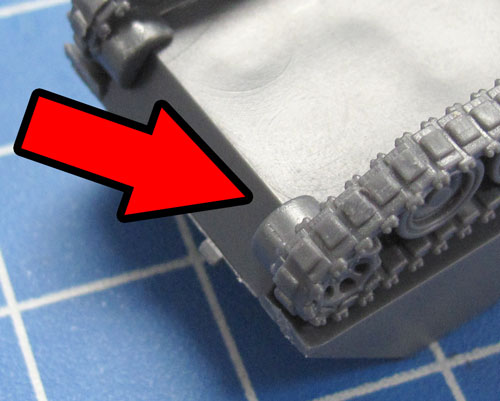
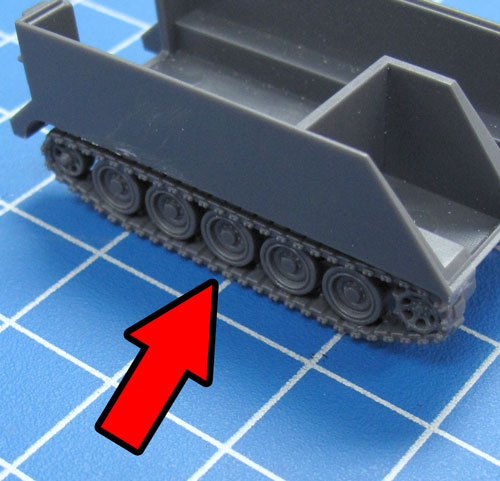
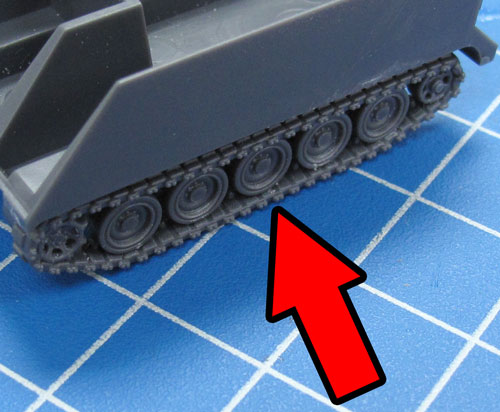
Step 1. Each track for the M113 has a small tab on the front end. This tab sits up against with the lower half of the hull front as seen in the examples below. |
Below: The right-hand and left-hand side tracks attached successfully to the hull.
Tip: When referring to left or right-hand side in regards to a Flames Of War miniature, the orientation is determined as if looking at the vehicle from the rear. |
 |
 |
 |
 |
| Step 2. Next, attach the front glacis plate to the front of the hull. |
Below: The glacis plate attached to the front of the hull. |
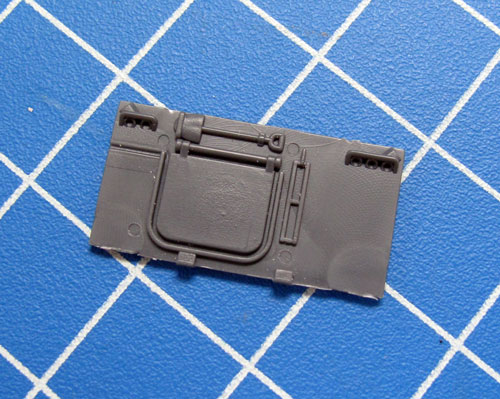
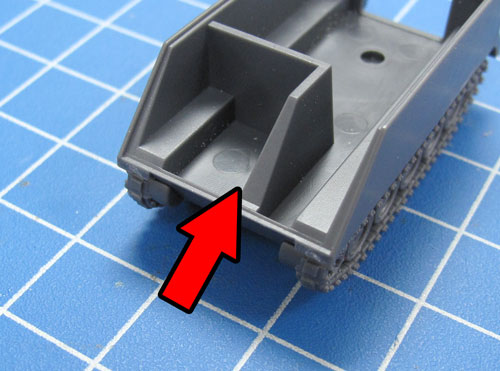
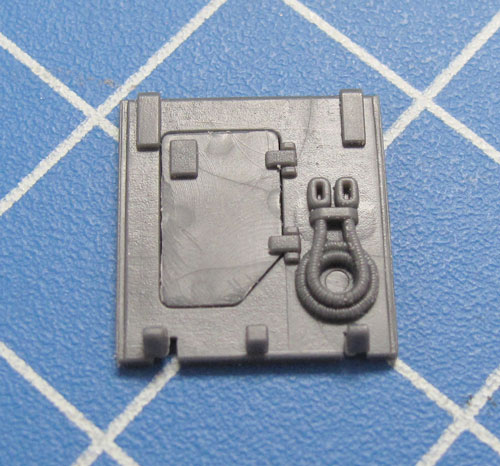
Step 3. Next, time to assemble the rear section; this is made up of the ramp and the rear door. |
 |
 |
 |
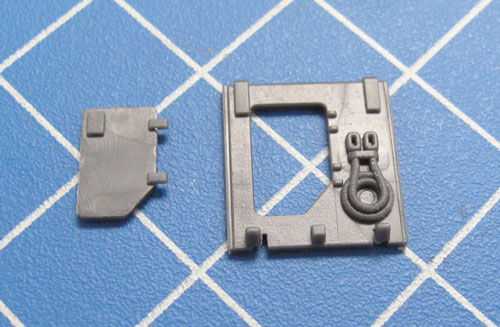 |
| Below: The assembled ramp section. |
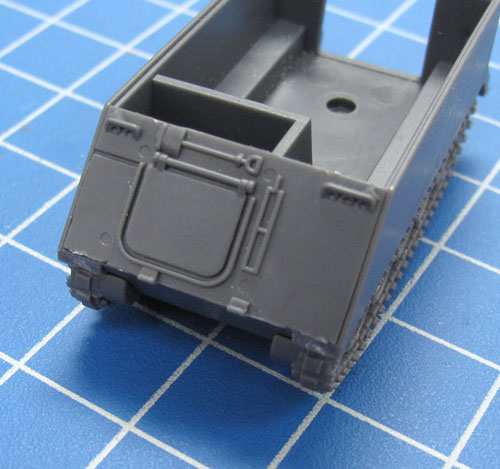
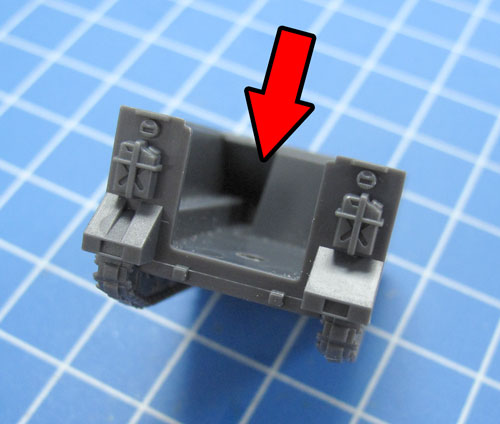
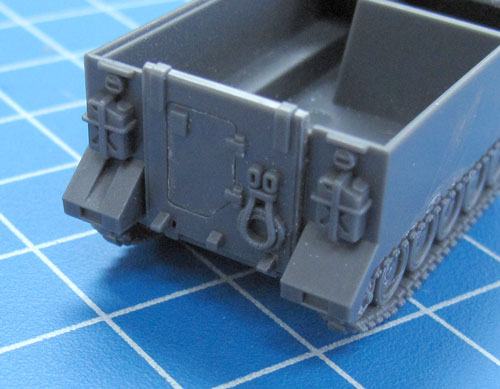
Step 4. Next,attach the rampsection to the back of the hull. |
Below: With the ramp section attached, the basic hull is now fully assembled. |
 |
 |
 |
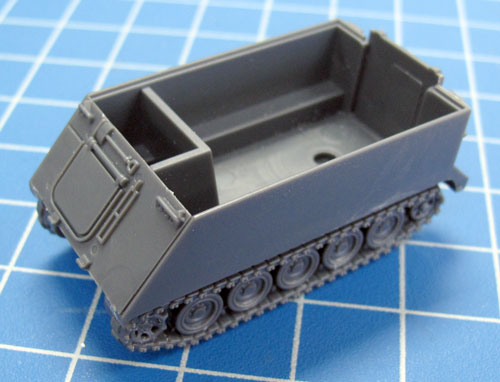 |
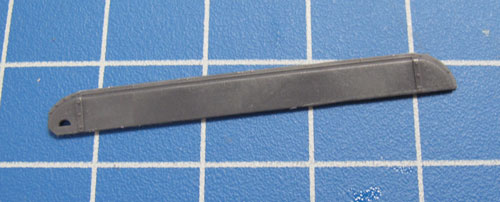
The Side Fenders
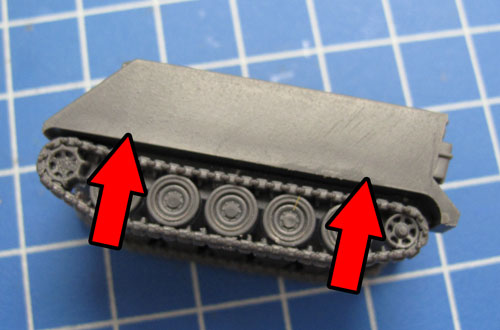
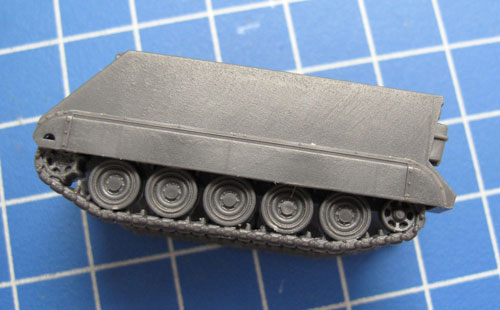
The side fenders attach to the hull just above the tracks as shown in the example below. |
Below: The side fender attached to the sides of the M113. |
 |
 |
 |
Assembly of the M113 Personnel Carrier
Along with the basic hull components; the components seen on the plastic sprue below highlighted in green are used to construct the M113 Personnel Carrier.
|
 |
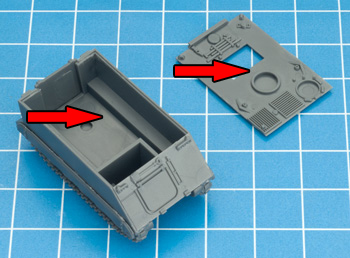
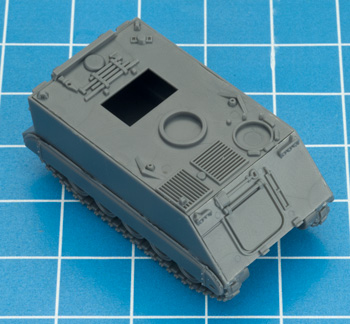
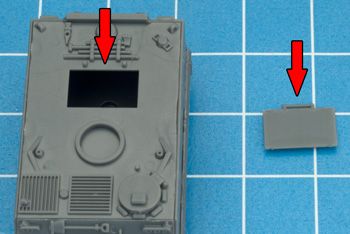
| Step 1. Begin by attaching the top deck to the top of the hull. |
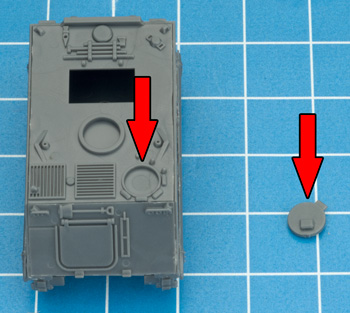
Step 2. Next, attach the vehicle driver's hatch. |
 |
 |
 |
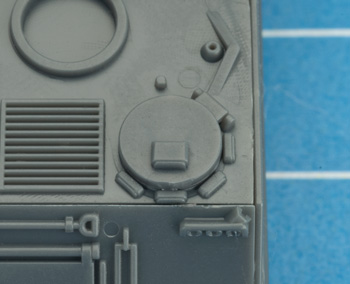 |
| Step 3. followed by the passenger compartment hatch. |
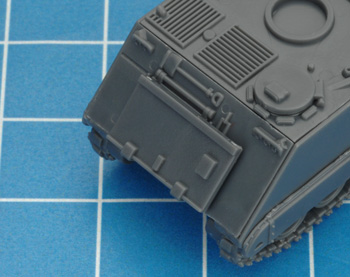
Step 4. Now add the trim vane to the front of the hull. |
 |
 |
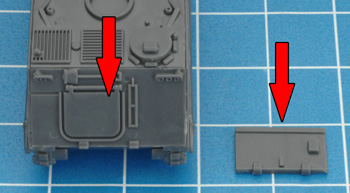 |
| Below: Trim vane attached correctly. |
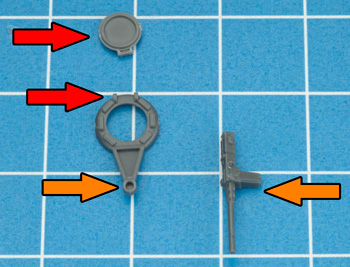
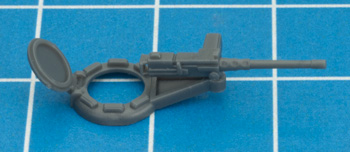
Step 5. Next, assemble the .50 cal MG turret. |
Below: .50 cal MG turret.
Note: If you don't want a crewman in your turret, glue the hatch closed. |
 |
 |
 |
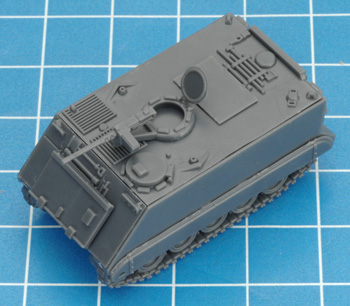
| Step 6. Add the turret to the M113. |
Step 7. Finally, if you've glued your hatch open you can choose a crewman off the sprue and glue him in the turret. |
 |
 |
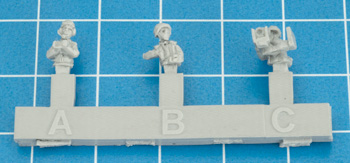 |
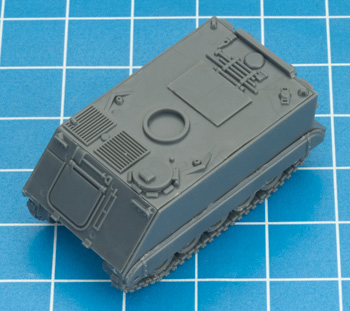
| Below: Fully assembled M113 Personnel Carrier. |
 |
Assembly of the M106 Heavy Mortar
|
 |
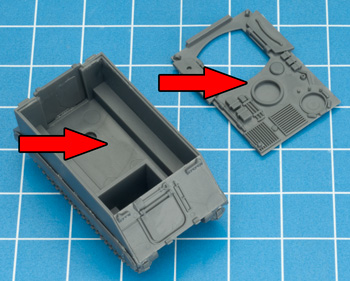
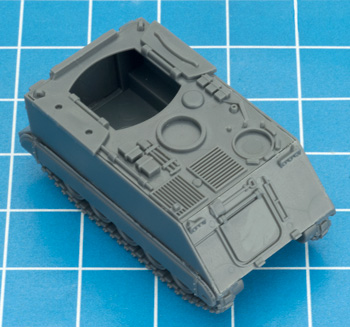
| Step 1. Begin by attaching the top deck to the top of the hull. |
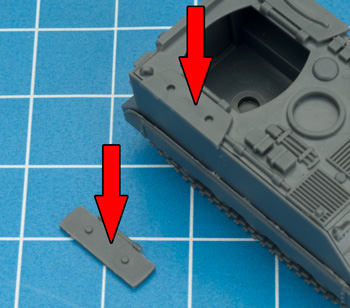
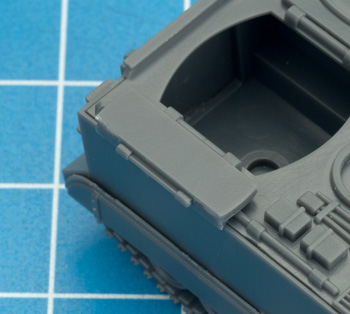
Step 2. Attach the hinged section to the top of the hull. |
 |
 |
 |
 |
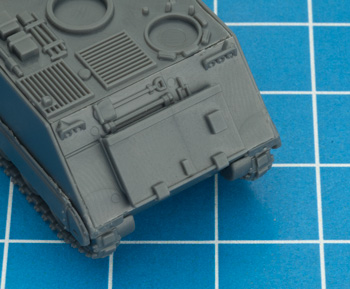
| Step 3. Now add the trim vane to the front of the hull. |
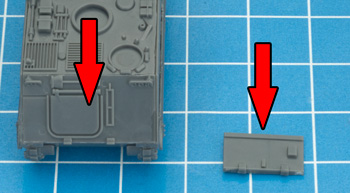
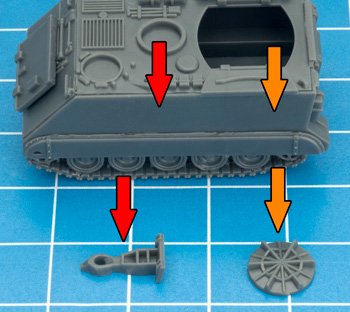
Step 4. Glue the mortar base plate and bridge assembly to the left side of the tank. |
 |
 |
 |
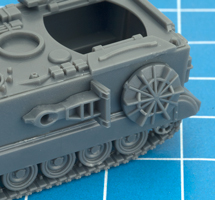 |
| Step 5. Next, attach the driver's hatch to the top deck. |
Step 6. Attach the 4.2in mortar to the base plate. |
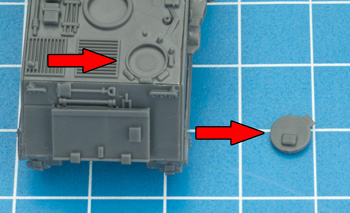 |
 |
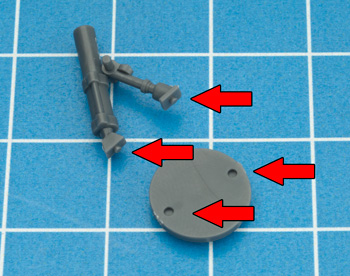 |
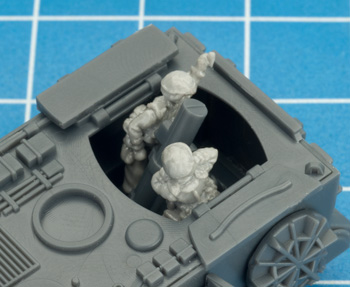
| Step 8. Now you can glue the mortar and crew into the fighting comaprtment. |
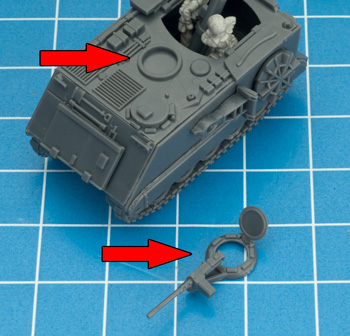
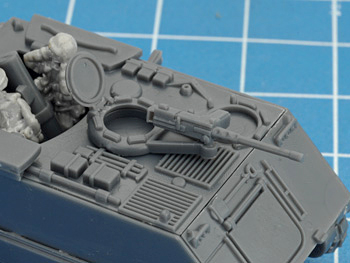
Step 9. Next, assemble the .50 cal MG turret. |
Below: .50 cal MG turret.
Note: If you don't want a crewman in your turret, glue the hatch closed. |
 |
 |
 |
| Step 10. Add the turret to the M106. |
Step 11. Finally, if you've glued your hatch open you can choose a crewman off the sprue and glue him in the turret. |
 |
 |
 |
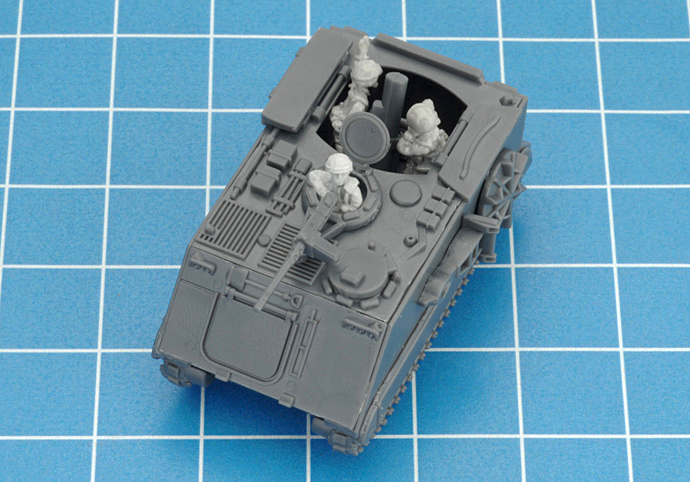
| Below: Fully assembled M106 Heavy Mortar. |
 |
|
| Assembling the M163 VADS |
| Begin assembly of the M163 VADS by following steps one through seven of the M901 ITV assembly guide. |
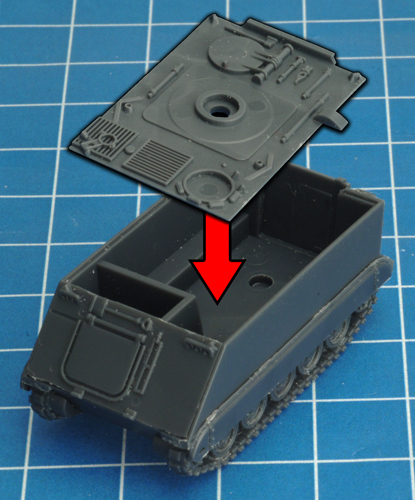
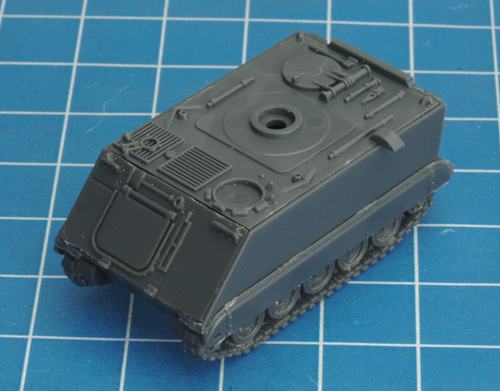
| Step 8. Attach the top deck shown in the examples below. |
Step 9. Attach the driver's hatch to the top deck. |
 |
 |
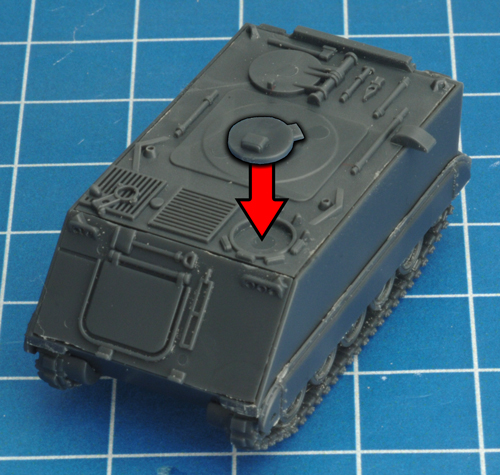 |
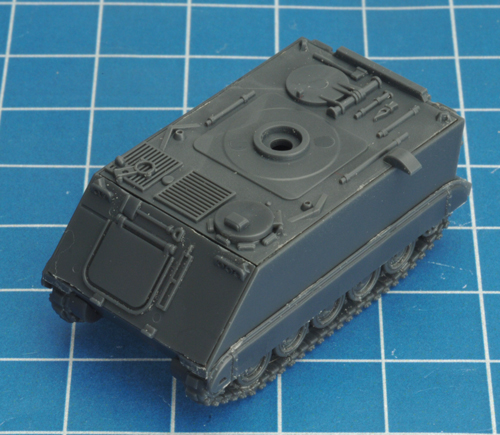
| Below: The driver's hatch in place. |
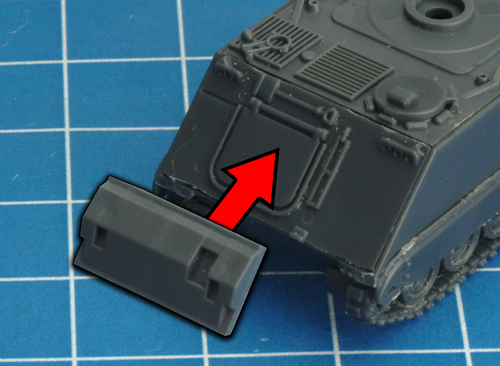
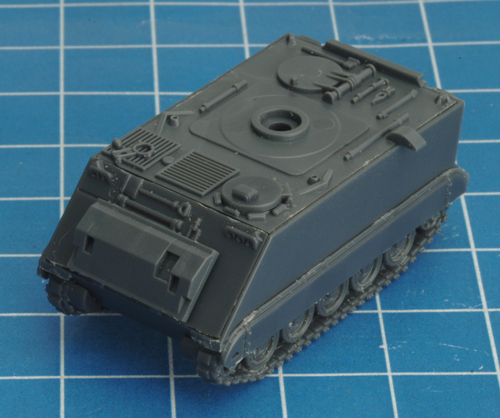
Step 10. Next, attach the high displacement trim vane to the front of the glacis plate. |
 |
 |
 |
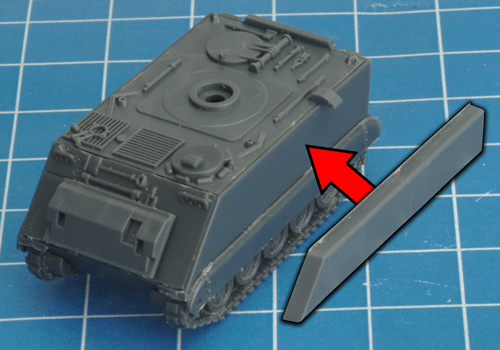
| Step 11. Attach the left-hand side flotation cell to the side of the hull. |
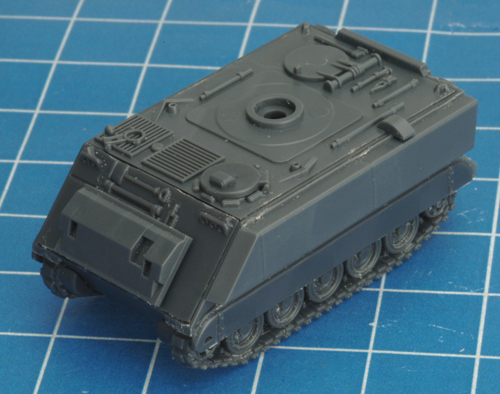
Step 12. Attach the right-hand side flotation cell to the side of the hull. |
 |
 |
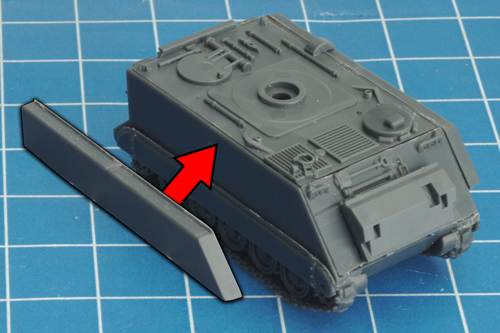 |
| Below: The both flotation cells in place. |
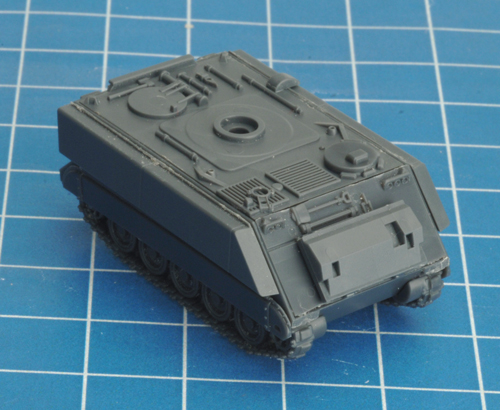
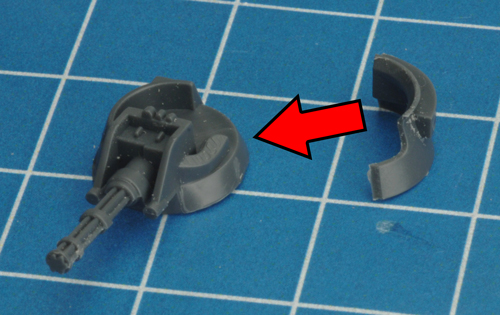
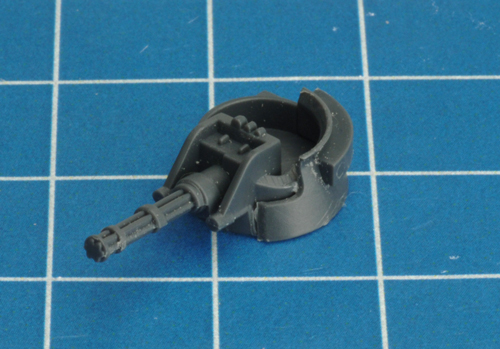
Step 13. Next, attach the side section of the turret to the main turret section. |
 |
 |
 |
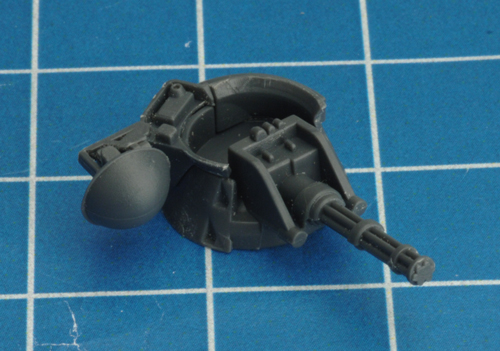
| Step 14. Attach the radar to the side of the side. |
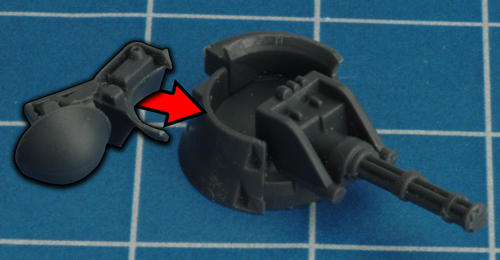
Step 15. Attach the front radar section to the side of the turret. |
 |
 |
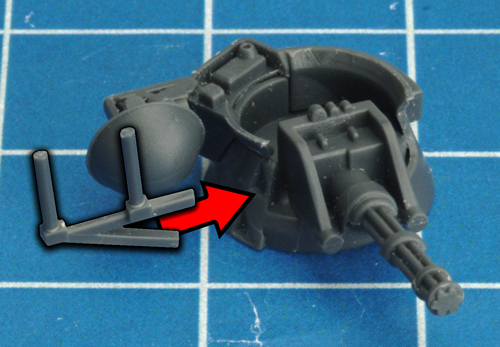 |
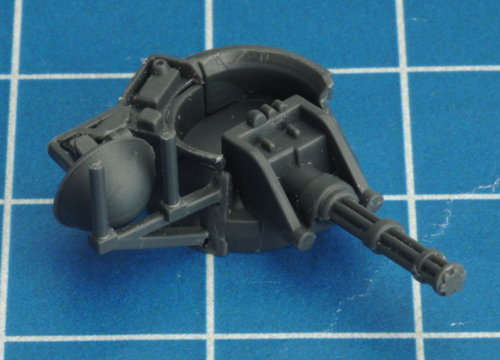
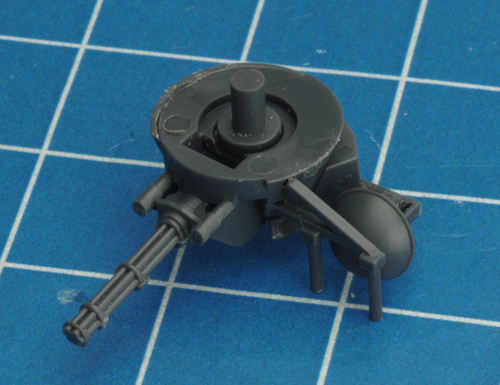
| Below: The completed M163 VADS turret. |
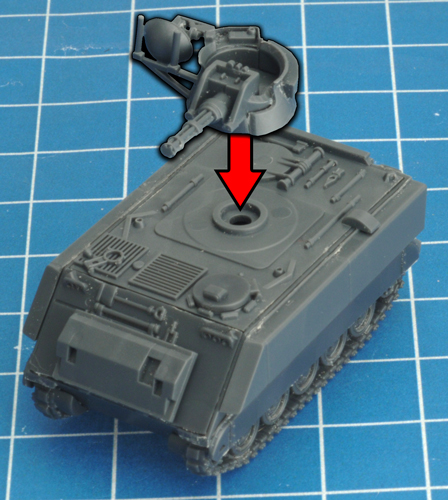
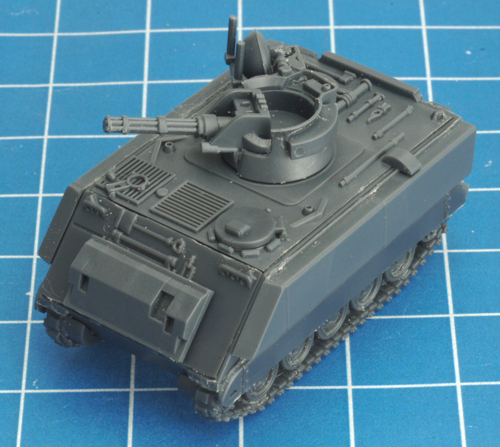
Step 16. Complete assembly of the M163 VADS by attaching the turret to the top of the completed hull. |
 |
 |
 |
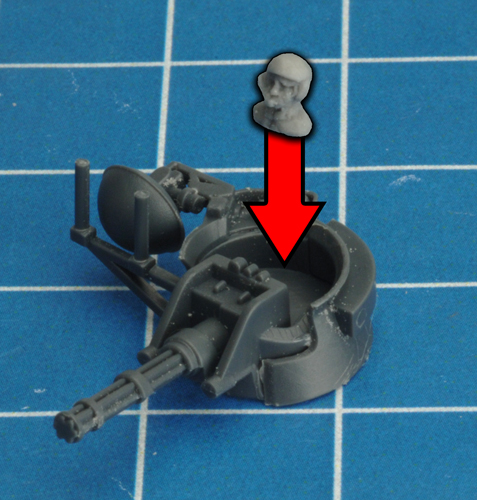
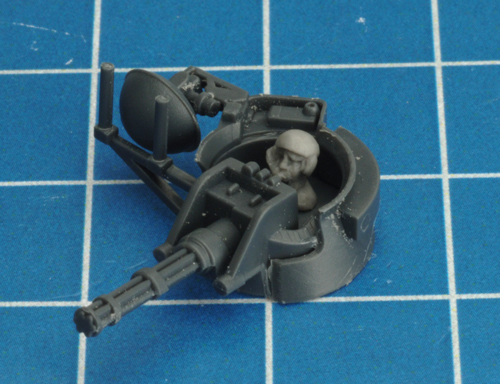
| Step 1. To add crew, simply insert a crew head to the inside of the turret. |
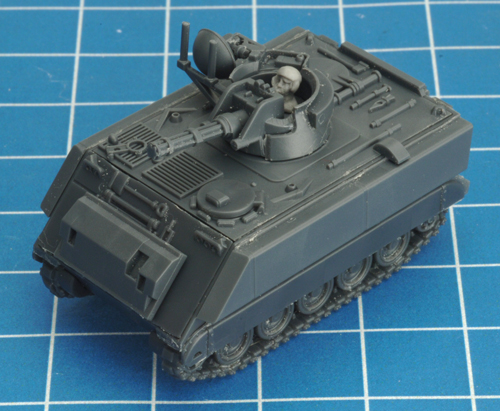
Below: The M163 with added crew. |
 |
 |
 |
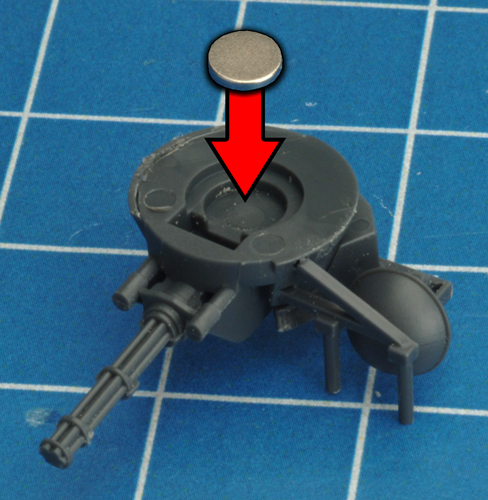
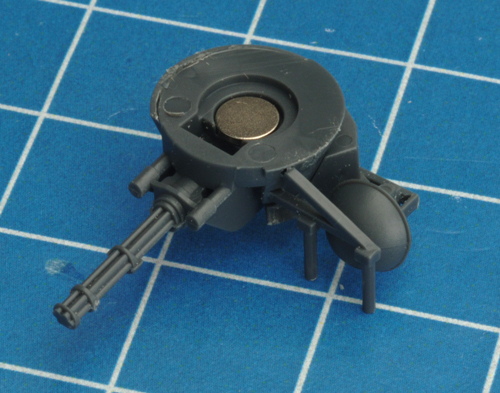
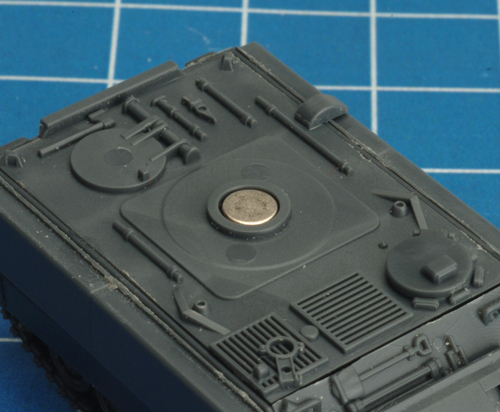
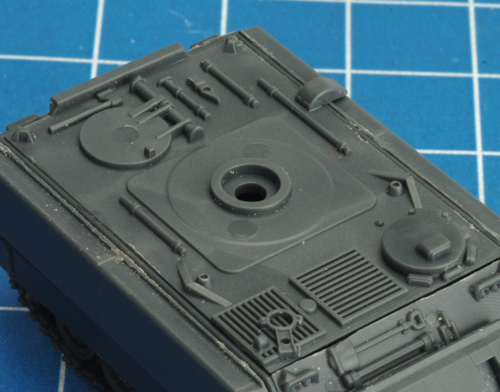
| To attach the turret to the hull, you can use rare earth magnets (sold separately in the online store here). Simply attach one to the bottom of the turret and the top of the hull. Learn more about using rare earth magnets here. |
 |
 |
 |
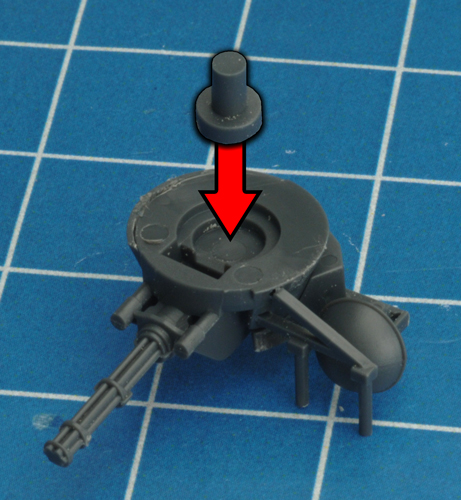
| The other option is to use the turret peg found on the plastic sprue. To do this, simply attach the peg to the bottom of the turret. The turret peg then simply mates with the hole in the top of the hull. |
 |
 |
 |
Last Updated On Wednesday, May 15, 2019 by Luke at Battlefront
|
|
|