|
|
 |
|
|
Russell Briant's 16. Panzer
Russell Briant's New Zealand NatCon 2005 Tournament force
My family and I flew into Christchurch from Wellington for the Easter weekend 2005. They to visit Science Alive, Orana Park and the Fudge Factory. Myself to attend NatCon 2005.
That year I was running a German Aufklarung Kompanie (Mechanised Infantry Reconnaissance) based on 16. Panzerdivision at Salerno, Italy, September 1943.
|
This force was inspired by the revisions to Hitler’s Fire Brigade (now found inside Ostfront). I saw in it the potential to build a balanced tournament force. One that might deal with a wide range of conditions and overcome some of the weaknesses in my previous Fallschirmjager force.
|
Things I was looking for included a force still built around aggressive infantry but with more than six platoons. Ability to attack across open ground and speed in attack.
|
Kompanie Summary
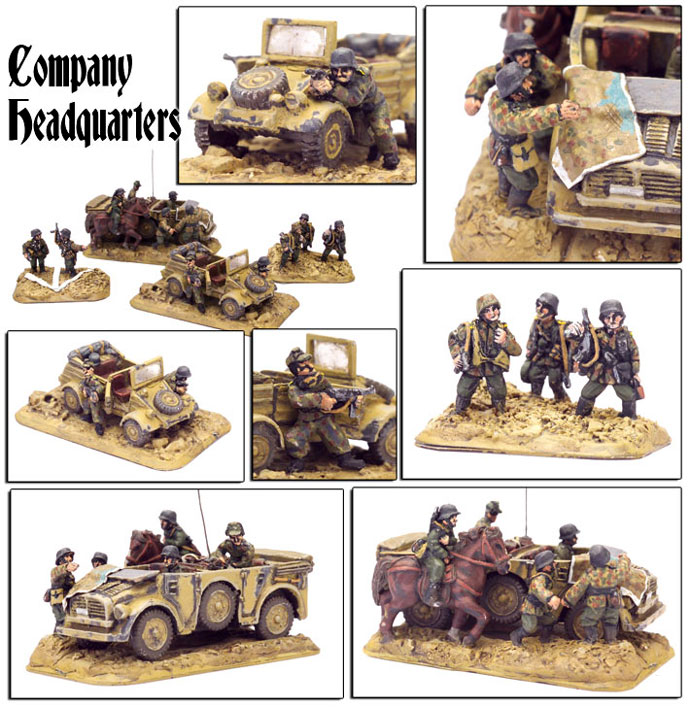
HQ platoon. 1 SMG and 1 Panzerknacker SMG team, transport
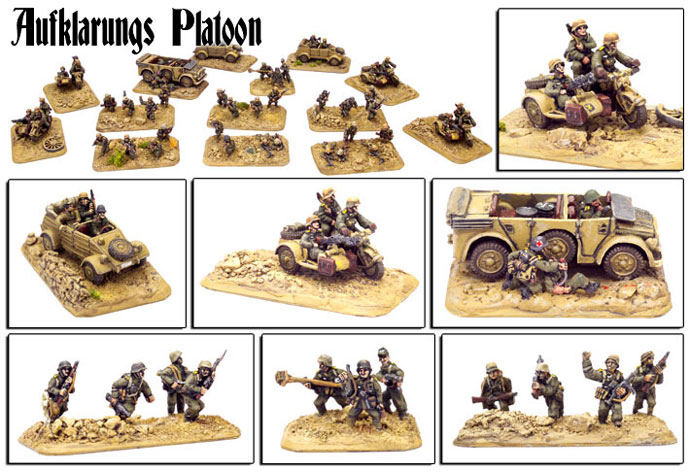
Combat Platoon. 1 Panzerknacker SMG, 6 MG teams. Motorcycles and Kubels
Weapons Platoons
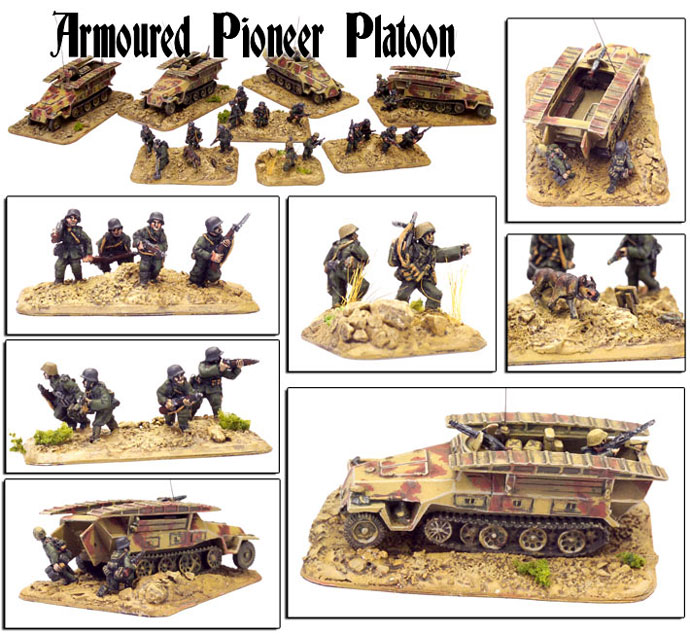
Armoured Pioneer Platoon. 7 Pioneer MG Teams in 7 SdKfz 251 Pioneer half-tracks
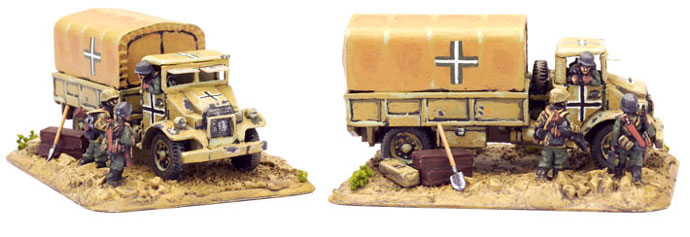
Infantry Gun Battery. 1 SMG team, 1 Observer, 3 7.5cm guns, transport
Armoured Car Patrol. 1 SdKfz 250 and 1 SdKfz 250/9 2cm
Armoured Car Patrol. 1 SdKfz 250 and 1 SdKfz 250/9 2cm
Support Platoons:
Tank Hunter Platoon. 1 SMG Team, 3 Marder I
Light Anti Aircraft Platoon. 1 SMG Team, 3 Armoured SdKfz 7/2 (3.7cm)
Seven platoons with an option to kampfgruppe an eighth to give me four on table platoons in those defensive scenarios that require half the force to be off table.
|
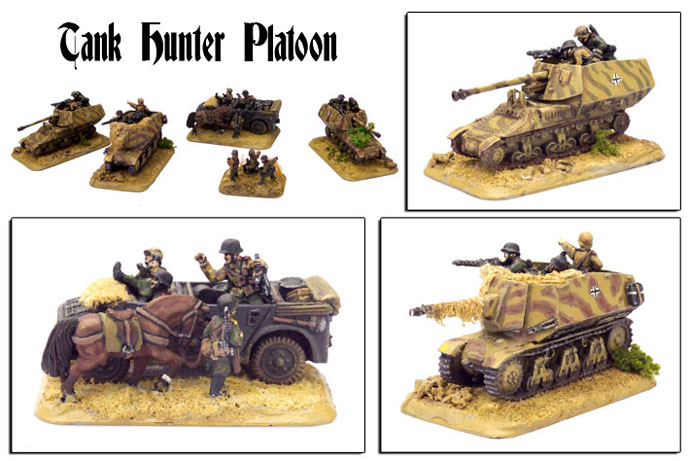 |
Things I liked in the list
The Infantry Guns. For just 175 points I get a 3 tube battery that didn’t need to re-roll artillery hits. AT9, rate of fire 2, small gun. An efficient combo.
The Flak. I thought this might surprise some people. First thought was something to deal with swarms of Bren Gun carriers and their ilk. Reach out to 24"/60cm, rate-of-fire 4, AT 6. The armour makes a huge difference. Survival of a small arms hit jumps from 33% to 97%.
While the list was designed to give me a chance against all comers, it was biased towards fighting infantry armies rather than tanks.
|
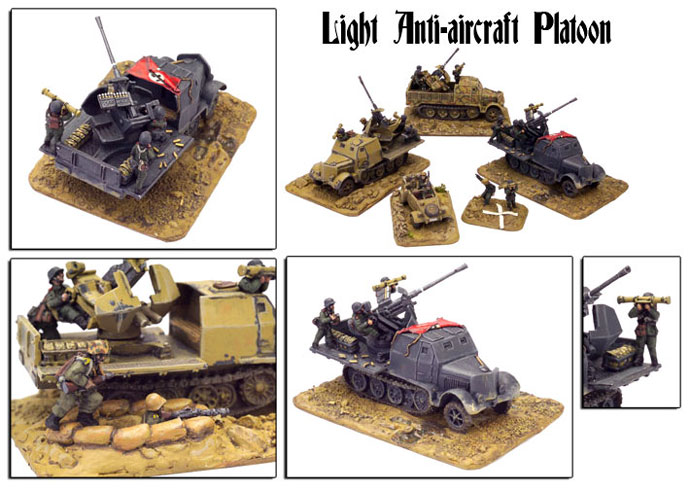 |
So how did it go?
Game 1. Brent Burnett-Jones (Canadian Infantry) – Free For All – Result 1-3 Draw
Mucked this game up. I had the force that could maneuver across the table, pick a point and concentrate its attack. Brent concluded his force couldn’t.
The Canadians consisted, as best I remember, of 2 Infantry platoons, a Mortar platoon moved by Carriers, a Carrier recce platoon, a Sherman tank platoon (Ronson prone Brett kept saying), a 2 gun 17pdr battery, a 2 gun 6pdr battery, Limited RAF
Brent deployed on the left on a hill and next to a village - an infantry platoon with the 6pdr battery and the CinC; behind a central hill – the Sherman II troop, the 3” Mortar battery and Carrier recce troop; on a big and difficult right hand hill – the second Infantry platoon, 2 gun 17pdr battery and the 2ic.
|
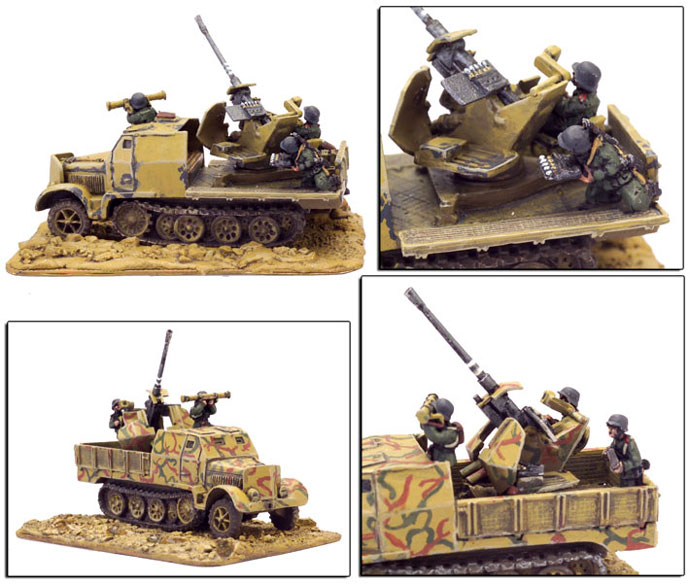 |
I was worried about not getting the first turn and losing crucial teams in the first salvo. Free For All has both in range deployment and everything on the move. So my deployment was – my dismounted pioneers and the observer on my left on a forested hill; in the centre behind a small hill – the pioneer half-tracks, Marders and Flak and on a right hill the Aufklarung with their bikes and the artillery. Between these three groups the two SdKfz 250 platoons ready to recce move forward to the cover of the village and a mid table wood respectively.
My plan was to reunite the Pioneers with their half-tracks and attack through the cover of the village but mortar fire pinned the half-tracks and delayed this gambit. The Shermans moved to cover the village and despite a good deal of sniping the Marders failed to pick any off while they scooted from cover to cover.
With the assault on the left stalled I mounted the Aufklars and sprinted up the right hand valley. This look promising but bunched the group as the troops dismounted to assault. For the only time in the tournament the RAF turned up and, wouldn’t you know it, the Flak was too far away to shoot them off. I’d seen this risk the turn before but forgot to move the Flak. All 3 Infantry teams hit died and this took the guts out of the assault on the Canadian infantry. Put the attack in anyway but broke it off when two more teams died. Failed the moral test. Aufklar go home stay home.
Redeployed the Pioneers in their half-tracks to attack the centre. Assaulted from the cover of the middle forest. Failed to pin the infantry. Destroyed one six-pounder but the other retreated. Kept up the assault until the platoon died.
Brent moved his Carries in the direction of my right objective then thought better of it. Never felt any risk of losing an objective. Had I positioned the Flak to cover the Aufklar attack or deployed the half-tracks with the Pioneers I think I could well have dragged Brent’s reserves to one side then had a good chance to capture the other objective.
Instead I broke platoons on him and time ran out. Game 1 over with a single point to show for it. Worse than last year when I picked up 2 points in the first game.
|
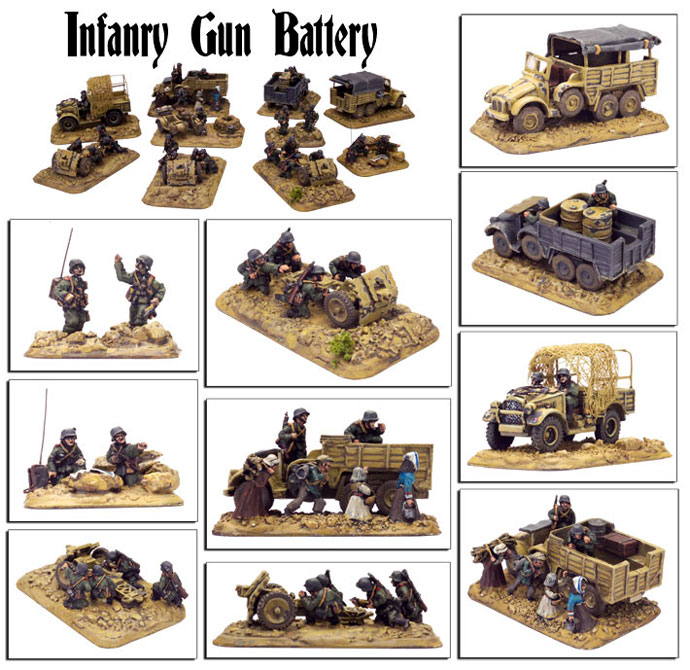 |
Game 2. Matt Rowan (British Armoured Cars) – Cauldron – Result 6-1 win
I won the dice off and chose to defend.
The terrain was really cool. One of the Timaru club specials I think. It was labeled Takrouna in Tunisia. It had a long Airfield and an adjacent large plateau that dominated the table. I was able to set most of my on table force on there. The infantry guns, Flak and Aufklarung. The Pioneers and their Half-tracks were deployed below on the airfield.
Marders, the two recce teams and the 2ic with one of the 250s remained off table.
Matt had his Company HQ platoon of a pair of Armoured Cars and Breda trucks, an Armoured car patrol and a Crusades troop with 6prds and 3” howitzers below the hill I was on.
|
 |
Out on the far side of the Airfield he had an Assault Platoon in Jeeps and a Armoured Car troop. Still to arrive were a couple more Armored Card patrols and a motorised infantry company.
In a about 3 turns I had destroyed the HQ company, Armoured Car and Crusaders attack for the loss of one gun. The had Marders arrived and the half tracks had raced out and cowered the other patrols. During this time the Pioneers built a mine field, just to show they could.
An assault by dismounted infantry and another Armoured car patrol in the direction of one of the objectives was nuetralised. The only thing preventing me claiming victory was a bailed Armoured car within 16” of one objective. It took a couple of anxious turns but just before time was called I destroyed that and won the game.
|
 |
Game 3. Stephen Hoare (British Motor) – Hold the Line – Result 6-1 win.
Again had the task of defending. Can’t recall but suspect that was my choice not Stephen’s.
Terrain was a winter landscape notable for the frozen river that zigzagged across it’s long length. There were several patches of open scrub. I deployed my objective by a bridge on my left and on my side of the river. Stephen deployed his objective well forward on my right near some trees.
By the left objective I emplaced the infantry guns on the riverbank. I dug in the Aufklärung around the right objective. In ambush I had the Marders and Pioneers.
Stephen put everything down my left flank. He advanced his Armoured car platoon to scout out ant ambushes that might be in the scrub in advance of the bridge.
|
 |
Three infantry platoons started grouped around a 25-pounder battery. Hidden in scrub in his rear were two Crusader platoons that did not want to advance until the Marders were fixed.
Fired early into the mass of infantry and the artillery, with my guns, killing one gun and pinning 25prds for about 3 turns.
Then destroyed the Armoured Cars on the anti-ambush mission with the infantry guns and the early arriving Flak teams. The Infantry platoons then advanced to the scrub supported by one Crusader troop. I ambushed, from the scrub the ACs had been concerned about, with machine gunning pioneers and half-tracks routing two of the Infantry platoons. The Marders emerged and knocked out one Crusade. The remaining pair supported by the second troop assaulted my pioneers, destroying five of the seven teams who retreated through the scrub then over the river bridge.
Marders, Flak, infantry Guns and my own recce mopped up the Crusaders over a couple of turns. Stephen’s Company Commander advanced over the centre line to keep the company in the fight, only to succumb and conclude the game.
This was a difficult game for Stephen to win who nonetheless remained cheerful throughout. This is the sort of battle and opponent my force was optimised to fight.
End of day one. One loss and two good wins. Mid table, just like last year. Off to Lone Star with the Family to hear about the cool stuff they did at Science Alive.
|
 |
Day 2. Game 4. Antony Kitson (British – Canadian? Motor) – Fighting Withdrawal – Result 5-2 win
This was an excellent game fought on John Hutton’s fabulous ‘Normandy’ landscape. Centre of the table dominated by a stone village built around a plaza square. Four macadamised roads ran from the town to each edge. Hedged and stone walled fields abounded and stands of poplar and larger forests in other locations. Plenty of cover for attacker and defender.
I placed one objective in a stone churchyard near my base edge. Antony put one in the middle of a large open area on my left and along a road on my right. I put the dismounted pioneers around the first with their half-tracks hidden down a hedged road. I dug in the Aufklar behind the hedge near the right hand objective. The Marders were my ambush team. The Guns and Flak were centrally placed behind the town and recce teams moping about well forward ahead of my infantry.
Antony put one dismounted motor infantry platoon facing my right together with the 2ic and a mortar to keep the attention of the Aufklar boys.
The weight of his attack was on my left towards an outnumbered feeling Pioneer platoon. Driving down one road was a mounted 6pdr portee platoon (with attached HQ mortar). Through a significant gap to the left of the village double-timed a second infantry platoon. Supporting them was a Crusader and a Sherman troop. Through the middle of the town rattled a recce Carrier patrol.
|
 |
The aggressive nature of the left hand thrust caused me some alarm. If I mucked up my counter they’d run over the pioneers in quick time.
I did take the bait of the still mounted portees and the double timing infantry. Shelled the portees with artillery and attacked them and the infantry with pioneers and as many half-tracks I could get in range. The Marders ambushed from behind a roadside but only managed to bail one Sherman. I pinned the portee, infantry and Company CO. They both failed to unpin in Antony’s next turn.
The Crusaders and Shermans both advanced on the Pioneers and their objective brewing four of their exposed half-tracks as they came.
Shermans and later Crusaders assaulted the pioneers who with the Marders eventually shot and counter attacked all the tanks to smoking wrecks at the cost of all the Marders but not their platoon commander.
My Recce and the Carriers hunted each other through the town while the RAF stayed away all game.
The Pioneers final job was to assault the then recovered infantry and CO. This they did to win the game but in doing so lost enough teams to take and fail a moral test to give a point to Antony.
After the game he told me he planned to win the game by turn two by mounting the infantry on the Crusaders and assaulting the pioneers, shot in by the Shermans and Crusaders. Sounded a good plan to me. The refusal to unpin by the Infantry changed the plan and the course of the battle.
|
 |
Game 5. Callum Manson (British Rifles) – Break through – Result 6-1 win
The result didn’t reflect the game and the game didn’t reflect the eventual tournament position of either player.
I did some very stupid things to start with and followed up with more rashness that only dug the hole deeper. In the last turn Callum had his own weak moment and handed the game back to me.
Back on the winter table again. Callum used a widely dispersed picket from his 17pdr battery and his 2ic to cramp my deployment.
One objective was as far away from my deployment sector as was possible over looked by two Bofors, a Churchill troop, an infantry platoon, his Company CO and Anti-tank gun captain.
|
 |
The other was as close to the centre line as was allowed and covered by a full strength dug in infantry platoon.
Flanking were the Aufklarung platoon and the Marders.
I charged my entire mobile, on table, resources – mounted pioneers, Flak, and Recce platoons - at one of the 17pdrs which I successfully assaulted at the cost of a couple of half-tracks.
Callum’s first turn had his second Churchill platoon arrive in the same corner as this tightly packed group.
|
|
They moved to reinforce the infantry platoon creating a formidable barrier to the planned objective.
I decided to charge this mob with the pioneers and their remaining HT’s anyway. Then pulled out when all the supporting shooting didn’t Pin the infantry leaving every one exposed. Lost most of the Half-tracks in the next round of Callum’s shooting.
Meanwhile a huge Carrier platoon, 10 strong, had turned up in my rear. My recce and Flak eventually dealt with most of these without breaking the platoon and drawing valuable supporting fire off his infantry.
Marders and Aufklar arrived to try and save the day. Marder’s first three shots only bailed one Churchill. The Motorcycle attack swept over the objective but the pinned (by my artillery) infantry shot off their assault. They retreated and awaited the returned favour that would end their capture of the objective.
Then Callum had his moment of lost concentration. He fired his two assault range Churchills at the Marders for no particular reason he later admitted. To add insult they weren’t destroyed. Everything else, from Bofors to the advancing reserve infantry, turned the Aufklar bikes into scrap. However, this left Callum with nothing to actually assault the Aufklar platoon off the objective. He’d forgotten the close infantry were still pinned.
The Aufklarung were, however, now below half strength after all the fire they had taken. I couldn’t look when I threw the dice to see if they stayed. It fell 6 side up to keep them in place and win me the game.
|
Game 6. Robert Sadler (British Armour) – Free for All, Dawn start – Result 3-3
Tough game. This battle started as a night engagement with the Attacker, Rob, throwing for sunrise from turn 3.
Concluded that if I attempted to attack during the limited visibility of night I’d get caught in the open at dawn. I decided to dig in and counter-punch.
Rob attacked down my left towards one objective, with a troop of Honey’s, an Armoured Car patrol, Sherman troop and Carrier Recce troop. Facing them was the dug in Aufklarung platoon supported by a single Marder.
On my right there was a large, table dominating, ridge. The second objective was at it’s right hand end. On this I dug in the Pioneers with their carriers hidden behind.
On the top of the ridge the Infantry Guns entrenched. The Flak and remaining Marders took a hull down position there as well. Rob marked this assembly with second Sherman and Stuart platoons. His Sherman HQ hovered centrally. My Recce was out scouting ahead but was driven back to my lines, losing a vehicle each.
Dawn came in turn 3. I hoped to lure forward this right hand force, knock it out then race for Rob’s objective; screening with everything else. It never happened. My shooting was probably too early and certainly ineffective. Claimed only one Stuart.
On the left I was feeling very exposed. I thought Rob should just rush the Aufklar and wrest the objective. The Marder and infantry might get a few but I didn’t have much to hold off a quick attack.
Rob, however, very cautious about this attack. I moved another Marder down and got off three shots at the Stuart platoon and brewed the lot. Managed to destroy two Armoured Cars and two Carriers without getting either to fail their platoon test.
Mean time Rob proceeded to knock out all my shooting assets. The guns, Flak, Marders and remaining Recce all eventually died. Only the Recce and guns counted as platoon losses though.
The last couple of turns involved furious assaults by Shermans down the line. They threw lousy assault dice and the Aufklar destroyed their attackers and survived their under strength moral test. The Pioneers chased off another assault without destroying a platoon. Rob’s last attempt to take the game was to assault my Company Commander with his own in a Sherman. He failed to make the assault hit test and I moved away. He then convert assaulted on to the Marder Commander with the same result. I passed the company moral test. Richard says times up. Game over. 3 points each.
Adding to Rob’s end of game frustration was an absence of RAF attacks throughout.
End of Day two I was in a group of three, one point behind the two leaders in Generalship points.
Bring the family to the Woolston Club restaurant for a enjoyable dinner. Hear about the Rhinos (Nashorns?) at Orana Park
Day 3 - Game 7. Chris Pooch (US Armor) – Break Through – Result 6-1 Win
Timaru Italian landscape. Difficult tank country. Narrow roads, Impassible rivers, Very difficult hills.
Chris had to attack me in this. He flanked with an armoured infantry platoon. His 10 Shermans in an HQ and two regular platoons charged down the central pass. An Armoured AA platoon sniped down the right flank.
Above the pass I dug in the Infantry guns and the Aufklar. Back down the valley I had the Marders hidden a Village. I double-timed the Pioneers on foot to cover the two objectives.
My first salvo of gun and Marder team scored 9 out of 12 shots. Sherman armour deflected all hits. Gradually, however, I destroyed all the Shermans in the valley. Wrecks at the exits trapped remaining Shermans until they were dealt to. Some difficult assaults against the Aufklar to survive until the destruction was completed. Chris’s flanking force never showed in three attempts. This was lucky for me, for had they cleared the Pioneers there was little to capture back the objectives. With my Flak and Recce joining to watch the show the game was mine.
The terrain prevented the Shermans assaulting the Guns and other usual methods Chris said he used. Historical terrain but poor tank country.
The leaders fought out a 5-2 result so I was in first equal place on Generalship points with a game to go.
Game 8. Dale Franklin (28 Honeys) – Hold the line – Result 3-4 Loss
Back on John Hutton’s Normandy set up with a great game to finish.
Last year I brought Big Push Terrain fortifications. Had I done so again this would have been the game to use it. Too busy painting figures.
I dug in the Pioneers in the town where I placed my objective and the Aufklärung in an open field behind the town where Dale put down his objective. I held the guns and Marders in ambush.
Dale’s force was in two companies of 4 platoons and an HQ troop of 14. The way to defeat the force is to destroy 3 platoons and preferably the HQ of one company.
Dale threw the lot down the left flank. I waited two turns before springing both ambushes and destroyed two platoons from the ‘Triangle Company’ in this first exchange. Dale did an excellent job in conserving the rest of the endangered Triangle species.
I did every thing to get that company. During the game the Pioneers assaulted and took out the Company Command troop. I sacrificed the arriving Flak and Recce teams to make another Triangle platoon take platoon moral tests. They passed. Twice.
Dale mean while cleaned out the Marders and the Infantry guns as well, but not their command teams who passed their moral test. With, at best, 1 or 0 a Stuart pack is daunting site. You bash one and his three mates bash you back and 16 inch moves gives you few places to hide.
He then massed all of the ‘Square’ company to assault the Aufklärung objective. They ducked out of one assault.
He brought up the two remaining under strength Triangle platoons to help. He needn’t and shouldn’t have. This gave me a final chance to snatch victory. I abandoned defending the objective and I orgaised two assaults against the Triangle platoon pair. The Aufklar remnants failed their two Tank Terror tests. The fast striding Pioneers, however, attacked with two teams rolling assault dice. They killed one Stuart from one platoon but the second tank evaded and passed its moral tests. The Pioneers convert assaulted into the second two-tank platoon. One was hit but passed the armour test. They also retired. My last attempt was an attack with the Goliath. This was nuetralised with a single 2pdr shot.
Game over. Still very pleased with the way I scrambled and created chances in this game. For about an hour I was one die roll away from winning. Sometimes they just don’t fall.
I knew Callum had had a 6-1 win which, with the 2 point win bonus, put him 5 Generalship points up on me.
However, that evening, when the Army and sportsmanship points were added I’d done enough to retain the title I won last year. Pretty chuffed to do this with a Company with maximum armour 1. Reviewing how the force went I think the balance was about right and the force was a chance in all its games. Could possibly have done with a tad more Anti-tank than I took.
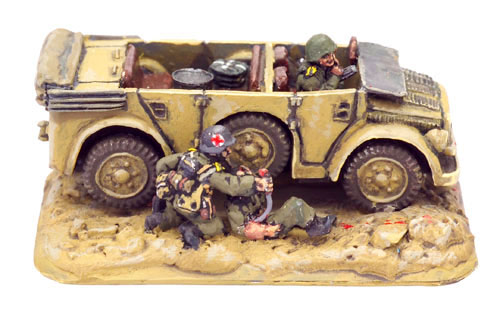
Picking up the best army prize at the Convention was an extra bonus and meant the hours I’d put into this force with it’s painting, conversions and vignettes had also been rewarded.
Woolston Working Men’s Club. What and ideal venue for a convention. Thanks Richard Steer for a well-run comp. The bias in the draw system for historical opponents, like last year, is worth continuing with I feel. Adds to the atmosphere.
Russell
|
Last Updated On Wednesday, April 8, 2009 by Wayne at Battlefront
|
|
|