|
|
 |
|
|
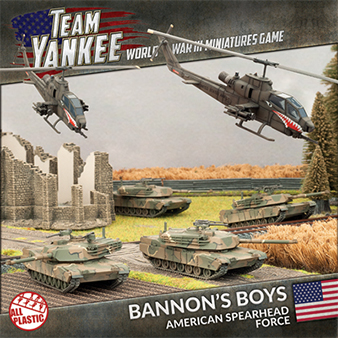
Bannon’s Boys American Spearhead Force (TUSAB1)
 |
Bannon's Boys (TUSAB1)
American Spearhead Force
Contains five plastic M1 Abrams Tanks, two plastic AH-1 Cobra Attack Helicopters, five resin tank commander figures, one resin objective marker, two decal sheets, five unit cards and one printed cardboard Artillery & Salvo template.
Team Yankee, a heavy combat team, faces a Soviet invasion of West Germany. Outnumbered and outgunned, Captain Sean Bannon and his men will have to fight hard and they'll have to fight smart if they are going to survive.
Please note that this product is no longer avalible. Please see the newer version of this box here...
|
 |
With the end of the Second World War in 1945, many hoped peace would follow. Instead, for forty years, East and West have faced off across armed borders.
Now it's 1985, and the Cold War just got hot!
Team Yankee brings to life the 1980s conflict that could have been, in miniature on your tabletop.
|
| "OCCUPY YOUR FIRING POSITIONS NOW. I SAY AGAIN, OCCUPY YOUR FIRING POSITIONS NOW. THE RUSSIANS WILL BE RIGHT BEHIND THOSE PEOPLE COMING THROUGH. ACKNOWLEDGE, OVER." Bannon called over the team net. The tracks to the left and right of Alpha 66 cranked up and pulled forward. |
 |
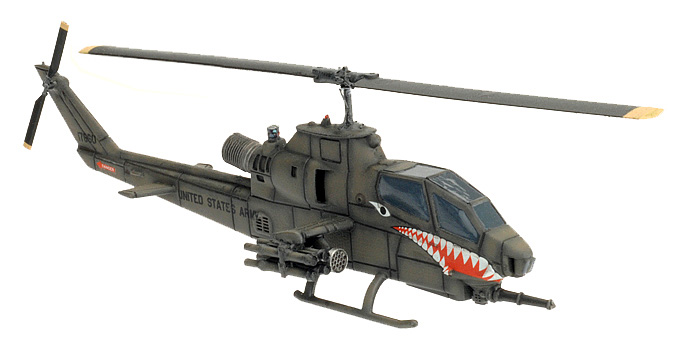
| AH-1 Cobra Attack Helicopter (x2) |
| With a flash and a streak of white smoke, the Cobra let fly a TOW antitank missile. The Cobra remained locked on targer for about fifteen seconds before tropping down and moving to another position. |
 |
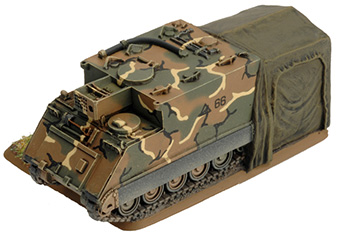
| Lieutenant Colonel Reynolds' Battalion CP Objective Marker |
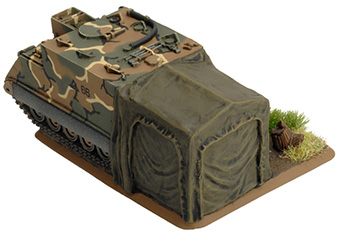
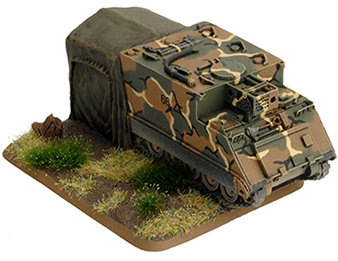
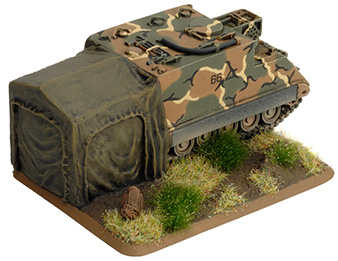
| The M-577 command post vehicles were parked side by side with their canvas tent extensions set up and connected with a massive camouflage net covering the tracks and extensions. Around this was barbed wire with one entrance guarded by a soldier checking access passes as staff officers and other commanders entered the tactical operations center, or TOC. Somehow, this just seemed wrong to Bannon. |
 |
 |
 |
 |
|
| Bannon's Boys Box Contents |
| Contact the customer service team at [email protected] if you have issues with any components. |
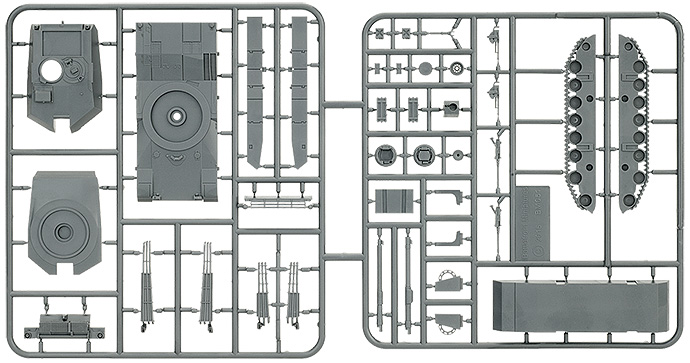
| M1 Abrams Tank Sprue (x5) |
 |
| Tank Commander Sprue |
 |
| AH-1 Cobra Attack Helicopter Sprue (x2) |
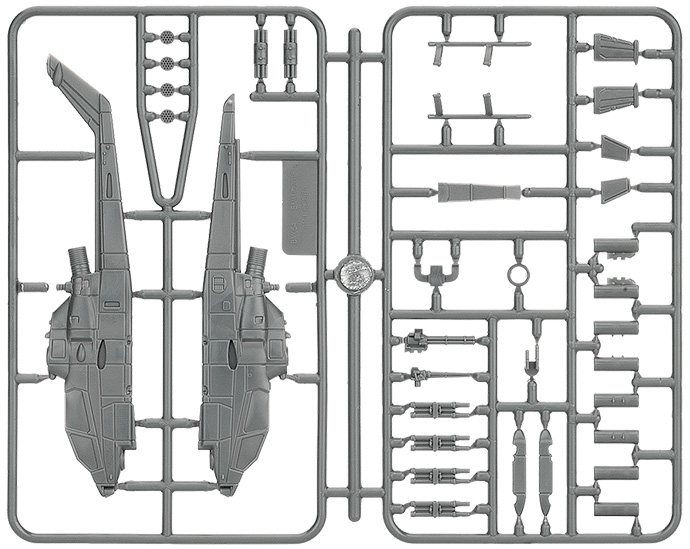 |
| One-Piece Resin Objective Marker |
 |
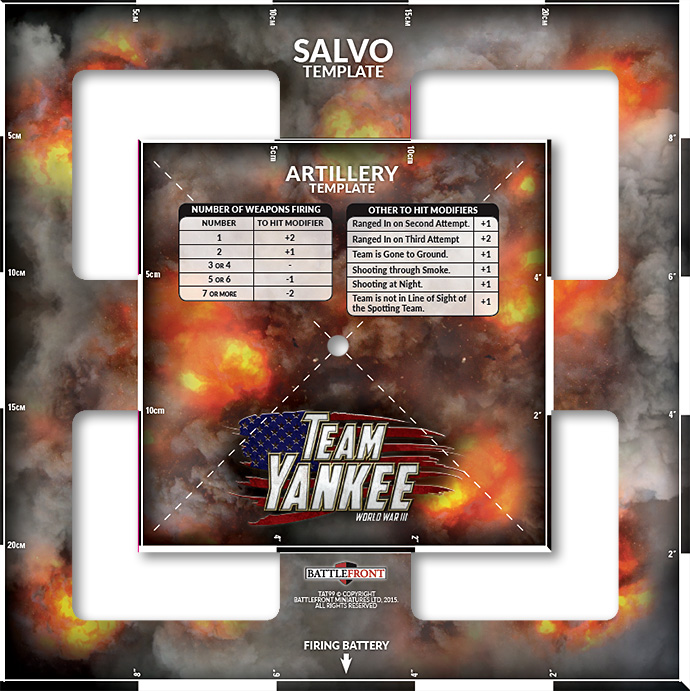
| Artillery & Salvo Template |
| Artillery Bombardments in Team Yankee use a Template to show the area being bombarded. There are two sizes of template: Artillery (6"15cm square) and Salvo (10"/25cm square) depending on the ROF of the weapons firing. The template in Bannon's Boys is designed to give you sizes of template in one. |
 |
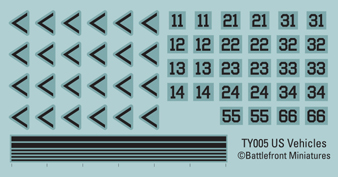
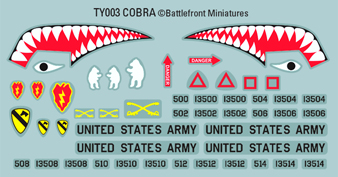
| Decal Sheets |
 |
 |
| Assembling Bannon's Boys |
| Assembling an M1 Abrams tank |
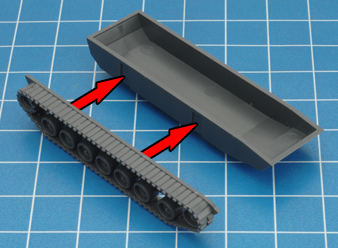
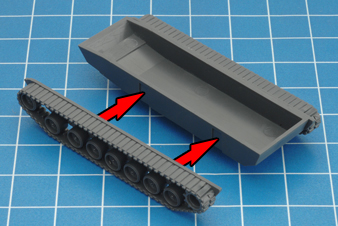
| Step 1. Start by gluing the tracks to the lower hull section. The notches on both sides will ensure that you can't put the tracks on the wrong sides. |
Below: The correctly attached tracks. |
 |
 |
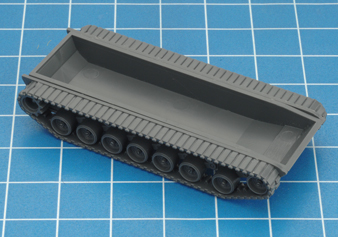 |
| Below: The correctly attached tracks. |
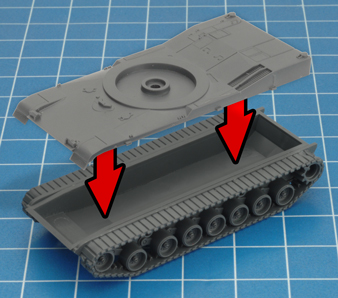
Step 2. Glue the upper hull section to the lower hull. |
 |
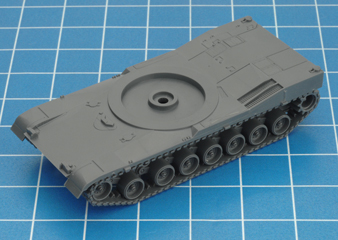 |
 |
| Step 3. Glue the rear skirt plates to the side skirts. There are two options for this part. The original M1, such as in Team Yankee, had the solid plate, and had a retaining ring to prevent thrown tracks due to dirt accumulating under the skirt. |
The notched rear skirt plate is for later variants, which had a cutaway section to prevent dirt build-up. |
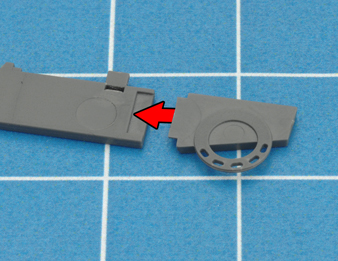 |
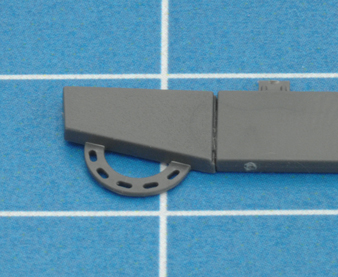 |
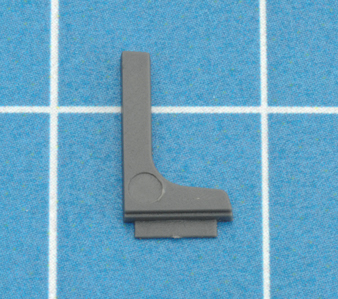 |
| Step 4: Glue the side skirt in place. Note the rear plate, with the retaining ring positioned over the drive sprocket. (Repeat for both sides) |
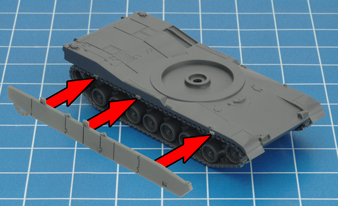 |
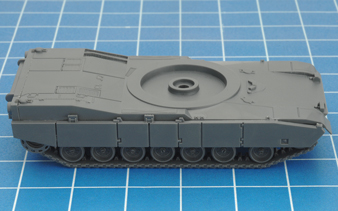 |
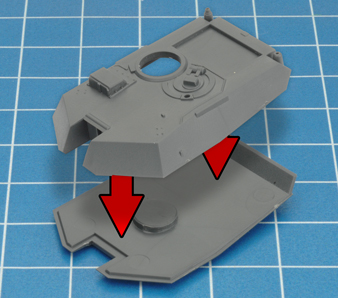
| Step 5. Glue the upper turret to the lower turret. |
Step 6. Attach the blow-off panel piece, with the three-part side up. This was a safety feature to help protect crew for an ammo explosion. |
This piece has a clever two-sided design. The other side, with two panels, is for the later redesigned blow-off panels on the M1A1. |
 |
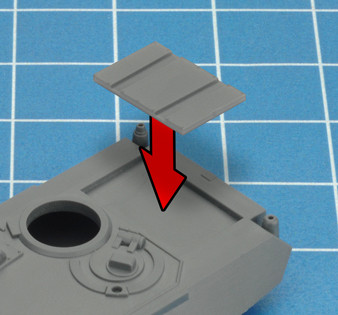 |
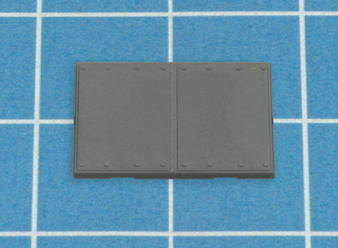 |
| Below: The attached blow-off panels. |
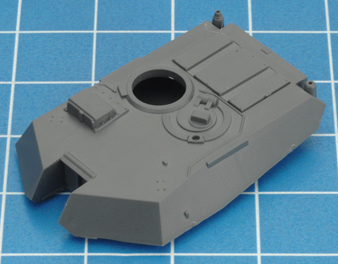
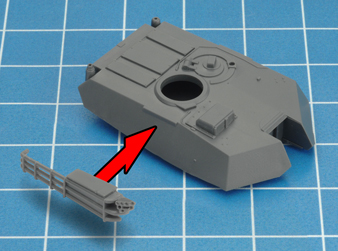
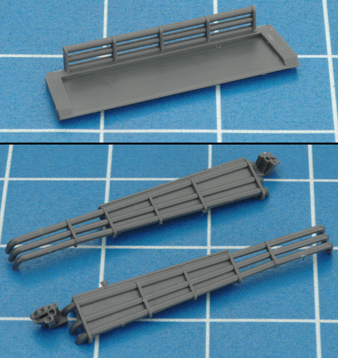
Step 7. Glue the stowage racks to both sides of the turret. Use the two short rack pieces for the original M1. |
A turret-rear stowage rack, along with lengthened side racks, are included for the IPM1 and M1A1. |
 |
 |
 |
| Below: The correctly attached stowage racks. |
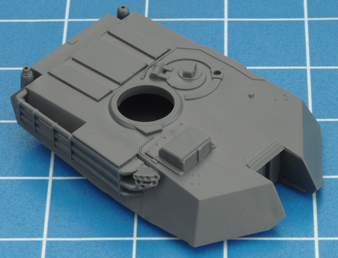
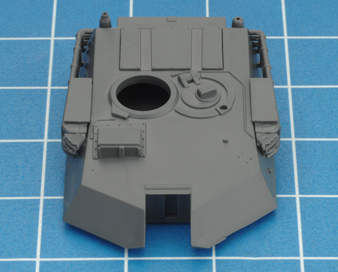
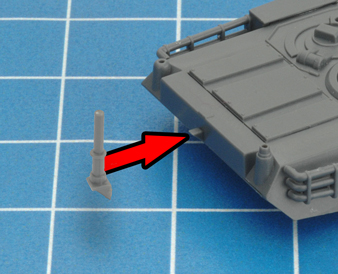
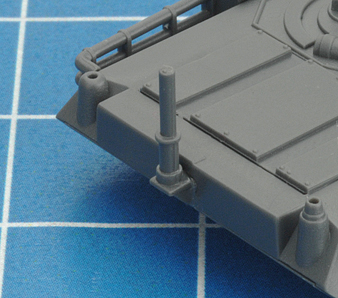
Step 8. Glue the crosswind sensor to the mount on the turret rear. |
 |
 |
 |
| Below: The crosswind sensor in place. This is an important component of a modern tank's fire-control systems. |
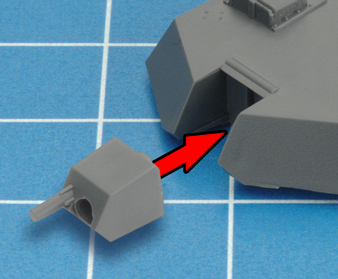
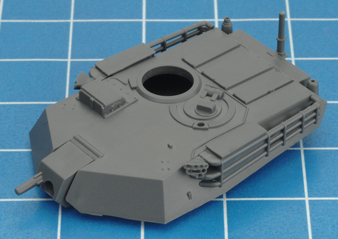
Step 9. Glue the gun mount in place. Note that the co-axial MG is in the right-hand side – but the tabs at the back of the gun mount piece should prevent gluing it the wrong way around, as well as helping with correct positioning. |
 |
 |
 |
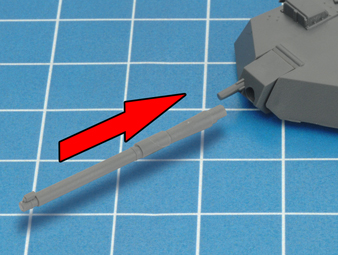
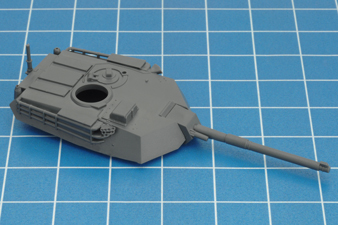
| Step 10. Glue the 105mm gun into the mount. This is the slimmer of the two guns on the sprue, without a bulge in the centre. The half-circle tab at the top of the gun ensures that you can't get it upside-down. |
The other gun piece is the 120mm smoothbore gun for the M1A1. It is instantly recognisible by the large bore evacuator in the middle of gun. |
 |
 |
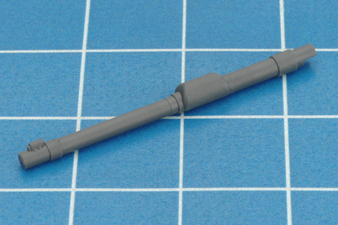 |
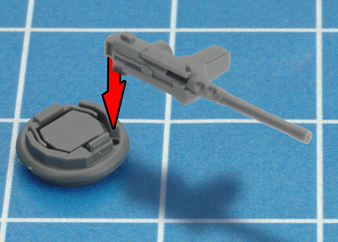
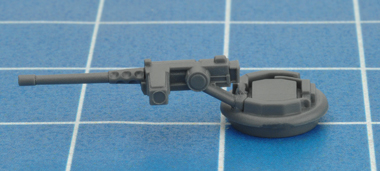
| Step 11. Choose either the open or closed commander's cupola, and glue on the .50-cal machine-gun. The small round hole at the front of the cupola, slightly offset to the left, fits the peg on the base of the mounting arm. An extra machine-gun is included on the sprue, so you will have a spare in case of breakages. |
 |
 |
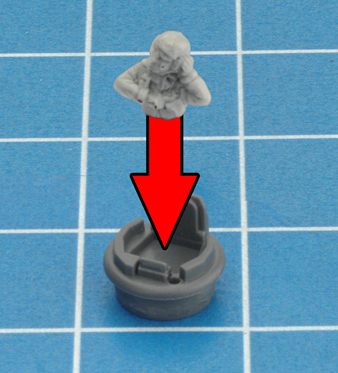
| Use the open hatch and add one of the resin tank commander figures, to mark a vehicle as a command tank. Then add the .50-cal machine-gun as above. Some people like to paint their commanders separately before glueing them in. |
 |
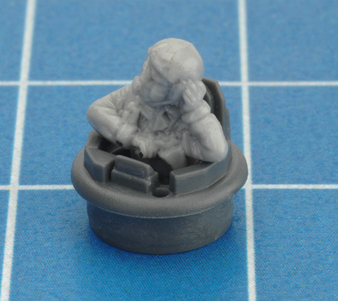 |
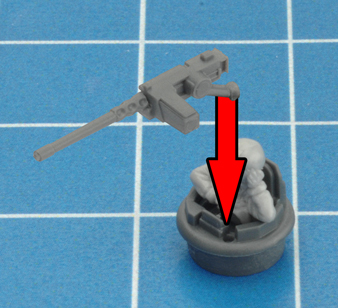 |
| Glue the cupola into the hole on the turret, with the hatch facing forwards. |
Step 12. Glue the pintle-mounted 7.62mm machine-gun into the hole beside the loader's hatch. |
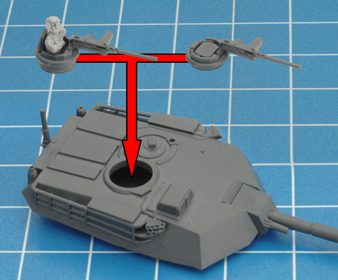 |
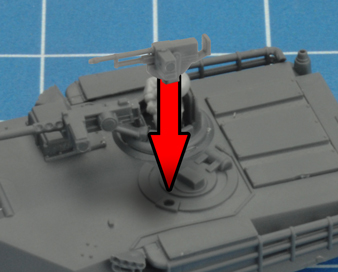 |
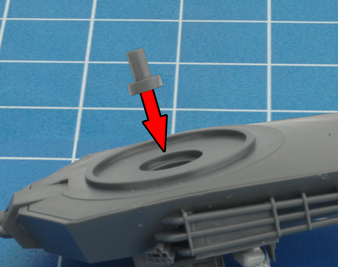
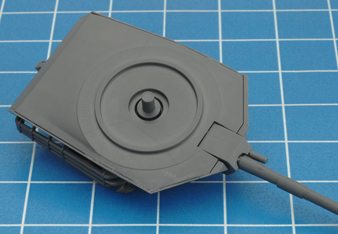
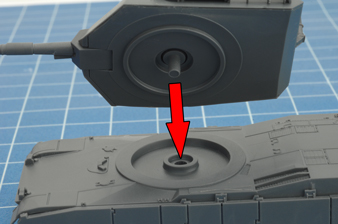
| Step 13. Glue the turret peg into the round recess on the bottom of the turret. Simply place the turret onto the body without gluing, so you can rotate the turret to point at the shooting target. |
 |
 |
 |
|
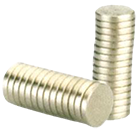
Alternatively, you may prefer to glue rare earth magnets into the recess in the hull and to the bottom of the turret. Magnets are a quick and secure way of fixing your turrets to the hulls, but they are a small added expense, which is why the turret peg is provided, leaving the choice up to you.
Rare Earth Magnets (XX105) are available through the online store here...
These 1mm x 5mm magnets fit perfectly into the round spaces in the hull and turret.
|
 |
|
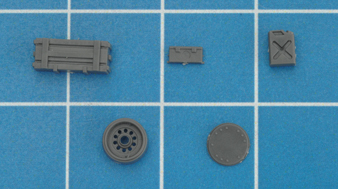
Optional Parts. Included are spare parts which you can add to your tanks as you choose, to make each one unique: ammunition and tool boxes, fuel cans and a spare road wheel.
Finally, the bolted round cover plate is only for the M1A1. If you wish to model this later variant, the plate is positioned in front, and slighty to the left of the loader's hatch (where the Commander's Independent Thermal Viewer would be mounted on the M1A2)
|
 |
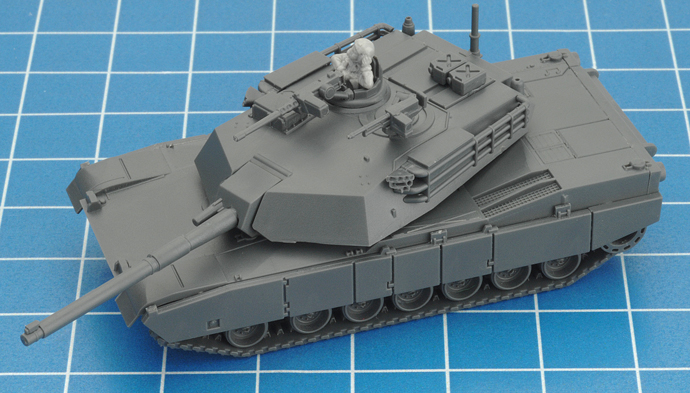
| Below: A completed M1 Abrams tank, including a couple of added fuel cans. |
 |
| James demonstrates how to assemble an M1 Abrams. |
|
|
| Assembling a AH-1 Cobra helicopter |
| Aaron shows you how to build an AH-1 Cobra, starting with the fuselage. |
|
| And in part two, he assembles the rotor system, weapons and flight stand. |
|
Last Updated On Wednesday, December 13, 2017 by Luke at Battlefront
|
|
|