|
|
 |
|
|
Harrier Assembly (TBBX15)
| Assembling The Plastic Harrier |
|
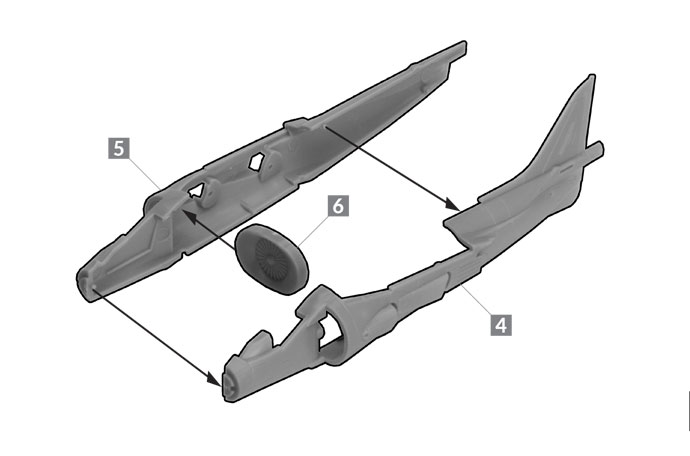
Step 1. Start by gluing intake fan (6) to two hull pieces of fuselage.
|
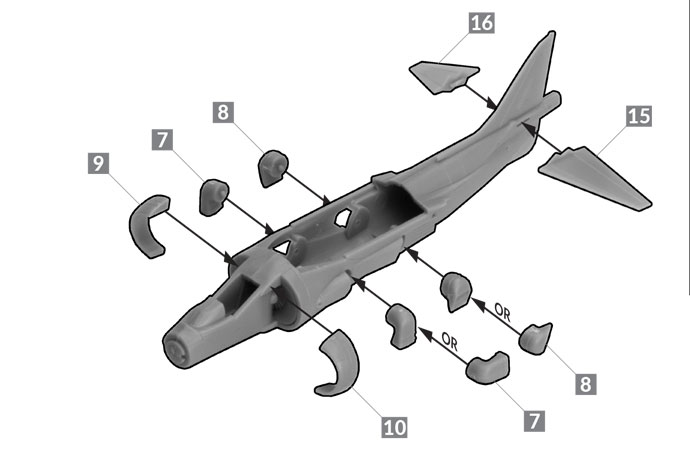
Step 2. Now you can glue the thrusters to the fuselage along with the turbine covers and elevators. Note that the turbines can be pointed down or backwards. |
 |
 |
|
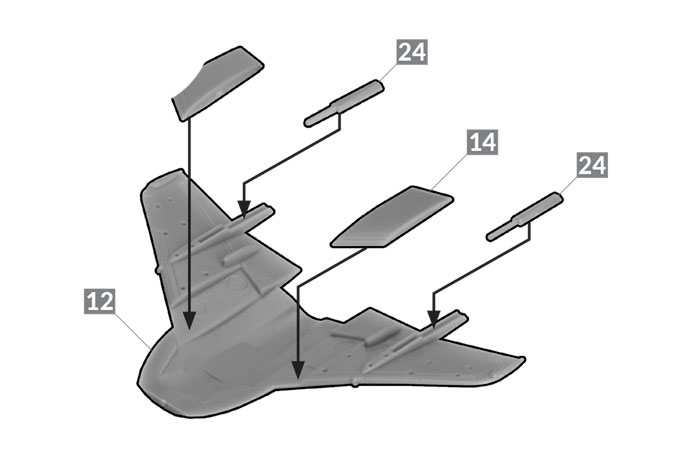
Step 3. Assemble the wing section and attach the weapon pylon bases to the underside.
|
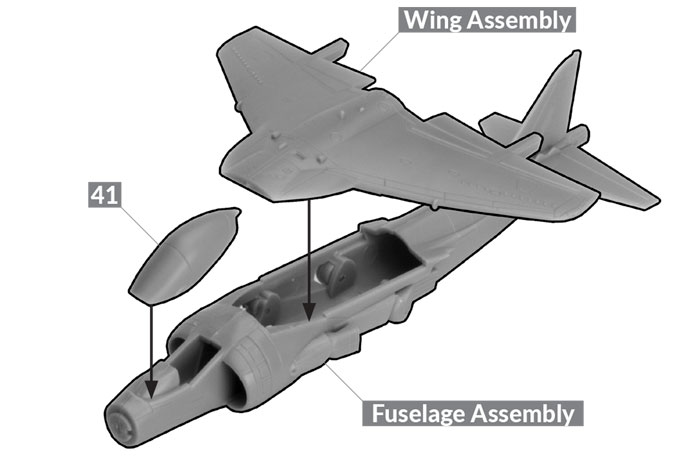
Step 4. Attach the Wing Asssebly and the cockpit window to the main fuselage.
|
 |
 |
Step 5. Attach the landing gear covers to the underside of the main fuselage.
|
Step 6. Attach the Resin Cluster Bombs to the weapon pylons and attach the pylons to the wing section.
Note that the Cluster Bombs will need Super Glue.
|
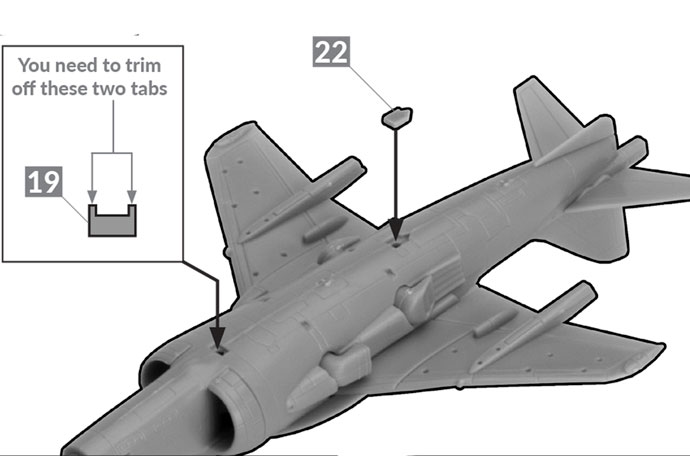 |
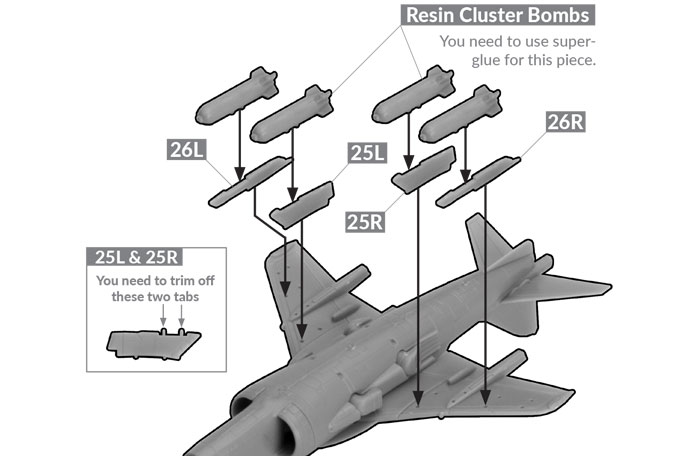 |
| Below: Any pylons can left empty or you can attach missiles. |
Step 7. Attach the fuel tanks to the underside of the fuselage.
|
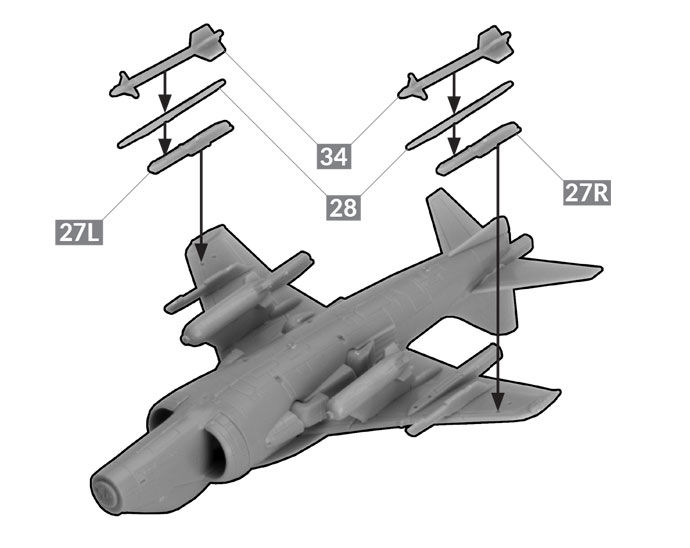 |
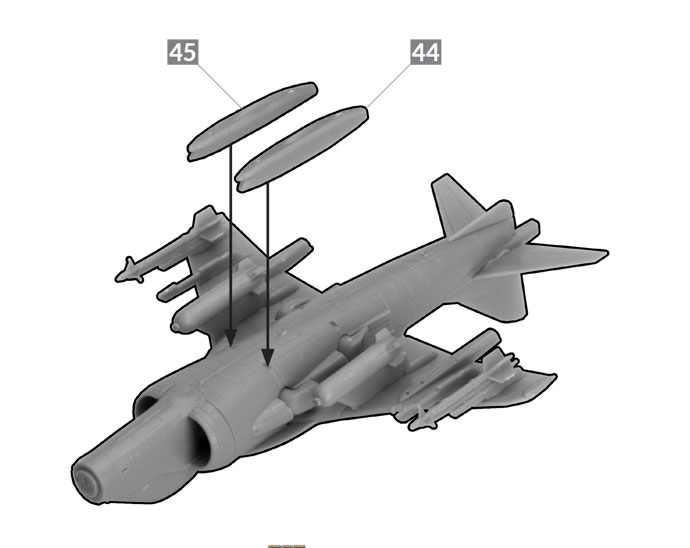 |
|
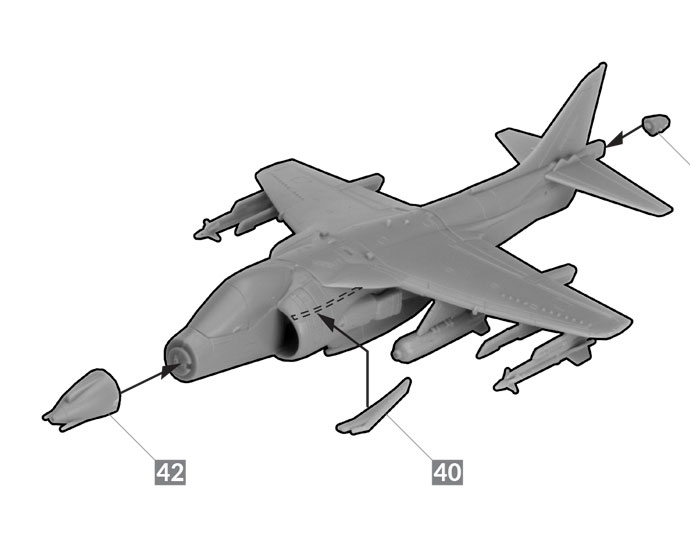
Step 8. Now glue the nose cone, the tail cone and refueling rod to the main hull.
|
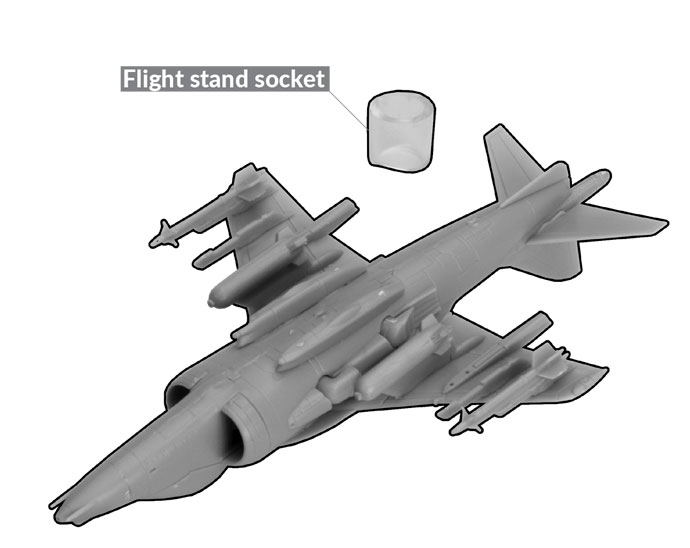
Step 8. Attach the flight stand socket to the underside of the fuselage.
|
 |
 |
|
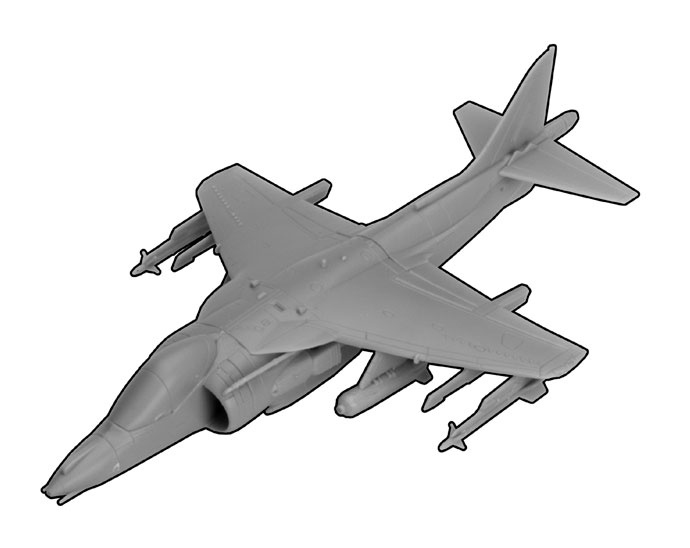
Below: The assembled British Harrier Aircraft.
|
 |
Last Updated On Monday, February 17, 2020 by Luke at Battlefront
|
|
|