|
|
 |
|
|
Swedish Armoured Forces in Team Yankee
 |
Swedish Armoured Forces in Team Yankee
By Ryan Jeffares
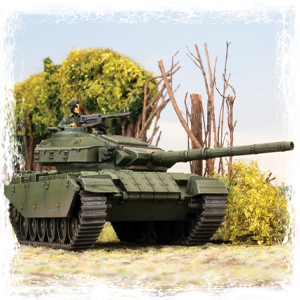
The release of Nordic Forces has brought the war to Sweden and in this article, we’ll examine the armoured formations available to the Swedes in Team Yankee. The Swedes made use of both imported and locally designed vehicles, notably the British Centurion and the STRV 103 S-Tank and we’ll look at their rules in game as well as tactics and some sample army lists.
|
|
The Strv 103 S-Tank in Team Yankee
|
|
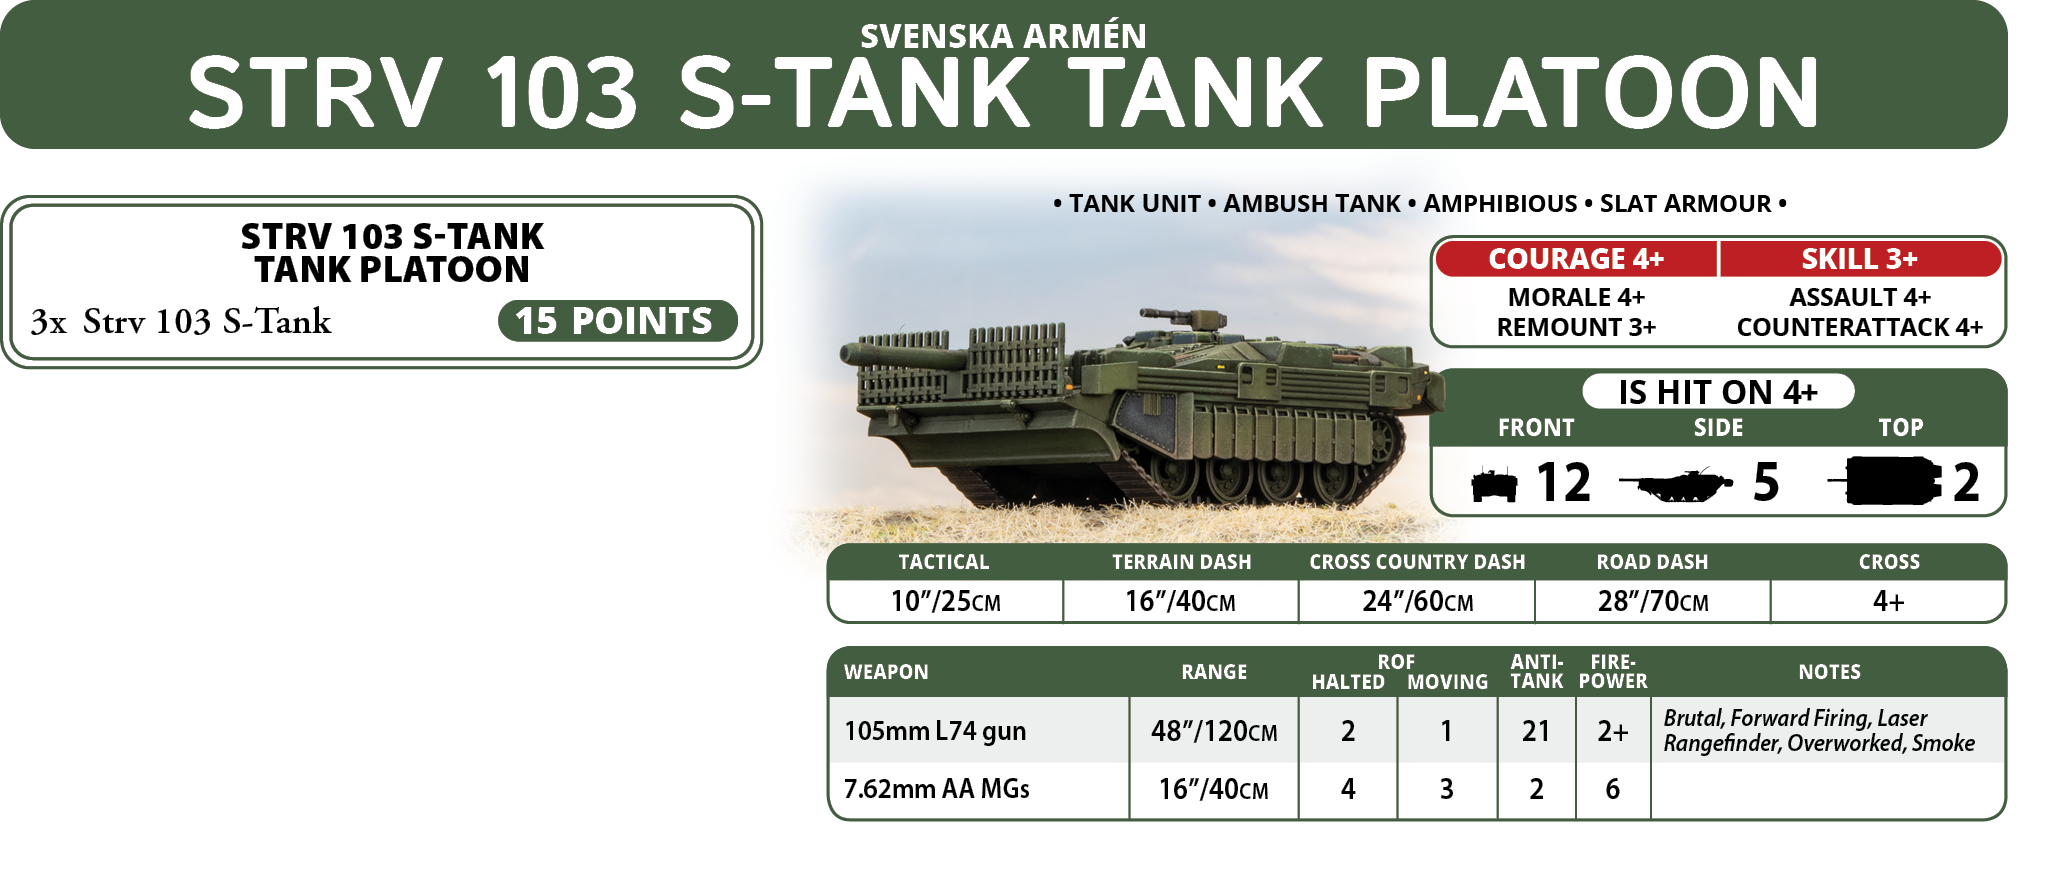
The S-Tank would be developed during the 1950s, with its radical turretless design aimed at reducing the tank’s silhouette to make it harder for an enemy to spot or hit. In Team Yankee, the S-Tank has a special rule, Ambush Tank, which represents its low silhouette and the tank’s adjustive suspension, enabling it to hide by lowering its suspension. If an S-Tank remains stationary and fires its main gun, the Ambush Tank rule allows the tank to stay gone to ground despite having shot. However, as the S-Tank lacks a stabiliser, the gun is overworked, forward-firing and has a rate of fire of 2/1, which dramatically reduces its ability to shoot effectively whilst moving.
|
|
|
|
These rules make the S-tank devastating when firing stationary from cover, but unable to maintain the same rate of fire or accuracy when shooting on the move. Furthermore, its armour is fairly weak, with Front 12, Side 5 and Top 2 so it is vulnerable to most other tanks if it gets hit. Overall, we have a tank that is rather fragile and isn’t good at shooting on the move but is very difficult to hit when concealed and excels when it can remain stationary.
|
|
The Swedish tank crews have good ratings, with Courage 4+ and Skill 3+ but most importantly, they are hit on a 4+, which when combined with concealing terrain and being gone to ground, can make it so they can only be hit on a 6, which offers far more protection than their armour.
|
|
|
|
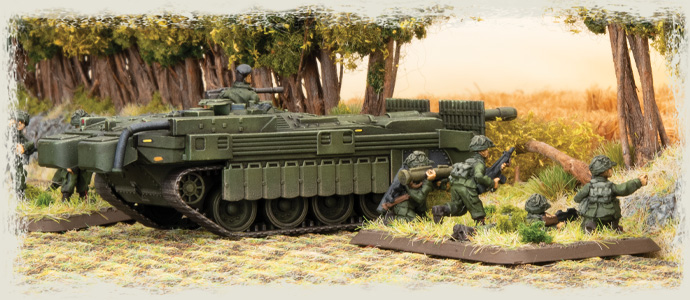
The Strv 103 S-Tank Tank Company formation consists of two compulsory units of 3 S-Tanks along with an HQ, which is 2-3 tanks strong. Optionally you can take up to two PBV 302 Armoured Rifle Platoons, a single PBV 302 Armoured Recon Platoon and an additional platoon of S-Tanks.
|
|
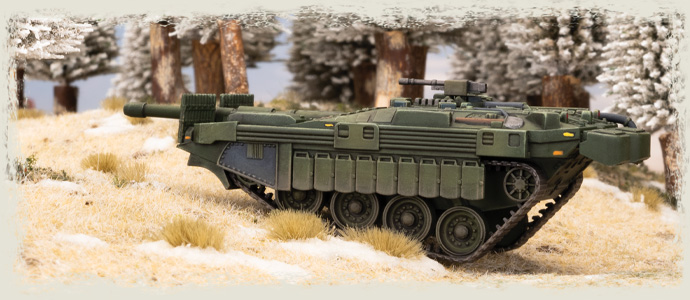
When using S-Tanks, you need to play to their strengths as they are far more specialised than other main battle tanks and simply lack the armour or mobility to be used in the same way as other tanks. When you deploy your S-Tanks, think carefully about the terrain, the tanks are very reliant on cover to increase their survivability but they will require clear sightlines in order to actually be able to shoot. This is even more important given their poor accuracy and rate of fire on the move. If the mission lets you deploy a unit from ambush, a unit of S-Tanks is ideal, if you can deploy them in concealing terrain, as being able to stay gone to ground due to the Ambush Tank rule will help them weather the inevitable return fire after they are revealed.
|
|
If you do need to attack with S-Tanks, try to ‘leapfrog’ your units forwards, leaving one unit stationary behind cover whilst another moves forward, with your platoons working as pairs. This will help to mitigate the lower moving rate of fire as the stationary unit will be able to shoot at full effectiveness whilst the moving unit gets into position to shoot from cover in the next turn and will help to keep at least some of your units concealed and hard to hit.
|
|
|
|
Against larger tank forces that tend to field large numbers of Leopard Is, Pattons, T55s etc. there is the risk that your formation could be overwhelmed by the sheer number of enemy tanks. You’ll want to do your best to make the most of the S-Tank’s high Hit on number while screening your tanks with your infantry to prevent your opponent from moving freely to get shots where your tanks are not concealed by terrain. Also be aware of the poor cross rating of the S-Tank, as with cross 4+ it is liable to get stuck at the most opportune time, so try to avoid deploying in woods or other rough terrain, such as fields, fences and the like will still grant concealment without the risk of failing a cross test.
|
|
With their poor assault value of 4+, along with the armour 13 granted by slat armour, S-Tanks are not very competent in assaults, especially given that they aren’t effective whilst shooting on the move, so they’re best used for fire support unless absolutely necessary. When designing a list, take this into account, make sure you include infantry or even Centurions (Which we’ll discuss next) as they are more effective in at driving enemy infantry from objectives
|
|
|
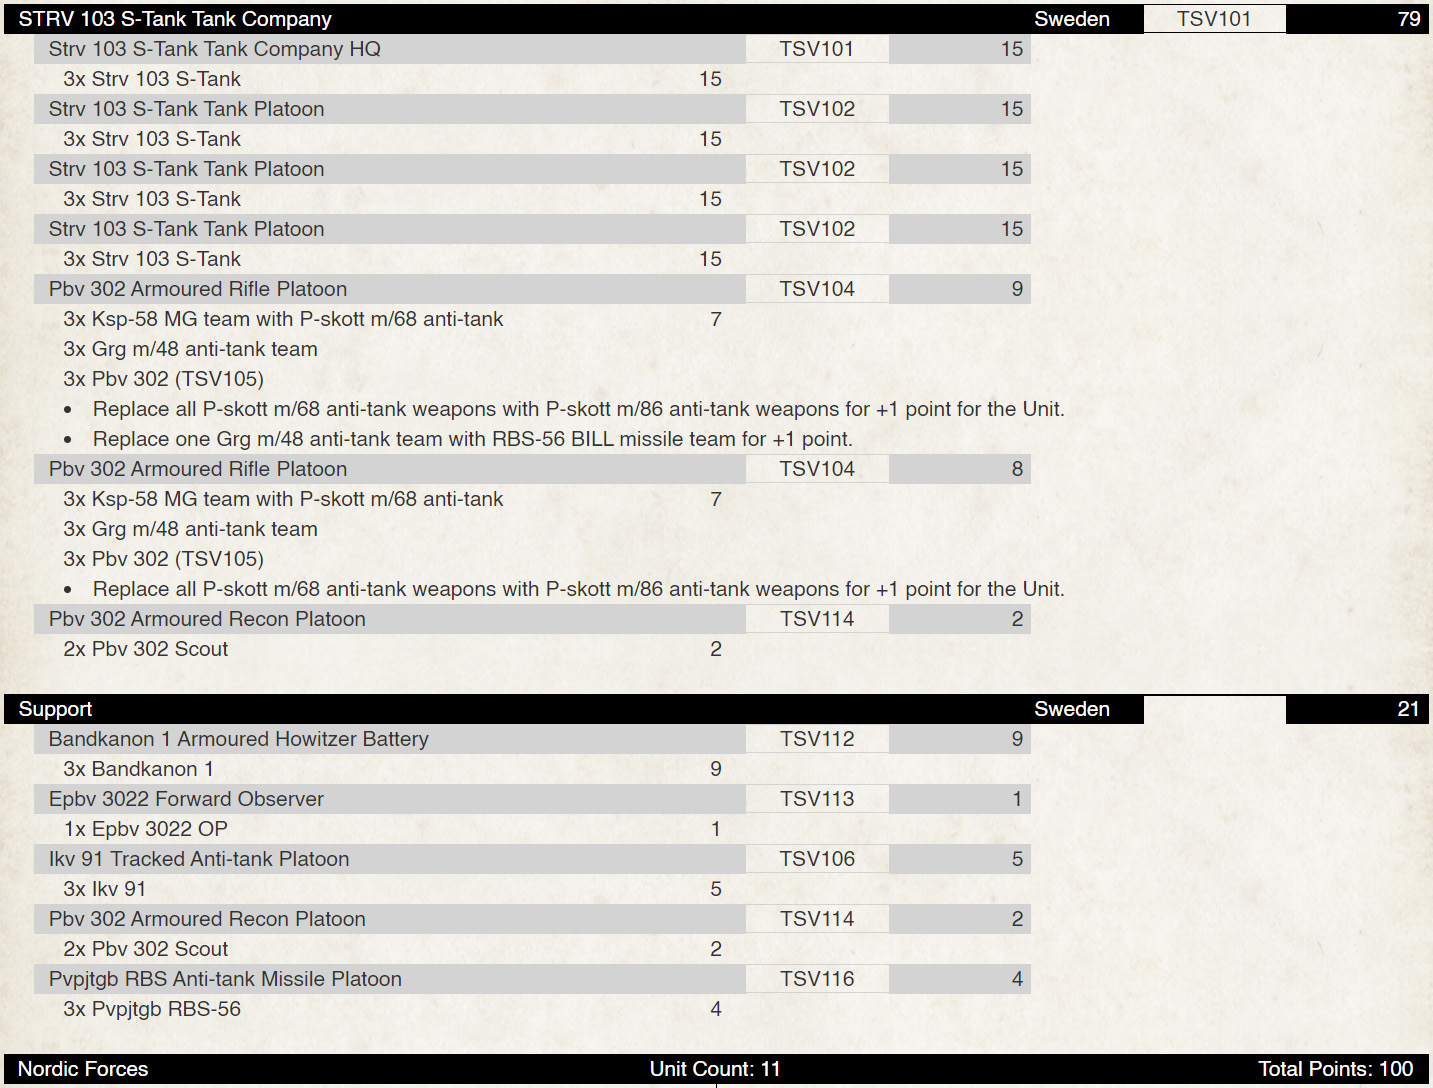
| This list is primarily a defensive list due to the nature of the S-Tank and will rely on your infantry to hold (or take) objectives, while the S-Tanks provide long-ranged fire to whittle down enemy armour. The Pbv recon platoons are crucial units to support your S-Tanks as their ability to spearhead can help you deploy your tanks in optimal firing positions before the battle even begins. The 20mm autocannons mounted on the Pbvs are also useful as they can destroy enemy light vehicles which can threaten your tanks if they manage to get around their flanks. To help destroy dug-in enemy infantry I’ve included a battery of Bandkanon 1s, whose autoloading guns are very effective at the task. Furthermore, they can target enemy artillery to protect your own infantry or even serve as emergency anti-tank guns if need be. |
| The RBS-56 BILL armed Pvpjtgb trucks are there to add a cheap fire support unit to bulk up the amount of anti-tank firepower and can to help secure a flank while your S-Tanks creep forwards supporting your infantry. Finally, the Ikv-91 platoon are a cheap, mobile unit with a decent main gun, capable of destroying enemy MBTs from the side and can provide a distraction to stop your opponent from focusing on destroying your S-Tanks. |
| If you wanted to make this list more mobile (Or just like lots of tanks) you could switch out the infantry Platoon equipped with the RBS-56 BILL for a unit of Centurions, as they are more effective when firing on the move and are somewhat more heavily armoured than infantry mounted in transports. |
|
The Strv 104 Centurion in Team Yankee
|
|
The Swedes also made use of the Centurion tank, a venerable design that was developed by Britain during the Second World War and would be purchased by Sweden in 1953. The Swedish Centurions would go through a series of upgrades, which would include the mounting of a 105mm L7 gun, an improved fire control system, ERA panels as well as the replacement of the engine, resulting in the Strv 104 Centurion we see in Team Yankee.
|
|
|
|
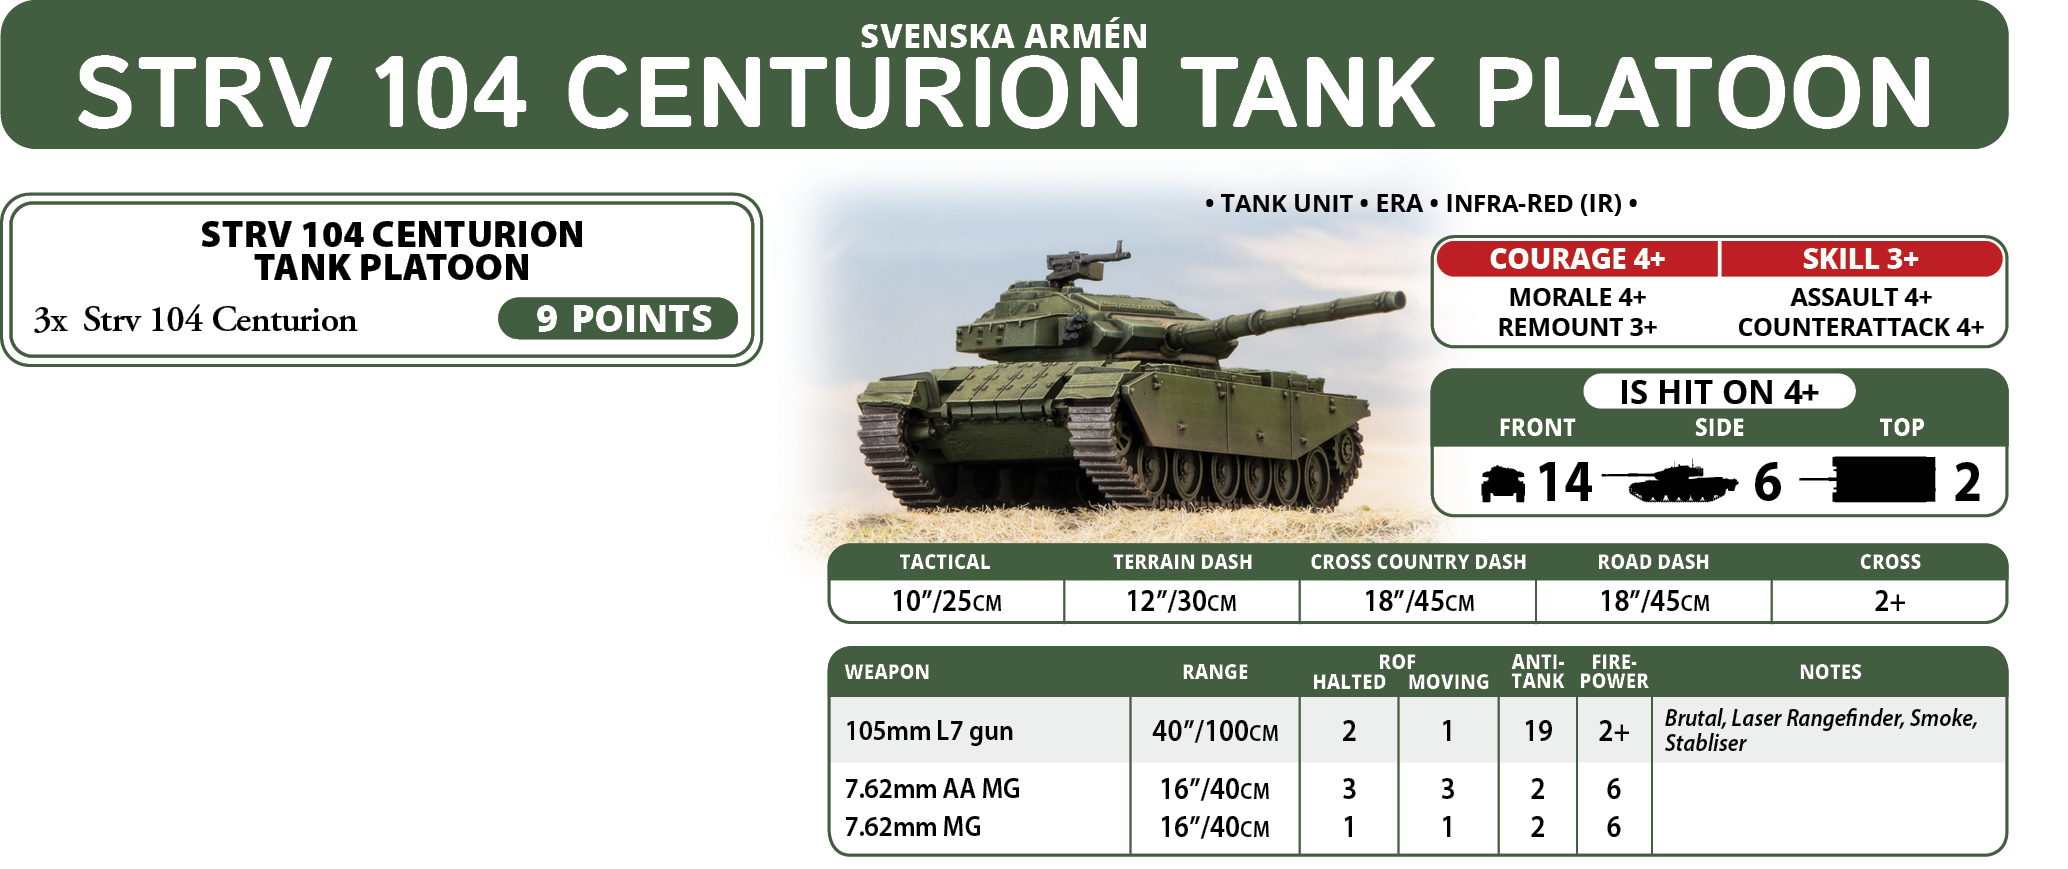
In Team Yankee, the Centurion has average armour, with Front 14, Side 6 and Top 2, protecting it against most light vehicles but leaving it vulnerable to fire from enemy MBTs or dedicated anti-tank weaponry. However, the addition of ERA greatly improves the survivability of the Centurion against HEAT weaponry, raising its armour to 16, giving them a chance to survive hits from guided missiles and drastically reducing the effectiveness of most handheld anti-tank weapons.
|
|
The L7 gun mounted on the Strv 104 has an AT value of 19 and FP 2+, enabling the Centurion to penetrate most tanks from the front bar top tier MBTs and it is more than capable of destroying any tank from the side. Although its gun has the same rate of fire of 2/1 as the S-Tank, the Centurion is more effective than the S-tank when firing on the move as it lacks the overworked rule and also has the additional flexibility of having a stabiliser.
|
|
|
|
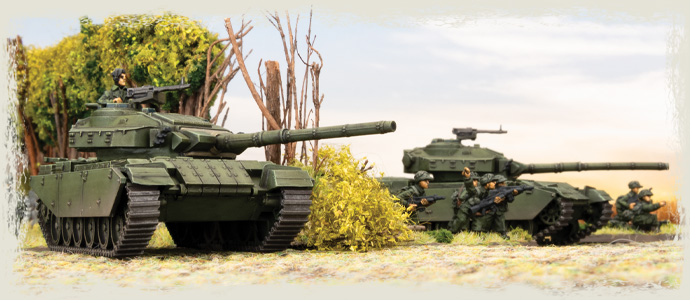
The Centurion has the same good skill ratings as the S-Tank, allowing it to comfortably blitz to maximise its ROF when necessary while being hit on a 4+ crucially raises its survivability, especially if you can make use of terrain to stay concealed from enemy units. Compared with the S-Tank, the Centurion has an excellent cross value of 2+ which enables it to be more cavalier when entering terrain, so you can maximise the impact of concealment while moving forward to get flank shots.
|
|
The Strv 104 Centurion Tank Company is almost identical to the aforementioned S-Tank Company, except with Centurions instead of S-Tanks. The formation is made of an HQ of 2-3 Centurions, and two platoons of 3 Centurions with the option to add a third platoon. The optional choices are rounded out by up to two Pbv 302 Armoured Infantry Platoons and a Pbv 302 Armoured Recon platoon.
|
|
|
|
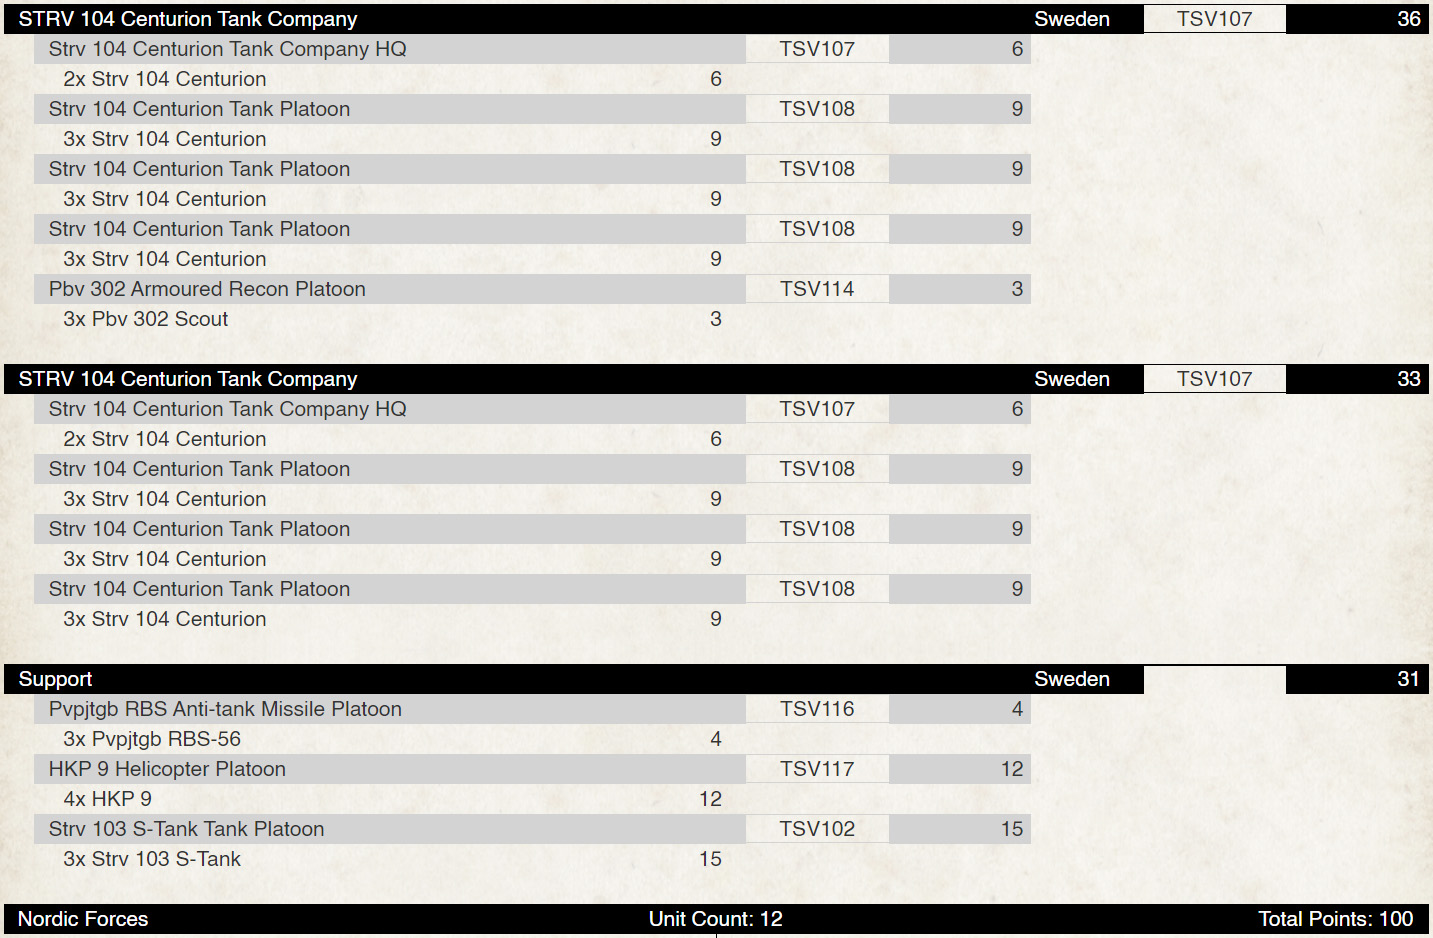
Here I’ve opted for a double formation list, with two Strv 104 Centurion Tank Companies because the Centurions will generally need to get around the side of heavier tanks in order to penetrate them, so you’ll need a large number of tanks as you should expect to take casualties. I’ve included both S-Tanks and a Pvpjtgb RBS Anti-Tank Missile Platoon to sit back and provide long-range anti-armour capability to support the Centurions as they move forwards. The HKP 9 helicopters will also add more anti-tank firepower as they can lurk above woods at long range, targeting enemy tanks that your Centurions might otherwise struggle to deal with. I have forgone artillery and infantry in this list as I reckon that massed Centurions can definitely drive enemy infantry out of their foxholes due to the protection offered by their ERA. By maximising cover and then rushing inside the minimum range of enemy-guided weapons you should be able to limit the number of casualties you take before you get into assault. If you wanted a more varied list you could swap out the second Centurion Company for an Infantry company mounted in Pbvs.
~ Ryan
|
Last Updated On Thursday, August 24, 2023 by Ryan Smith
|
|
|