|
|
 |
|
|
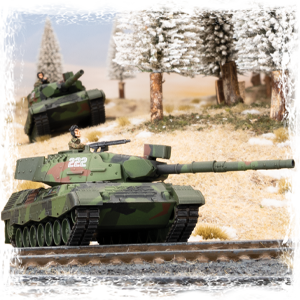
Norway’s armoured might, the Leopard 1
 |
Norway’s armoured might, the Leopard 1
By For Warned Forearmed
Hi all and welcome to another article from the land of ice and snow with your local S2. This time we’ll be looking at the New Norwegian Forces as part of the new Nordic release, more specifically the Norwegian Leopard 1 Formation. So at first glance of the Norwegian formations we only have 2 to choose from the Leopard 1 and the M113 Mech infantry formations, however, we’ll concentrate more on the Norwegian MBTs as these have plenty of punch when it comes to making a competitive list for WW3 Team Yankee. I will show you a more combined arms force as well for those that want to run both formations together. However, first a quick look at how Norway acquired its Leopard tanks.
|
|
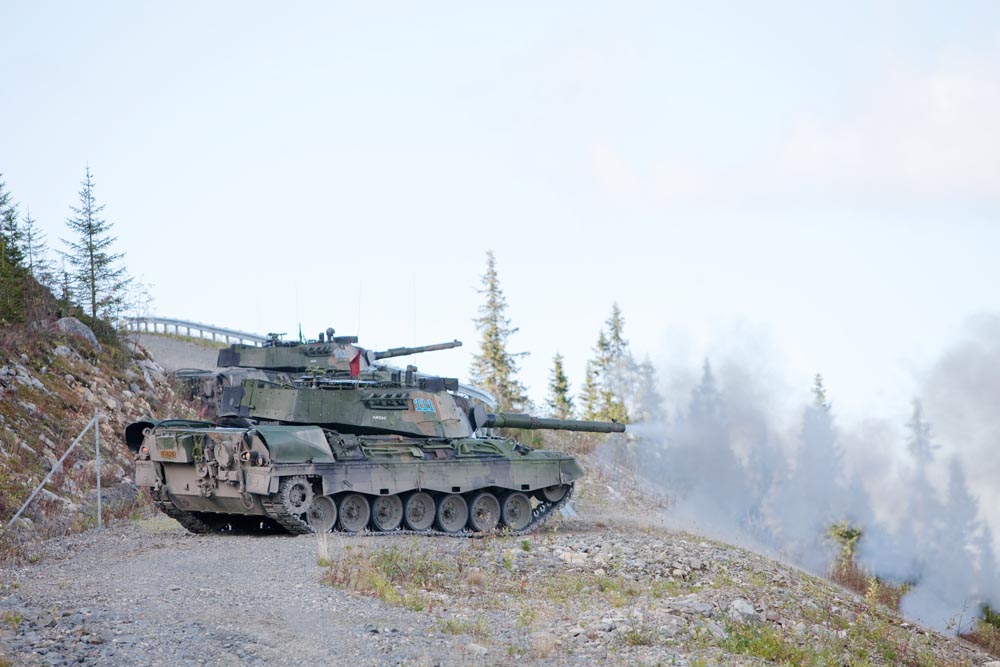
As Norway was a founding member of NATO this opened the way for the importation of military equipment from its NATO allies. This led to the acquisition of 172 Leopard 1 tanks in 1968, through its NATO ally German. Like Norway’s previous armoured vehicles, these Leopards went through various upgrades during service. This ended with the final version, the Leopard 1A5. The Norwegian army kept these tanks in service up until 2011, ending a service life of 42 years.
|
|
|
| Another fun fact about the Norwegian Military is it borrowed iconology from their infamous warrior ancestors, the Vikings. (However, the state has never officially approved of publicly embracing or glorifying war and its disturbing sides) This was used to name their armoured fighting vehicles. In more recent times, the members of the armoured units in Afghanistan used this ancient heritage as a weapon to boost morale it did however receive some criticism in the media, as it was considered a dangerous concept to glorify combat and war in such a manner. Regardless, this tradition lives on in the hearts and minds of Norwegian soldiers, whether it be the symbolism employed in the combat divisions of Norway, or in the morale of the soldiers themselves. |
|
So that’s a little background on Norwegian Leopards 1s and some of the things the tankers like to do to their tanks (which could provide some good hobby opportunities for modelling).
|
|
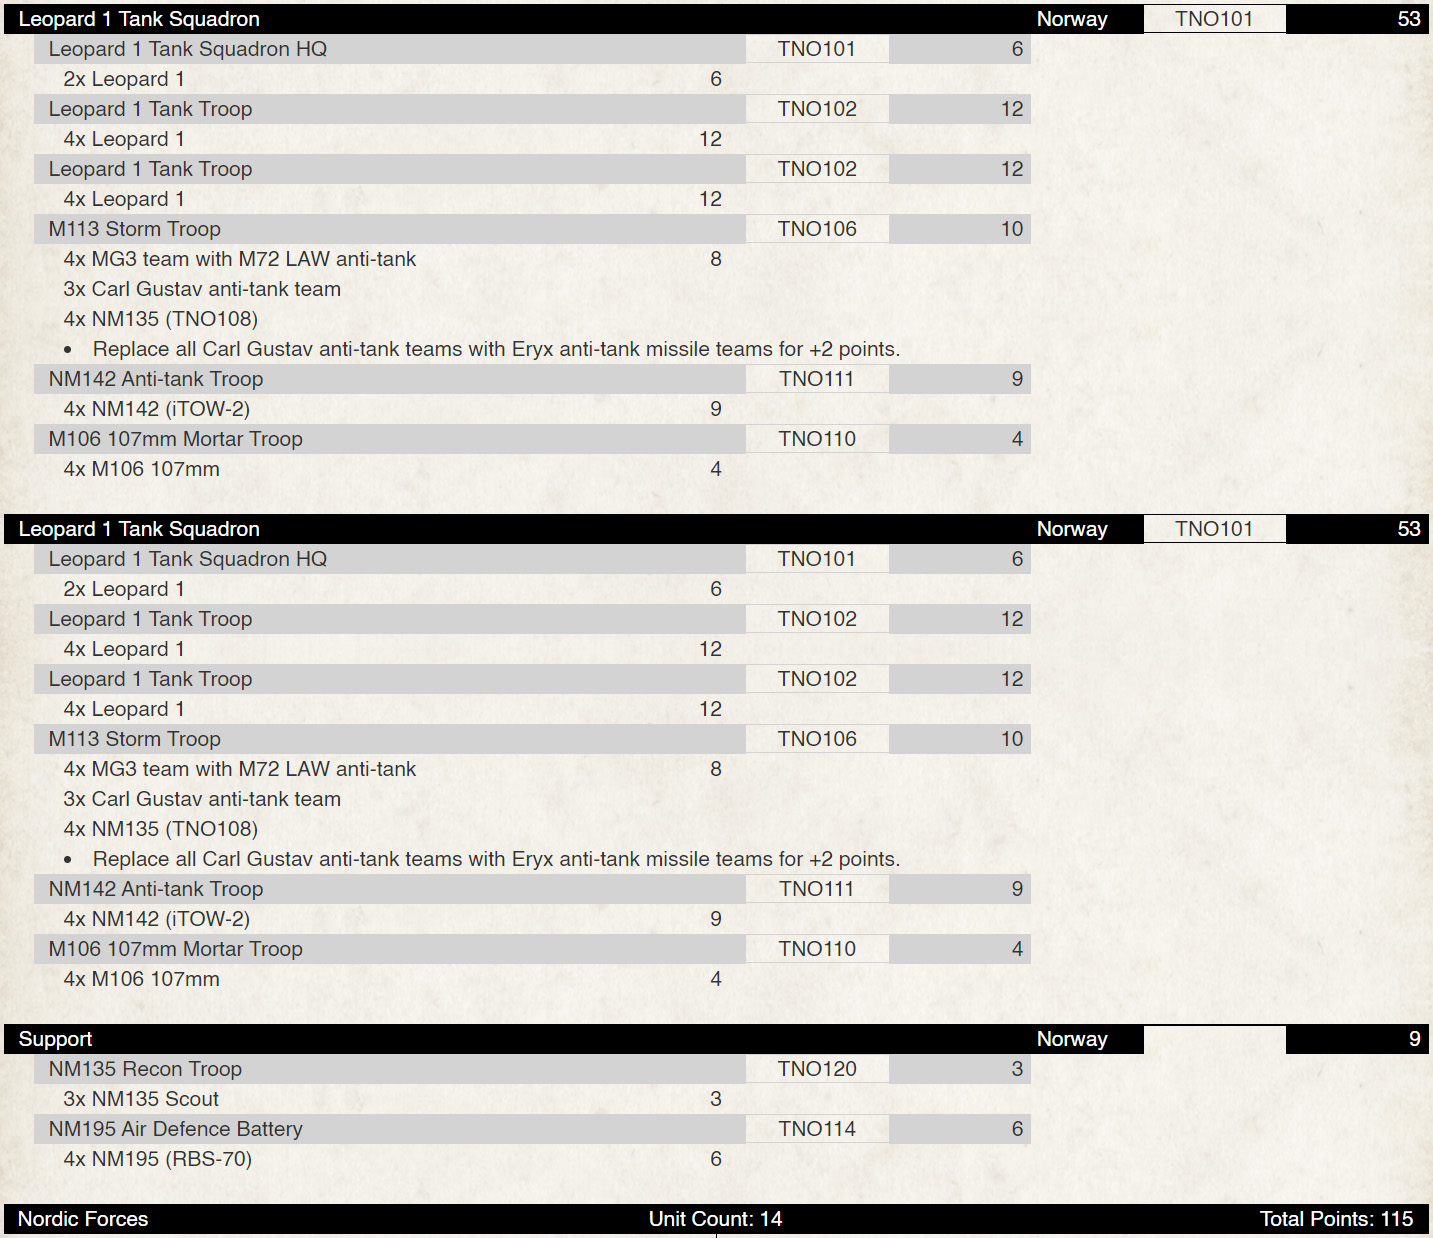
However, let’s start to take a look at our lists that are going to be used to represent Norway’s armoured might. So the first list is a pure Leopard 1 force with 2 formations of leopards. So let’s look at what we have in each formation, it has three tank platoons, an infantry platoon, a mortar platoon and an infantry platoon upgraded with the new shiny Eryx missile systems( handy in a pinch). 1 this packs plenty of leopards with a grand total of 20 to use and considering the skill of the Norwegian forces this will suit these very well. Rounding out the force is the scout troop and some RBS 70 AA.
|
|
|
|
The best way to use this force is to utilise the speed and skill of the Norwegian tankers to get onto the flanks of the opponent's force as they have the potential to move 14” each turn and coupled with their ROF of 2 it can definitely lay down the firepower. The infantry in these formations pack a big AT punch, however, this is reliant on the unit not being pinned down as this will mitigate the Eryx
|
|
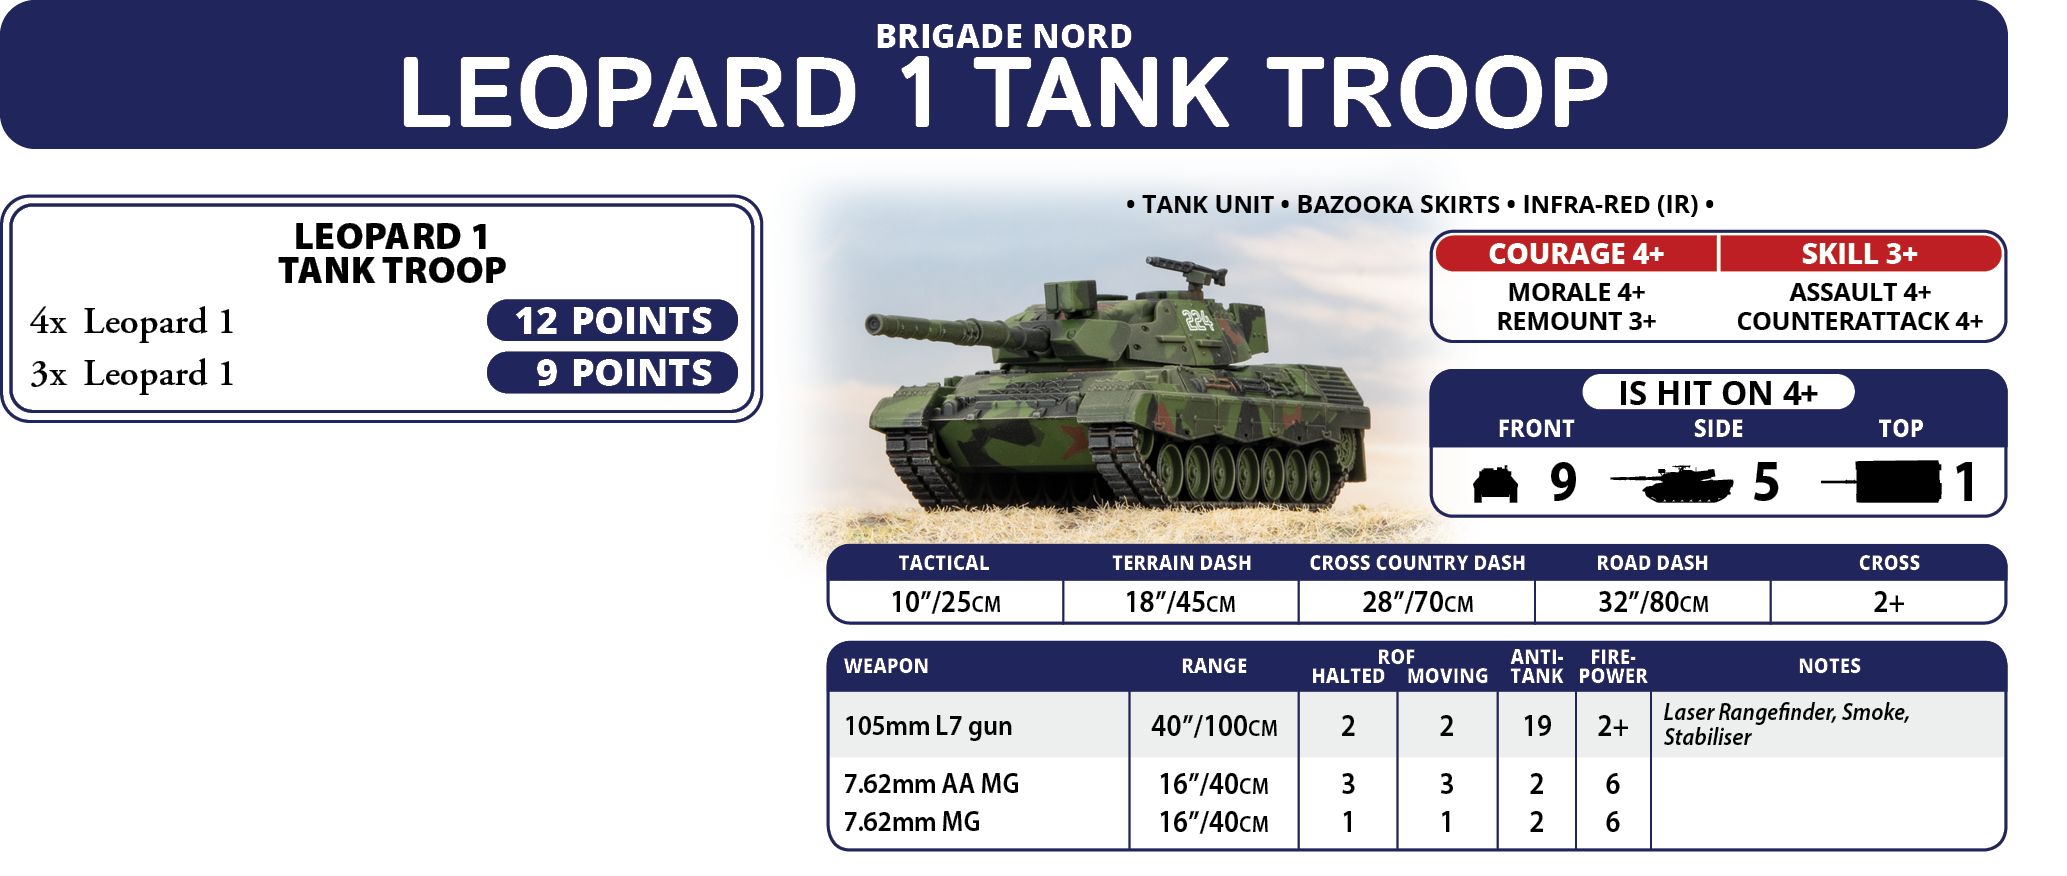
So we’ll have a more in-depth look at each unit of this force, starting with the Leopard 1. On paper, we have a fairly decent attack platform with some decent stats, 3+ skill and 3+ remount. The rest of the stats are 4+ so once down to the last tank the Norwegians are more likely to retreat than fight, however, to make the tanks survive more this is where your skill and the Leopard 1s outstanding 2+ cross-check come into play. This way we can take full advantage of being able to strike from cover and also to retreat back into the shadows. Using the Leopard 1s Tactical move we can either use a blitz move to get in to cover more quickly and once in cover can utilise that skill and cross-check to make the best use of it with shoot and scoot order. This way we can get out of trouble but also position our units to give cover fire for our infantry in case they are pinned and unable to use their Eryx missile systems. You can also use the headquarters to do this more effectively due to their higher skill also.
|
|
|
|
The recon units in this force will act more like an op as we don’t have one in this force, however, it does allow us to get this unit into a good position to look for opportunities to range in smoke or bombardment with better field position due to its spearhead ability. If there is an opportunity it can go AA or Arty hunting as it does have a decent gun in the form of a German-made 20mm the same as the Marder 1. This can also be used to defend itself from infantry or AFVs that may get a little too close for comfort.
|
|
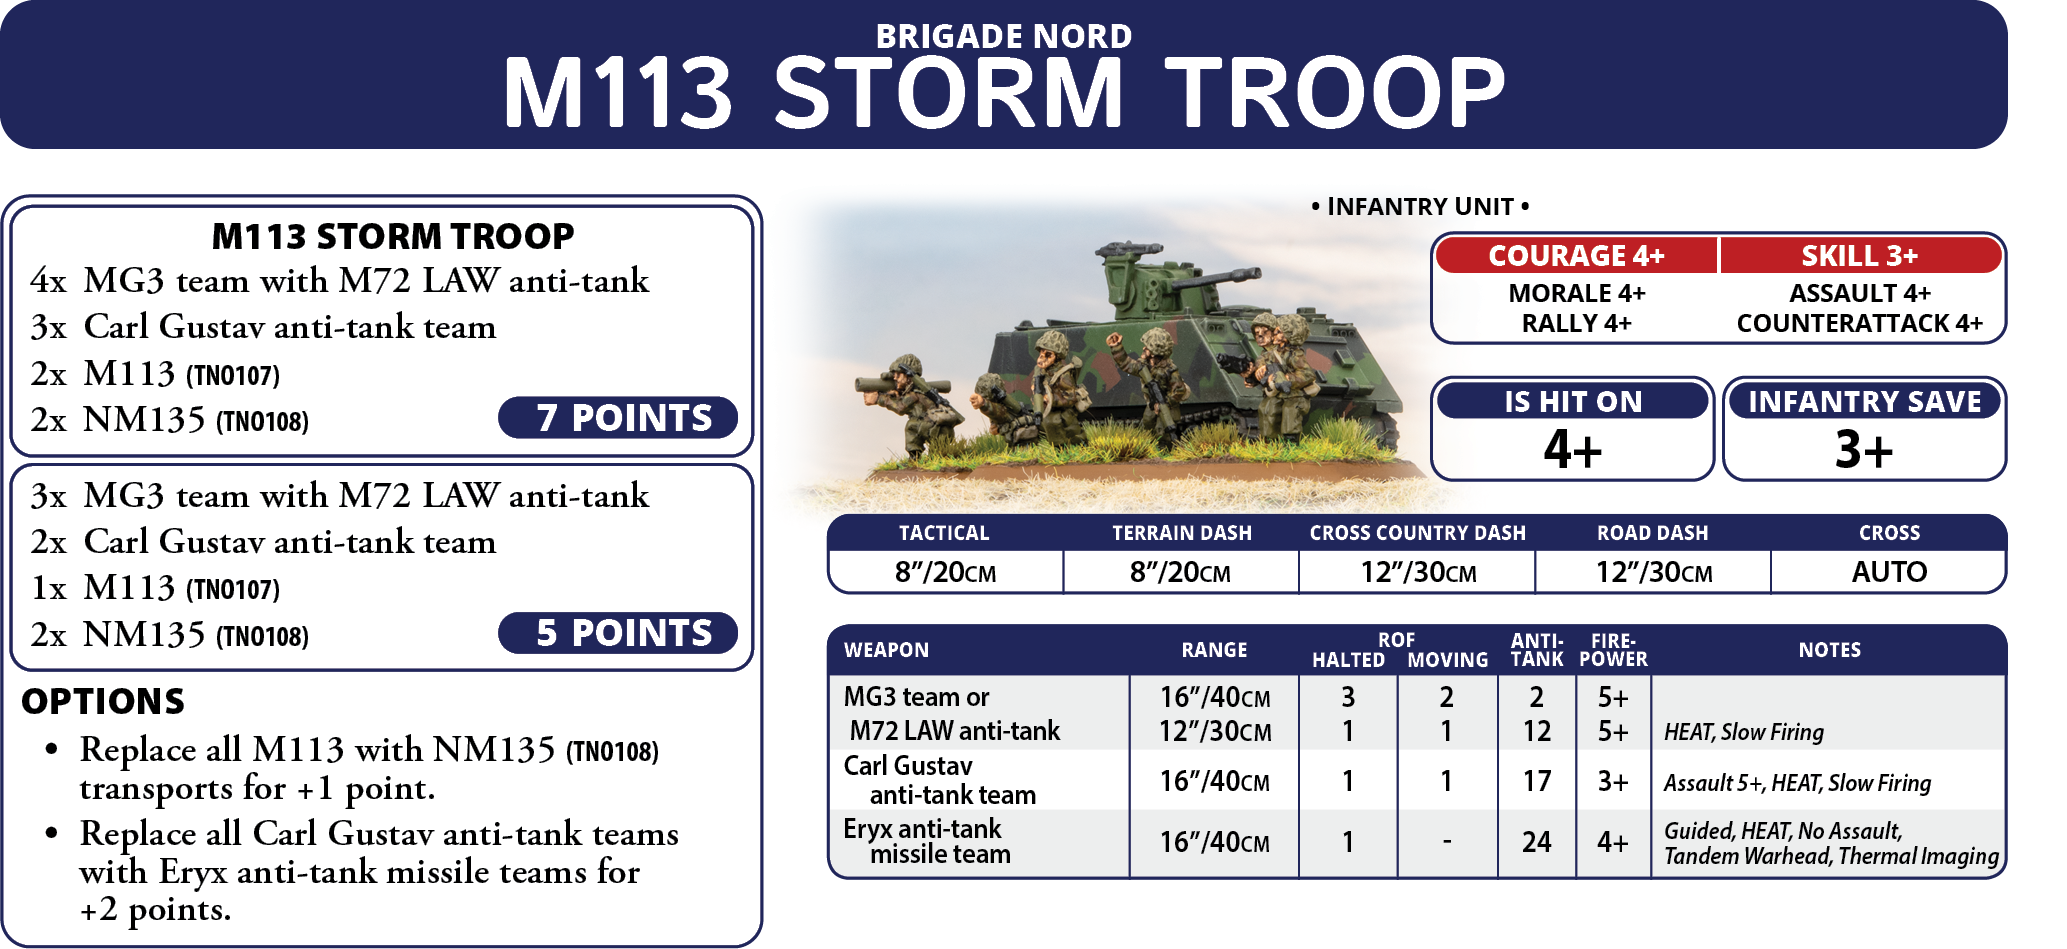
The infantry in this force will hold up on your defending objective as coupled with the Eryx will be able to deter an opponent’s tank assault as this little system may just surprise a few when hit by its AT24 tandem warhead missile. It will definitely make short work of any tank that comes into range and that may try to assault your infantry. The drawbacks are that if you do take the Eryx be prepared to face a lot of incoming fire as the best way to mitigate them is to pin your infantry as Norwegians only have a 4+ rally. So to ensure if you think you may get pinned have some Leopard 1s close by to act as a QRF. In the second list, you have an extra platoon of infantry not equipped with Eryx. A good opportunity is to have these units work in tandem with each other to give overlapping arcs of fire to ensure that you can face any type of threat.
|
|
|
|
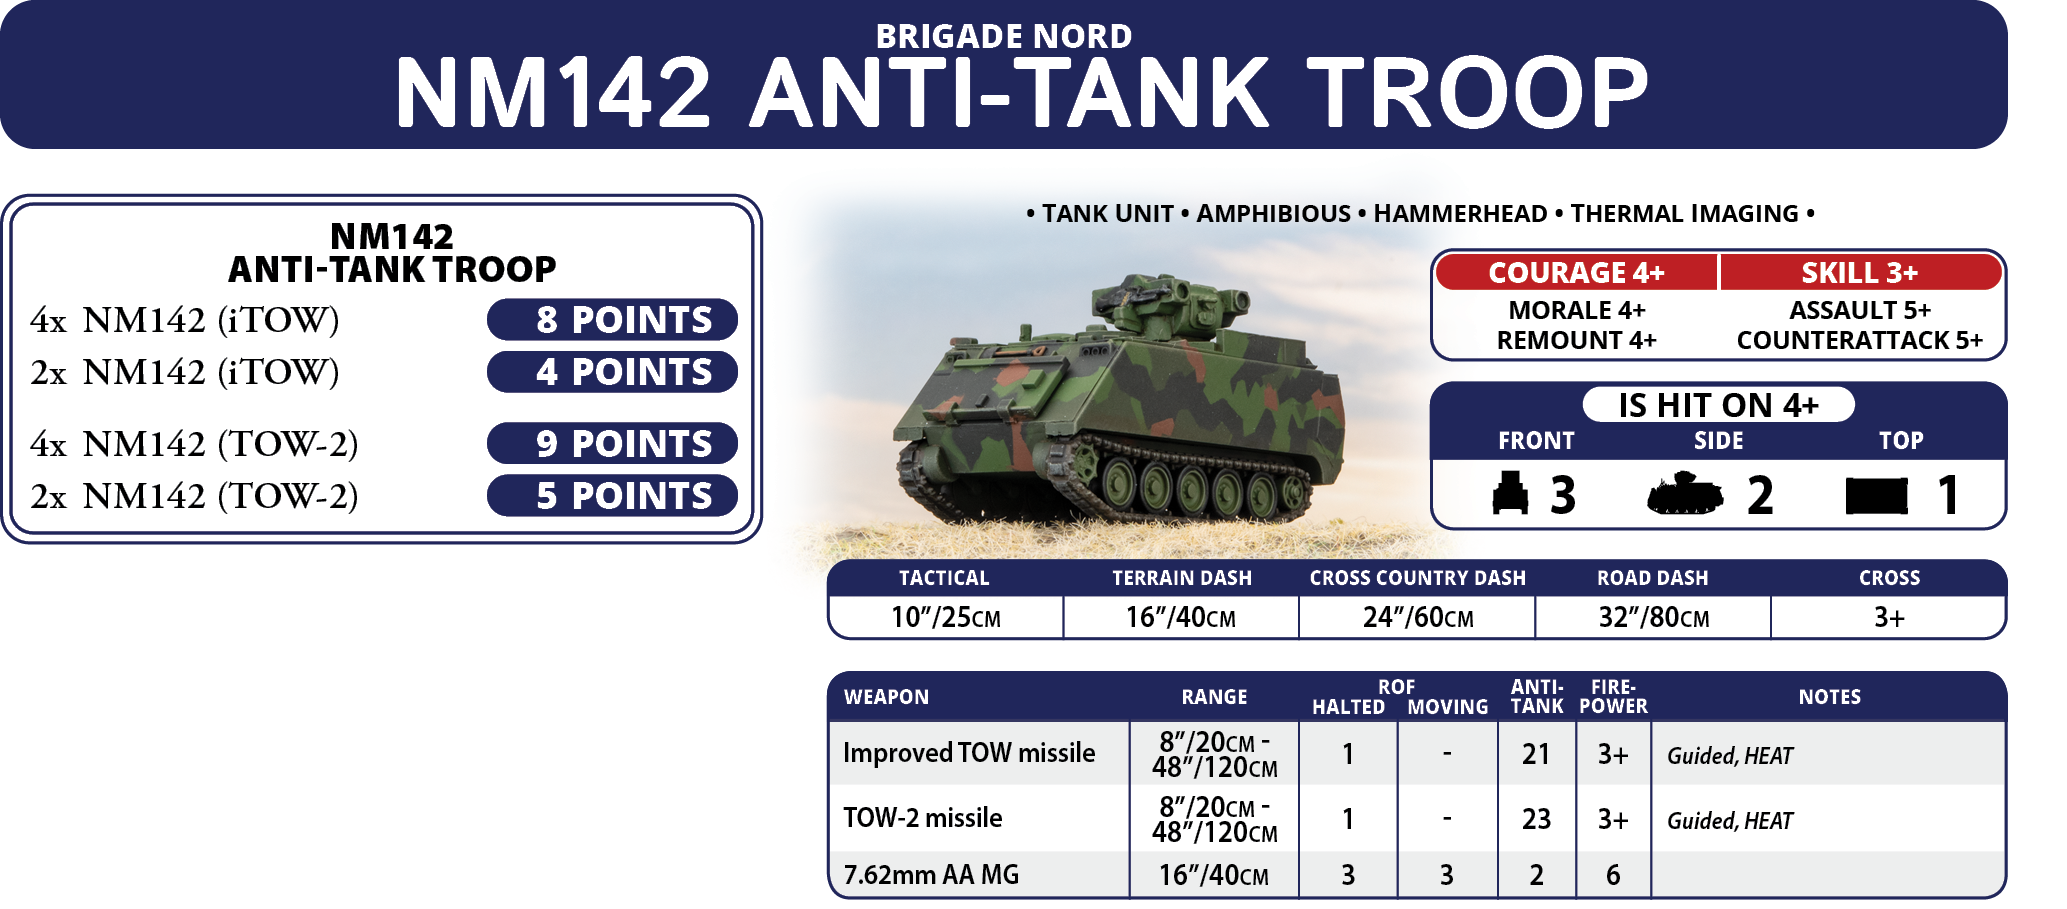
The next unit is the NM142, all have been upgraded with Tow 2 missiles. These also benefit from the Hammerhead rule so place these in cover so as to try to avoid as much retaliatory fire, as these will most likely be your main source of AT on the field if your tanks are in reserve. If you do have your full force to bring to bear against your opponent then try to take out targets that the Leopards will have minimal chance against from the front. These can be used to great effect to give opportunities to your leopards to flank the enemy whilst trying to avoid the NM142s.
|
|
|
|
Next the RBS 70 AA, its primary role is to go after Air units that your anti-helicopter units won’t have a chance of doing much damage to, such as strike aircraft. They do have a decent range so putting them in cover with good LOS is key.
|
|
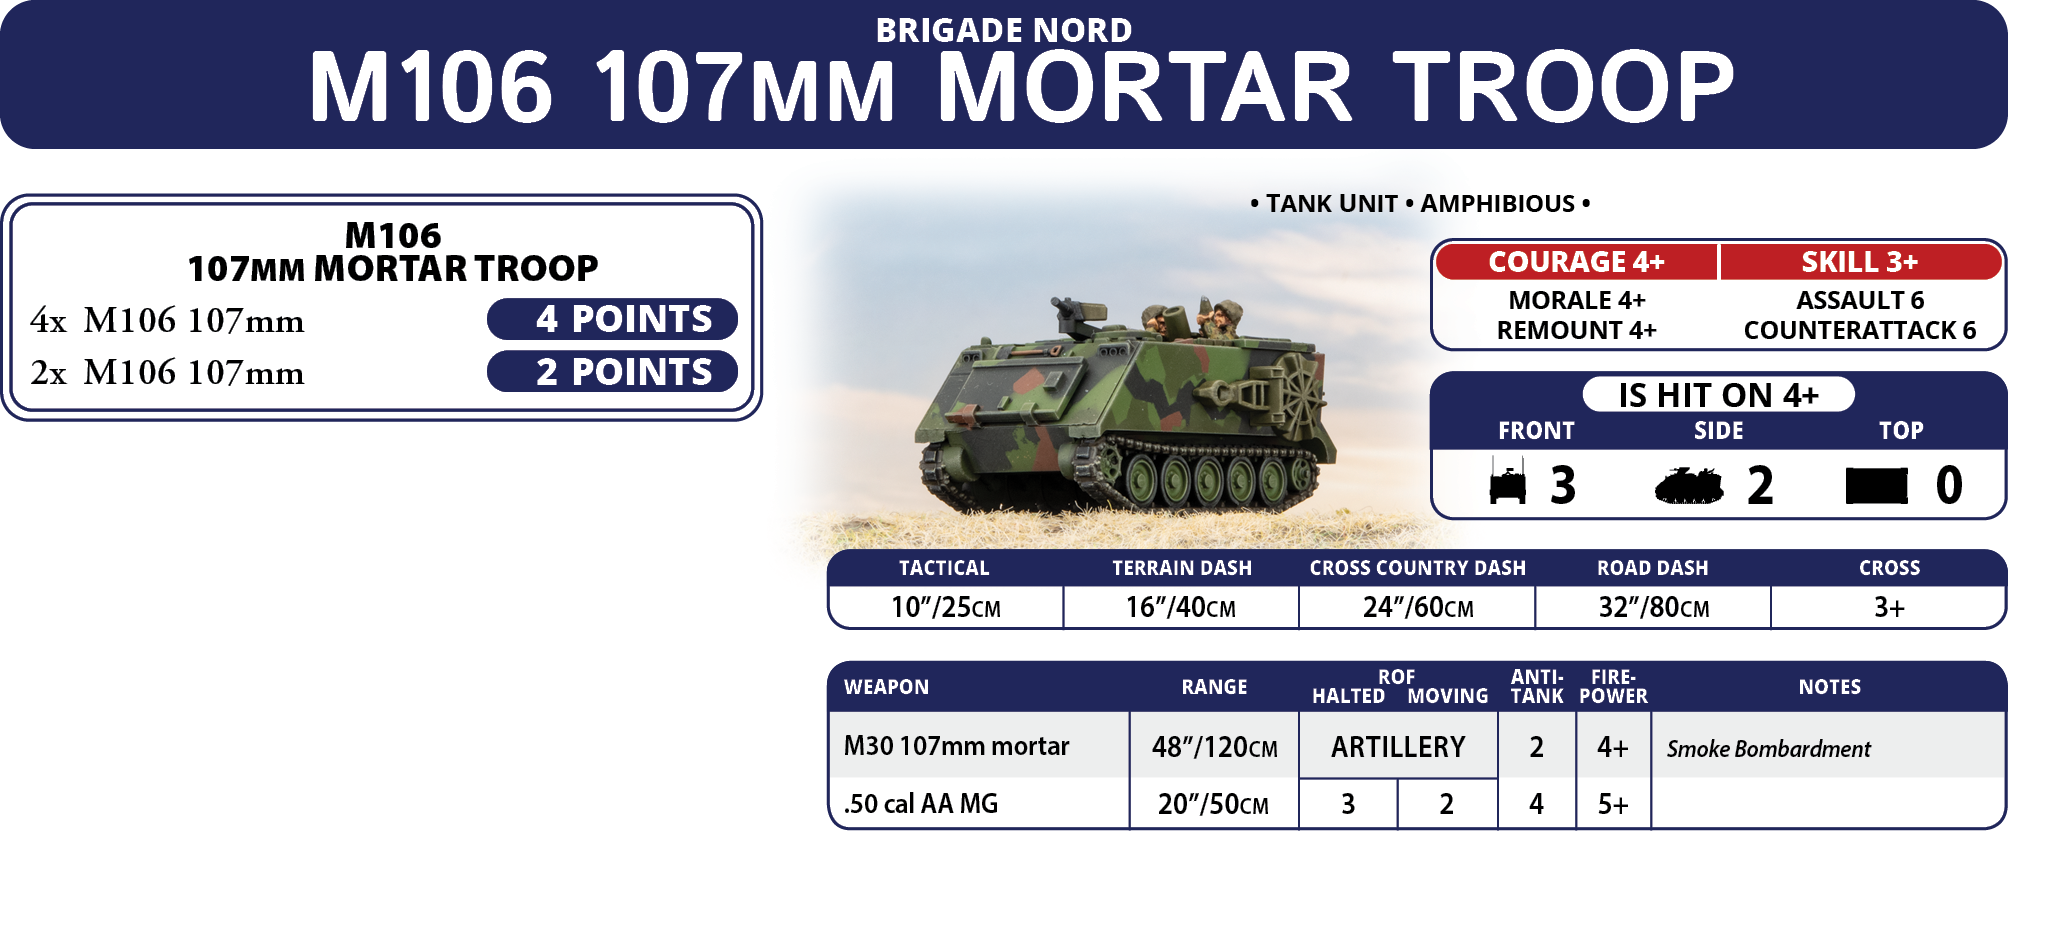
Lastly mortars, you have two units of mortars. Both have the smoke ability you should take an opportunity to use this to hinder return fire or to screen your tanks as they advance. The other good thing is to range them in close together on a similar target to get better coverage, but also because it can be used to great effect against infantry as it will force them to either move or retreat or weather the repeat bombardment next turn.
|
|
|
|
The second list plays very similar to the pure Leopard force. The main differences are it has some extra units, however, the roles are similar to what’s already available.
|
|
So I hope you enjoyed this article on Norwegian armour, its skillsets and history. Till next time, Good hunting.
~ For Warned Forearmed
|
Last Updated On Thursday, August 17, 2023 by Ryan Smith
|
|
|