|
|
 |
|
|
Charlie's Chieftains – British Army Deal (TBRAB1)
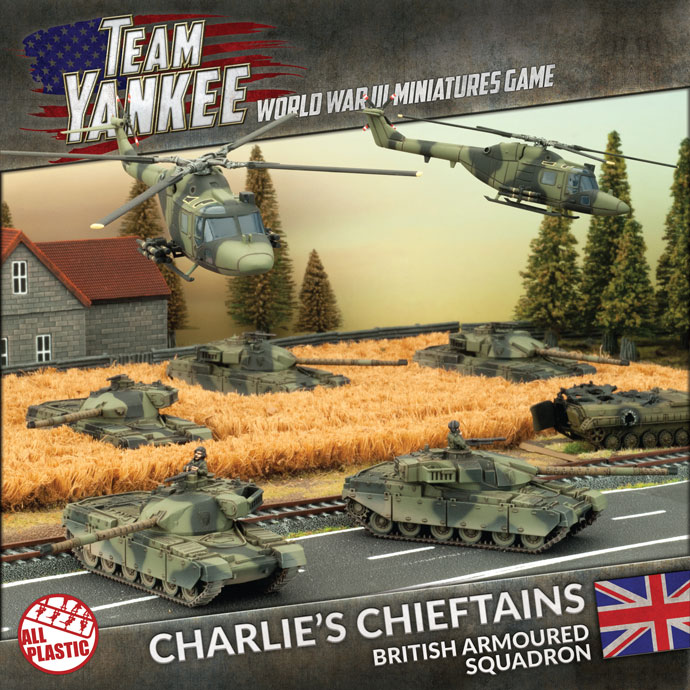 |
Charlie's Chieftains (TBRAB1)
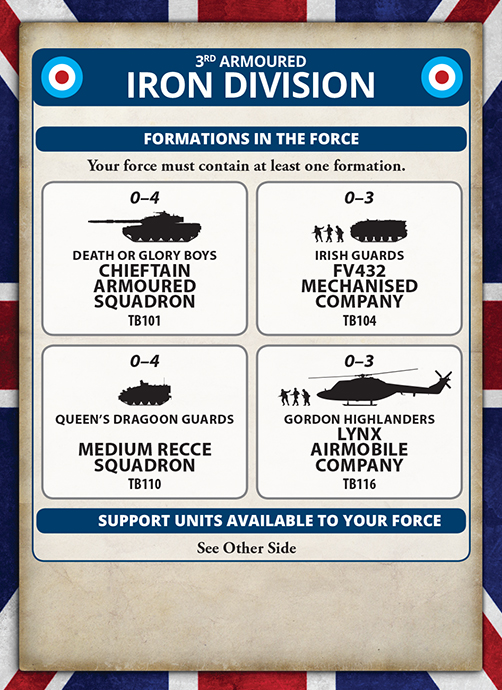
Contains five plastic Chieftain Main Battle Tanks, two plastic two Lynx helicopters, six resin tank commander figures, eight rare-earth magnets, two decal sheets, six unit cards and one printed cardboard Artillery & Salvo template.
C Squadron, 17th/21st Lancers, and the Irish Guardsmen supporting them made their last-minute preparations, each man checking his weapons one more time and going through the little rituals that had become talismans against violent death.
After days of hard fighting, they were worn and frayed, no longer so eager to test themselves in battle. Their expressions were grim and hard. The coming battle was not going to be easy.
This product is no longer available...
|
|
With its usual professionalism, the British Army had prepared for war. Now, as the Soviet Army flooded across the border into West Germany, it was ready and waiting. Fox, Scorpion and Scimitar recon vehicles skirmished with the Soviet forward detachments as the Challenger and Chieftain armoured regiments waited. The infantry held the towns and woods, forcing the enemy into killing zones, new Warrior infantry fighting vehicles in fire support. If anything broke through, the airmobile troops in their Lynx helicopters would hold them. The British Army is ready.
Click here to learn more about World War III: British...
|
 |
| The Chieftain has a simple job in Team Yankee: find a good firing position and destroy everything that comes in front of it. With its heavy armour and 120mm gun, there are few tanks that want to engage it in a stand-up fight. |
|
The TOW Lynx mounts the US Improved TOW anti-tank missile for the HELARM (Helicopter, Armed) operations. The Lynx is fast and aerobatic, making it ideal for the anti-tank role as it can fly below tree-top level to sneak into position, then pop up using its roof-mounted sights to acquire targets and destroy them with its missiles. Once done, the helicopter quickly repositions to avoid unwanted attention from Soviet air-defence vehicles.
|
 |
|
| Charlie's Chieftains Box Contents |
| Contact the customer service team at [email protected] if you have issues with any components. |
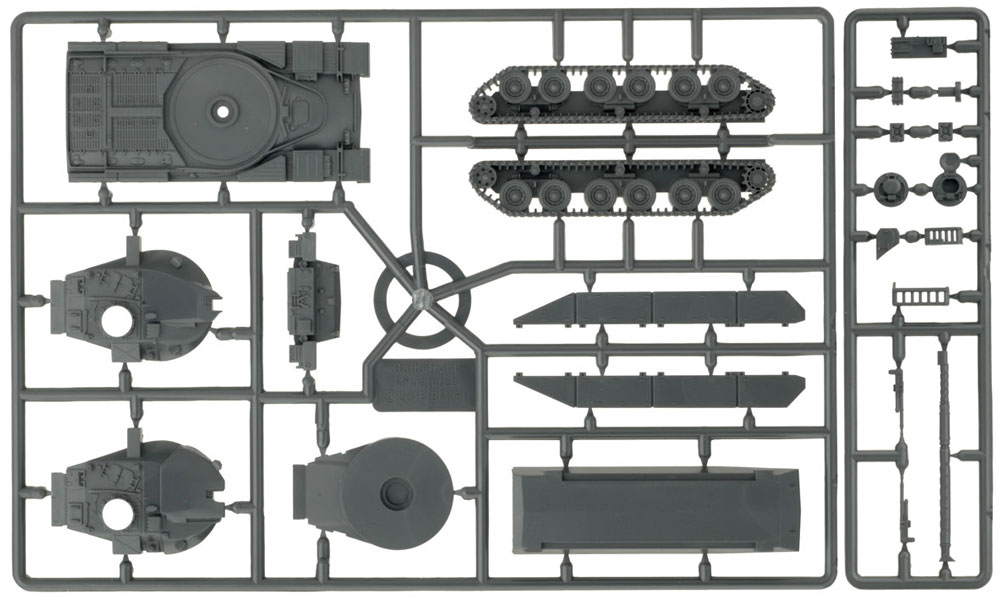
| Chieftain Sprue (x5) |
 |
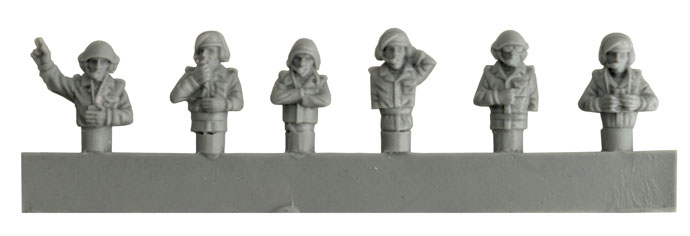
| Tank Commander Sprue - front |
 |
| back |
 |
|
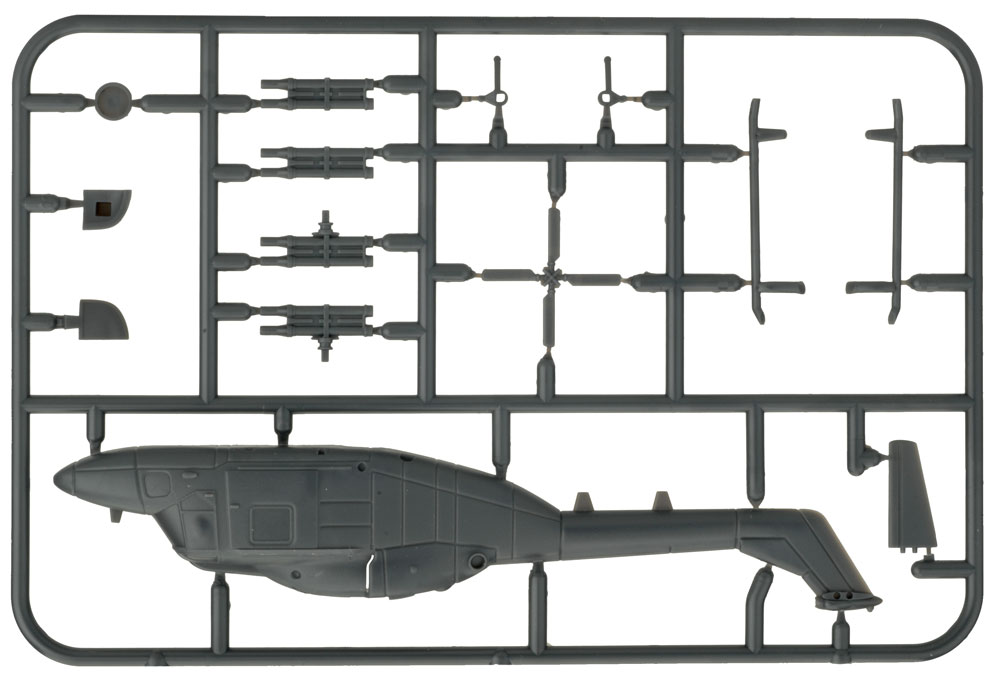
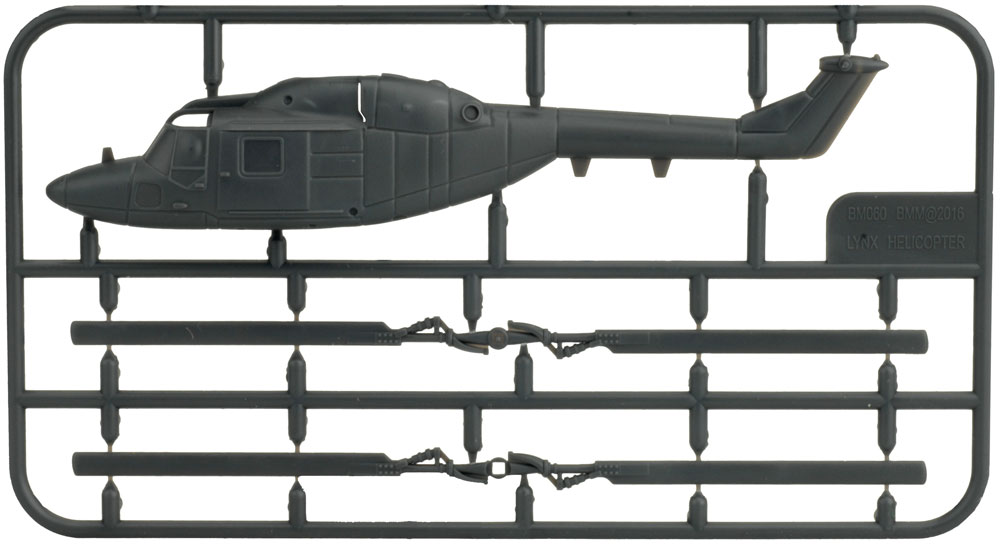
Lynx Helicopter Sprue (x2)
|
 |
|
|
 |
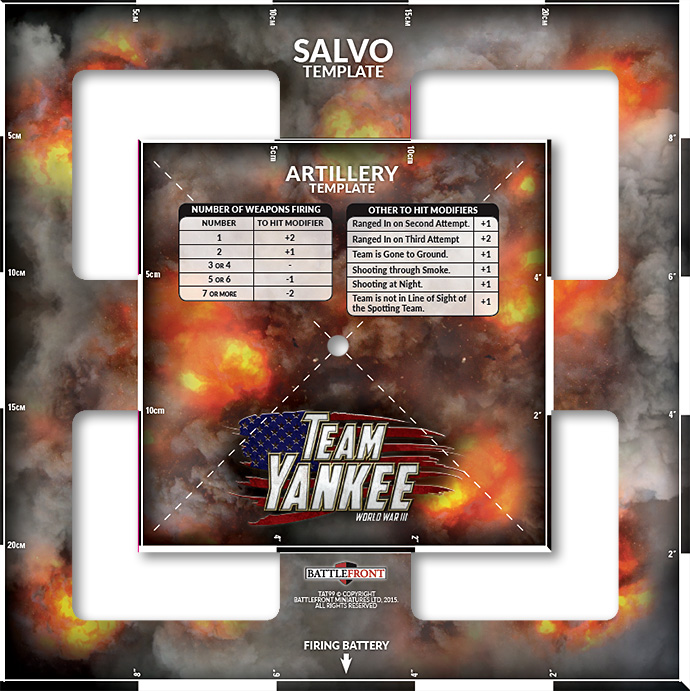
| Artillery & Salvo Template |
| Artillery Bombardments in Team Yankee use a Template to show the area being bombarded. There are two sizes of template: Artillery (6"15cm square) and Salvo (10"/25cm square) depending on the ROF of the weapons firing. The printed template in Charlies Chieftains is designed to give you two sizes of template in one. |
 |
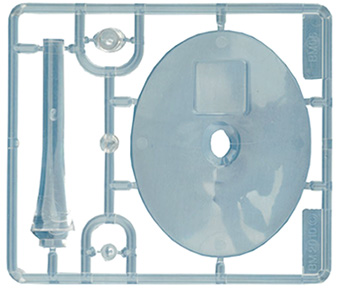
| Flight Stands (x2) |
 |
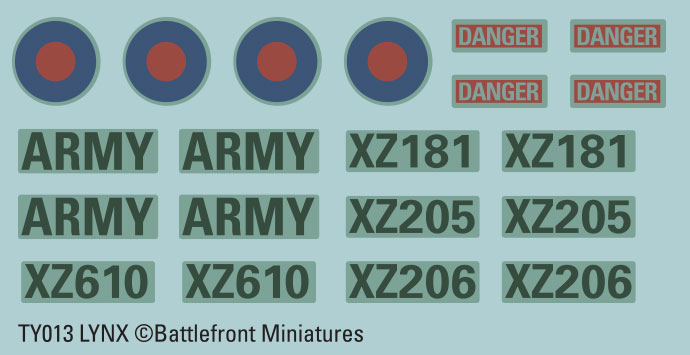
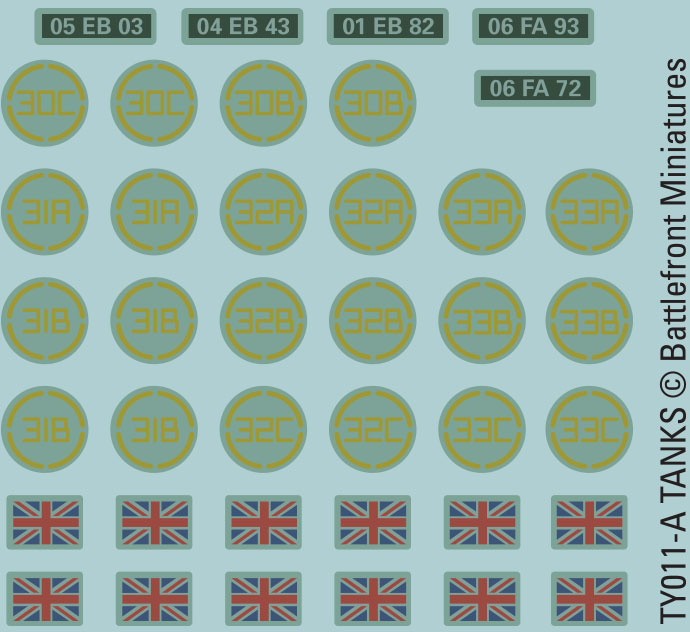
| Decal Sheets |
 |
 |
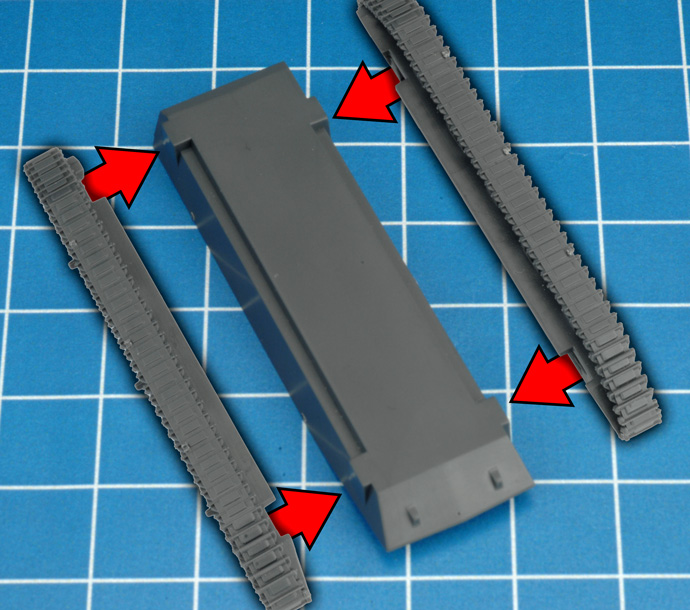
| Assembling The Plastic Chieftain |
| Step 1: Start by gluing the tracks to each side of the lower hull section. |
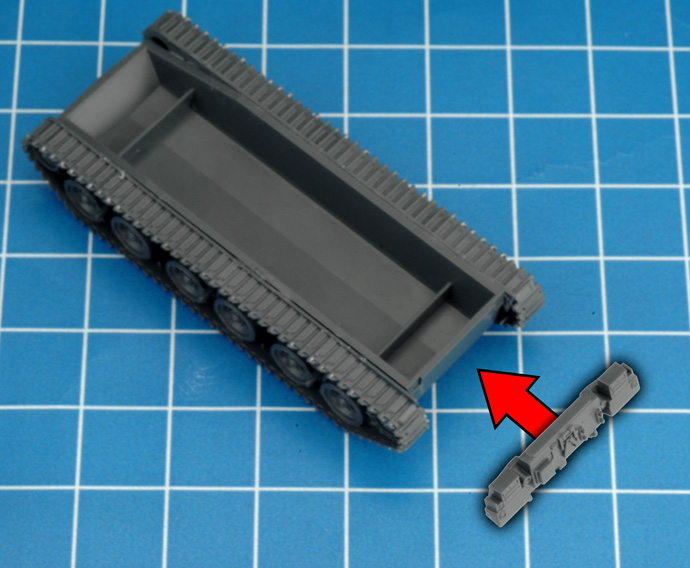
Step 2: Next, glue on the hull rear plate to the back of the lower hull section. |
 |
 |
| Step 3. Attach the top deck of the hull to the lower hull section. |
Step 4. Next, attach the track skirts to the each side of the hull. |
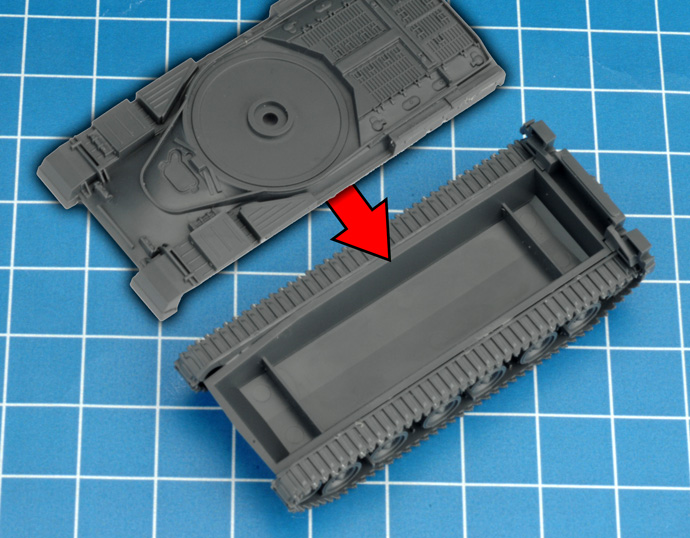 |
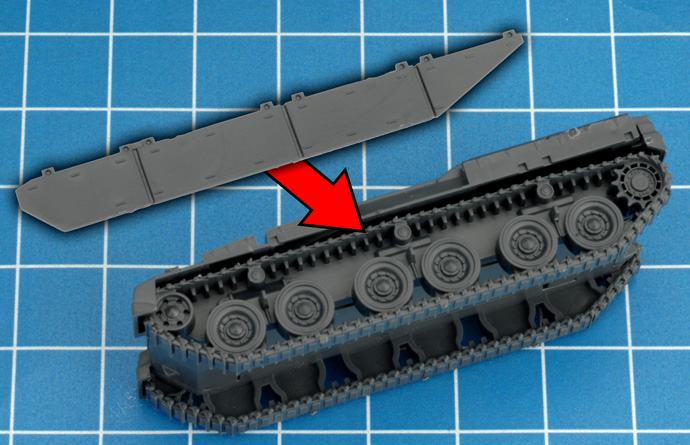 |
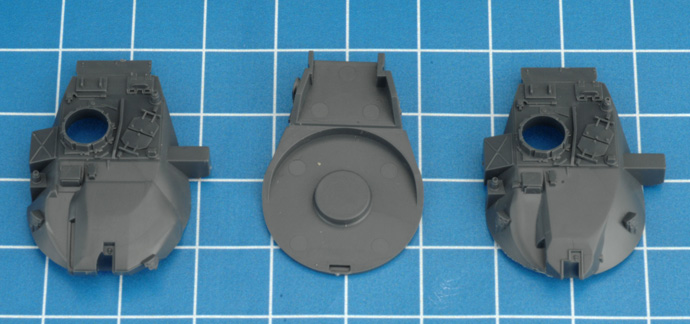
| Below: The plastic Chieftain includes a turret option for the Stillbrew armour upgrade. The Stillbrew turret can be seen on the left in the image below. The regular turret without the Stillbrew upgrade can be seen on the right. |
 |
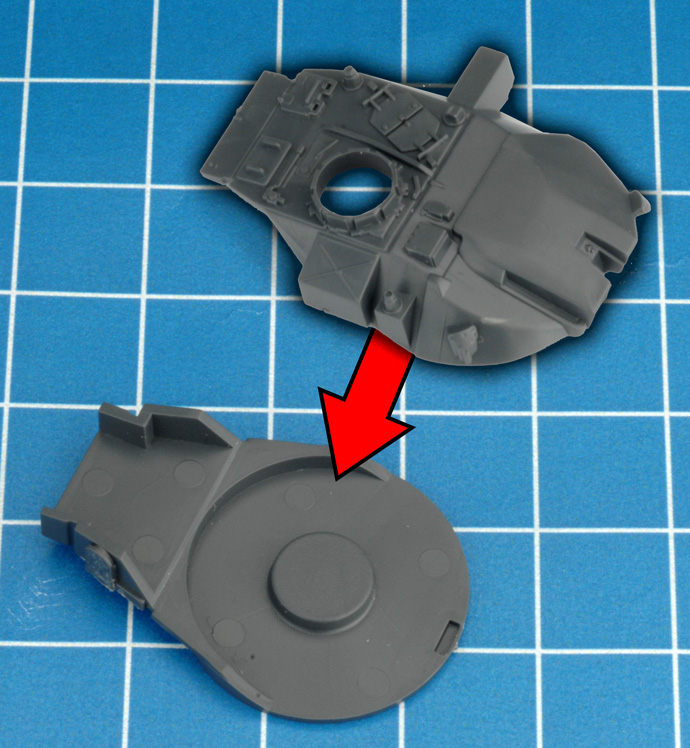
| Step 5. Once you've decided on a turret option, attach it to the lower turret section. |
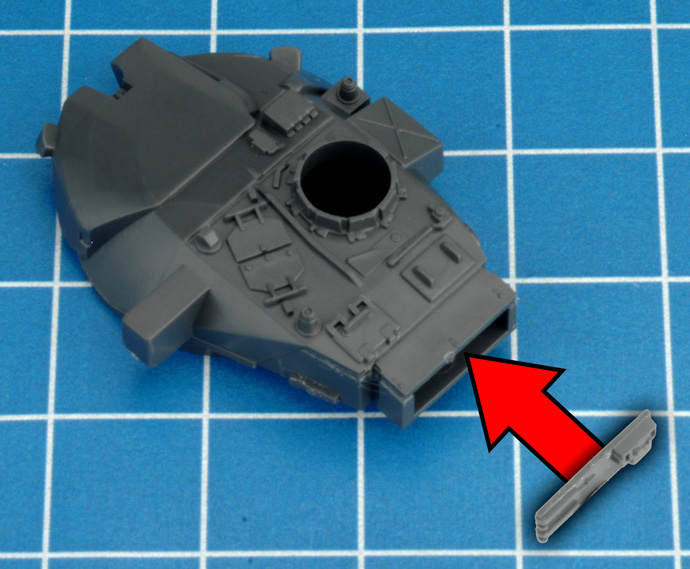
Step 6. Add the rear turret plate. |
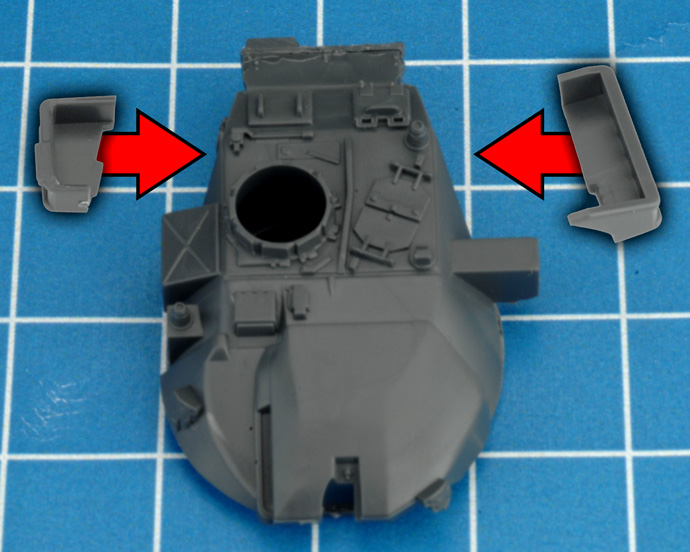
Step 7. Next, attach the storage baskets to the sides of the turret. |
 |
 |
 |
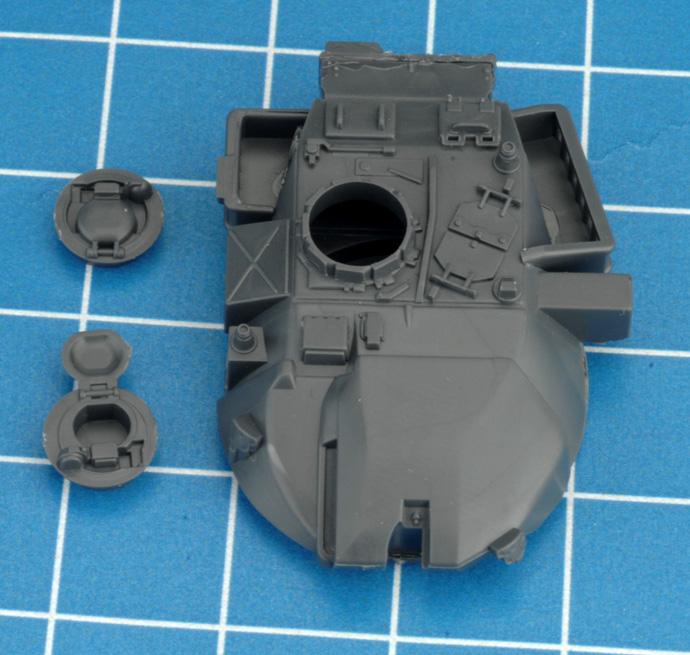
| Below: The Chieftain comes with both a closed and open version of the Commander's cupola. |
 |
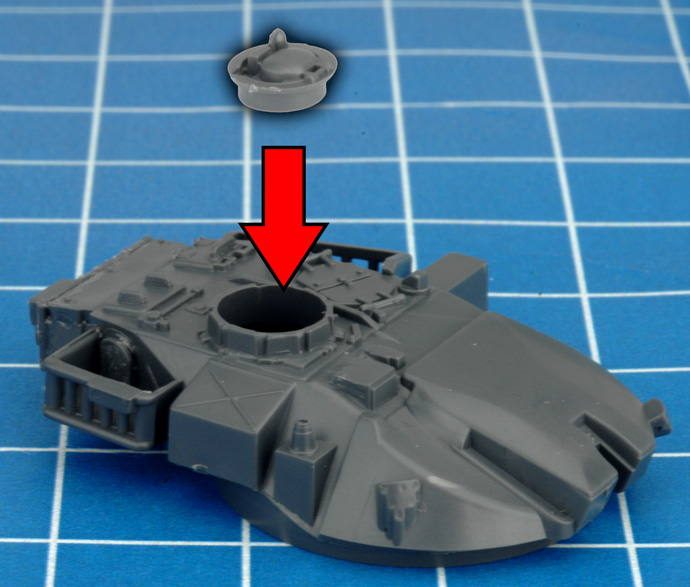
| Step 8. Next, attach the cupola of the choice to the top of the turret. |
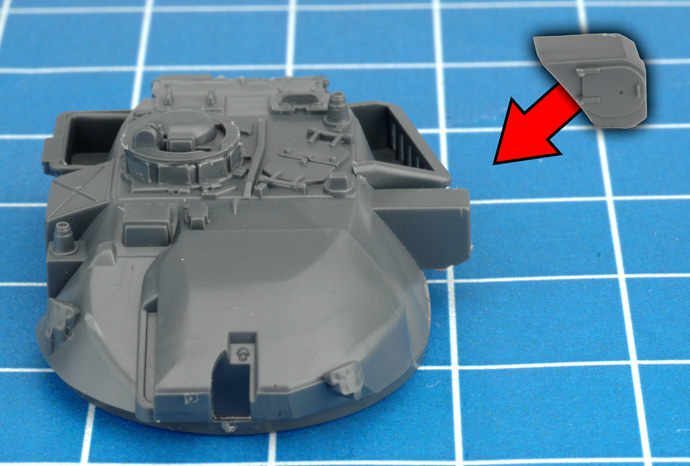
Step 9. Attach the searchlight housing to the side of the turret. |
 |
 |
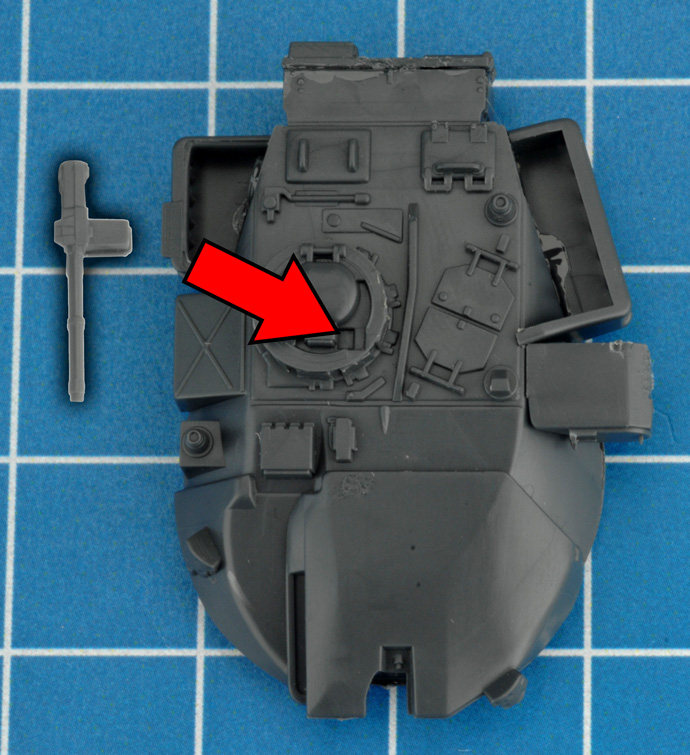
| Step 10. Attach the machine-gun to the cupola. |
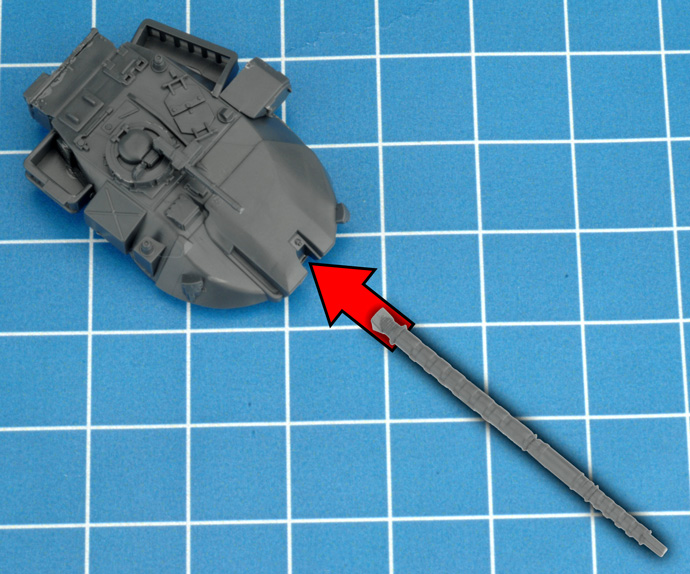
Step 11. Next, attach the 120mm main gun to the front of the turret. |
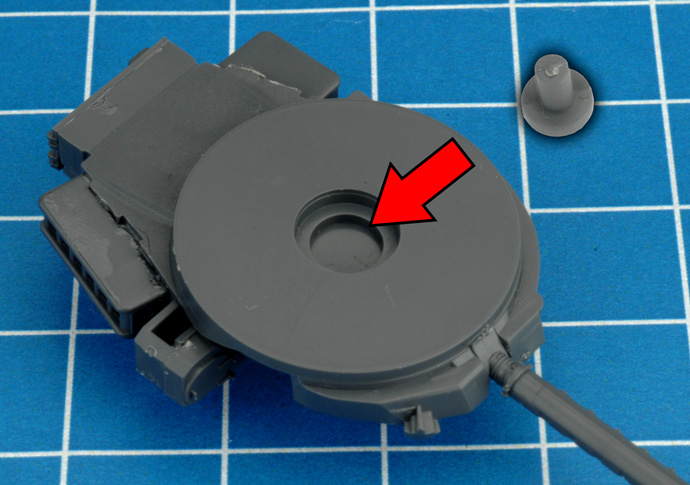
Step 12. Attach the turret peg to the base of the turret in order to secure the turret to the hull. |
 |
 |
 |
| Below: With the turret now secured to the hull, the Chieftain is now fully assembled. |
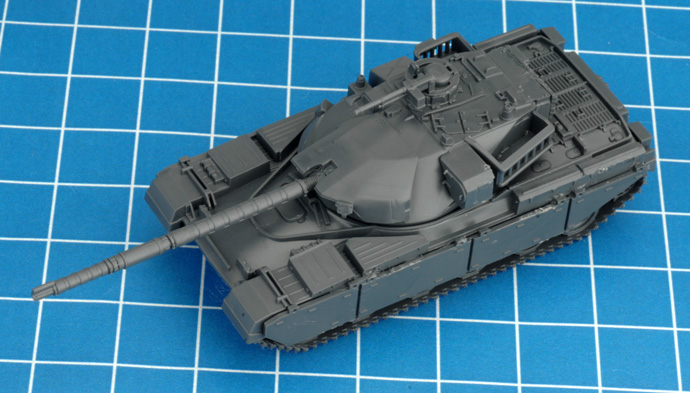 |
| Aaron demonstrates the process of assembling the Chieftain for the British forces in Team Yankee. |
|
Assembling the Lynx Transport Helicopter
|
|
Components Required For The Lynx Transport Helicopter
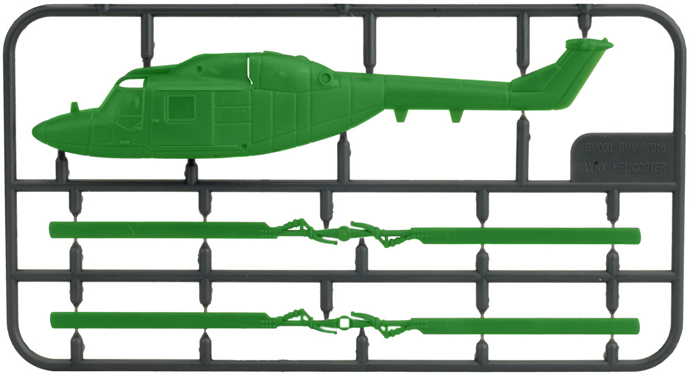
The components required to assemble the Lynx Transport helicopter can be seen below highlighted in green on the two plastic frames below.
|
 |
| Assembly of the Lynx Transport Helicopter |
| Step 1. Begin assembly of the Lynx by joining the two halves of the fuselage. |
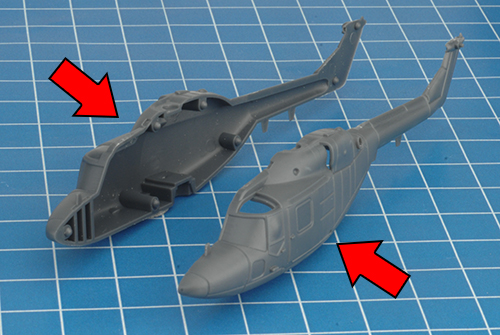
Below: Each side of the fuselage has a number of orientation points. As seen in the image below, this side has female points. |
 |
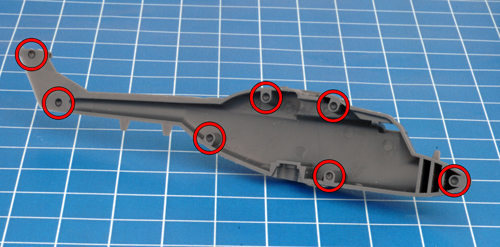 |
| Below: The male orientation points of the second half of the Lynx fuselage. |
Below: Both halves of the fuselage joined correctly. |
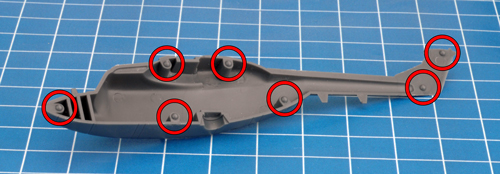 |
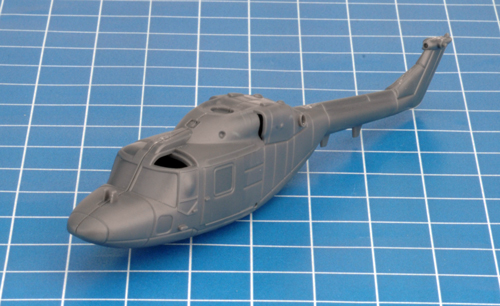 |
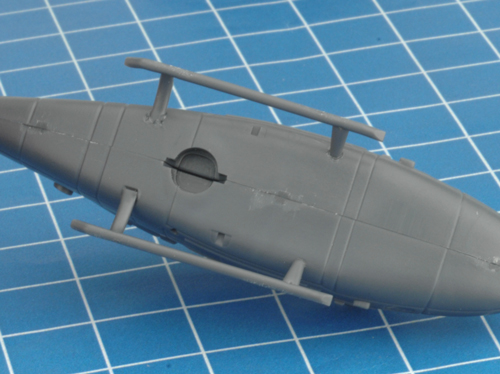
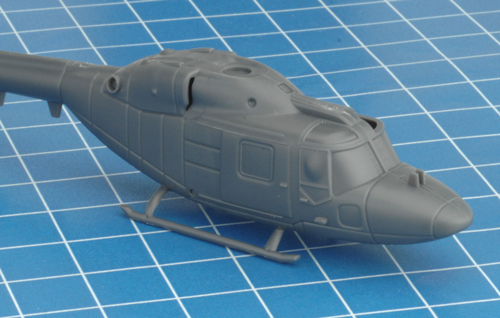
| Step 2. Next, attach the landing skids to the bottom of the fuselage. Note: The longer strut on the landing skids attaches to the fuselage towards the tail boom. |
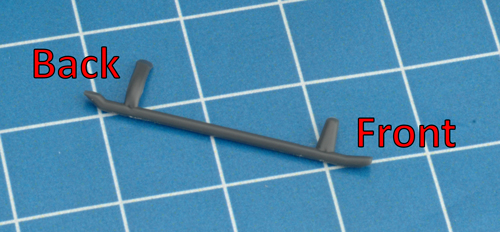 |
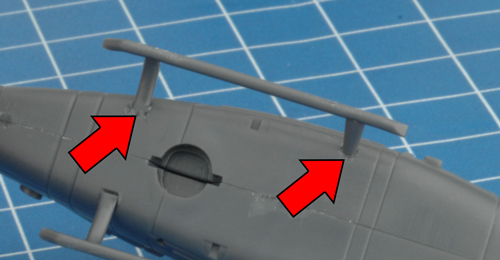 |
| Below: Both landing skids attached correctly to the belly of the fuselage. |
 |
 |
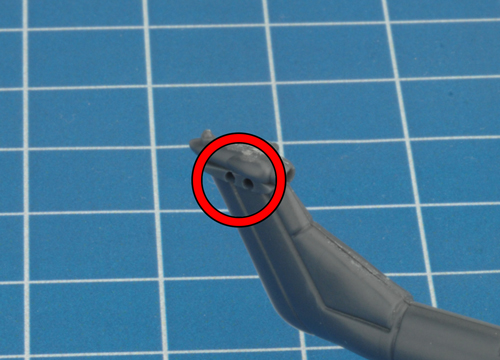
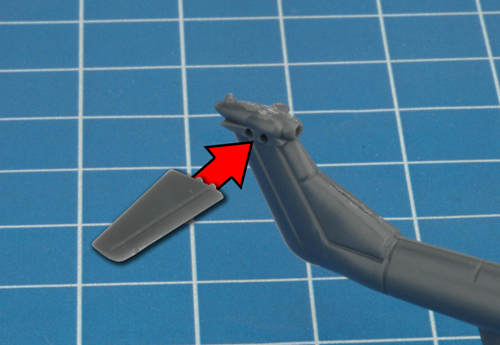
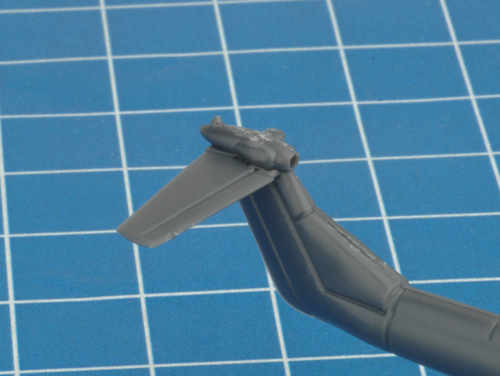
| Step 3. Attach the tail fin to the tail boom. Note: The tail fin has orientation points to ensure correct orientation. |
 |
 |
| Below: The tail fin attached correctly to the tail boom. |
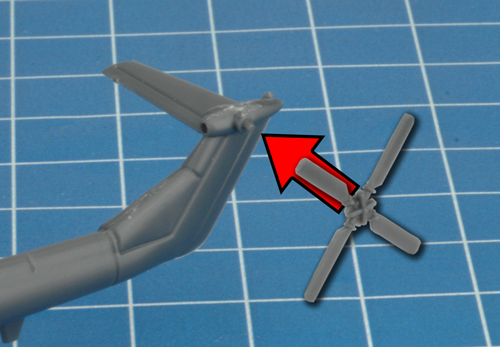
Step 4. Next, attach the tail rotor to the tail boom. |
 |
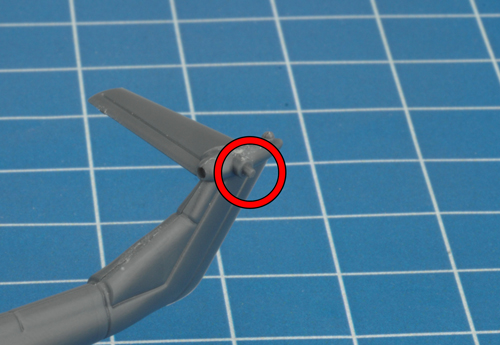 |
| Below: The tail rotor attached to the tail boom via the small mounting pin. |
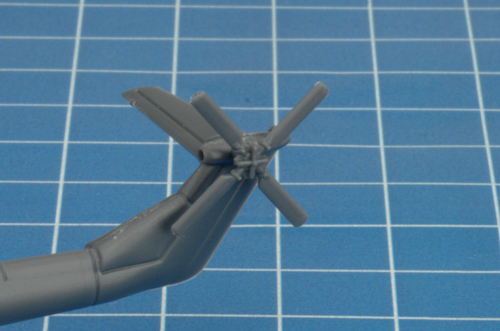
Below: The tail rotor attached correctly to the tail boom. |
 |
 |
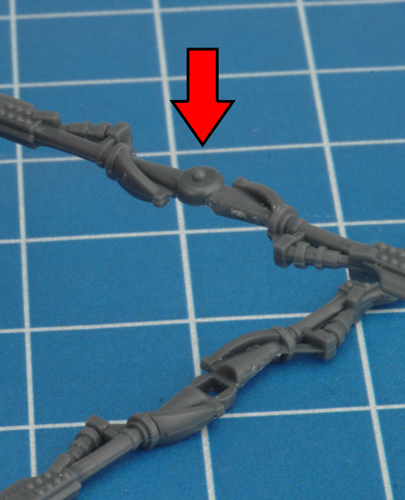
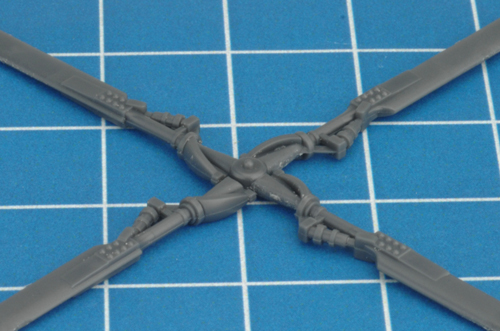
| Step 5. Join the two sets of main rotors to create a '+' shape. Note: The set of rotors with the rotor cap should be placed on top of the set with the square cut-out. The square cut-out provides a location to secure the rotor spinner. |
 |
 |
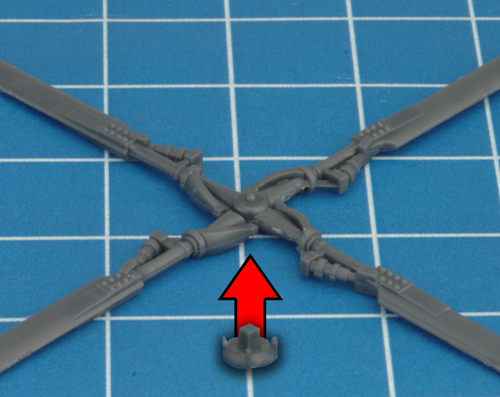
| Step 6. Next, attach the rotor spinner to the bottom of the main rotors. |
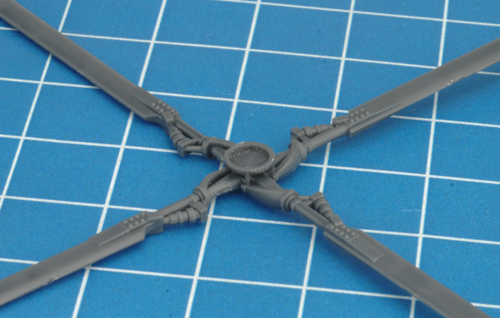
Below: The rotor spinner attached correctly to the bottom of the main rotors. |
 |
 |
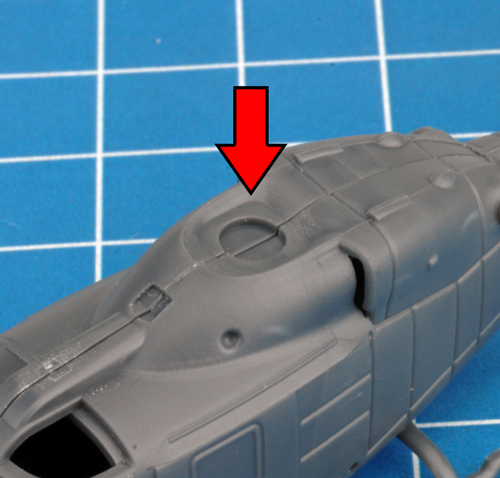
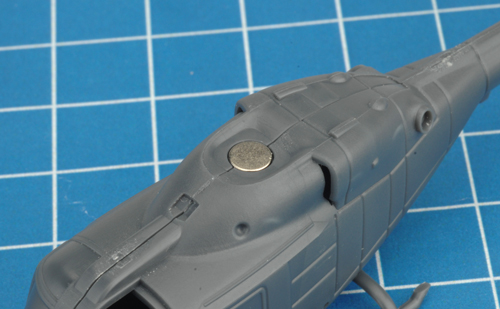
| Below: Adding a rare earth magnet to the fuselage. |
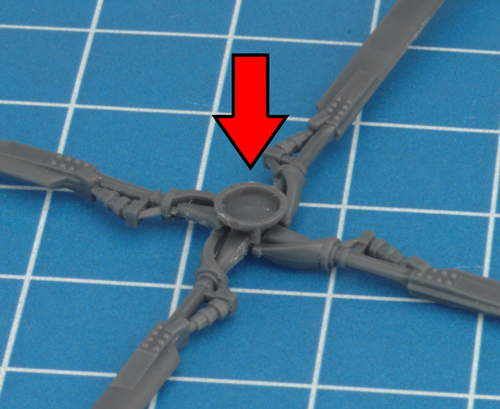
Below: Adding a rare earth magnet to the rotor spinner. |
 |
 |
 |
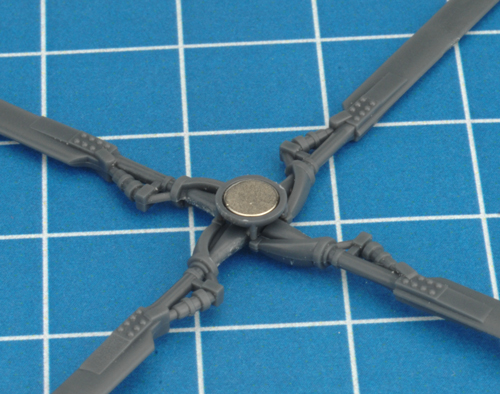 |
| Below: The main rotors can be attached to the top of the fuselage using the rare magnets included in the box set (see above) or permanently attached using plastic glue. |
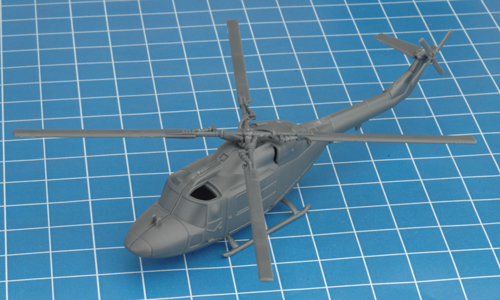
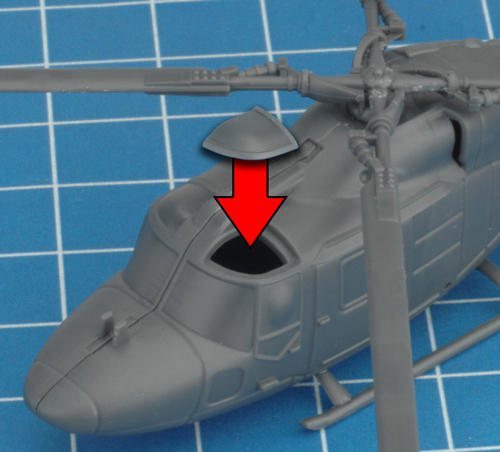
Step 7. Finally, attach the clear roof panel to the top of the fuselage. |
 |
 |
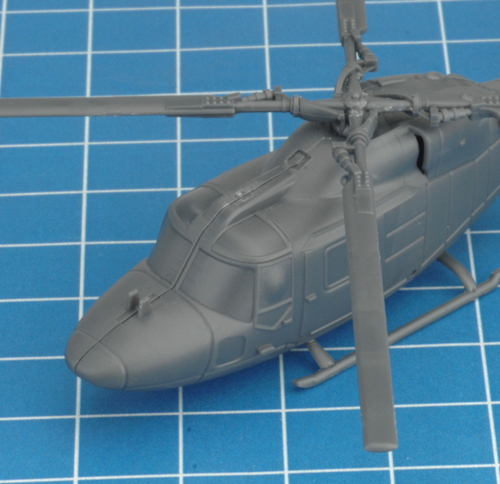
| Below: The clear roof panel attached correctly to the top of the fuselage. |
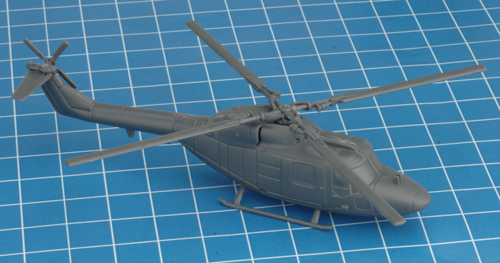
Below: With the clear roof panel in place, the Lynx Transport helicopter is now fully assembled. |
 |
 |
| Assembling The Flight Stand |
Step One
Cut the parts of the flight stand off the plastic sprue using a sharp hobby knife or a pair of hobby cutters. |
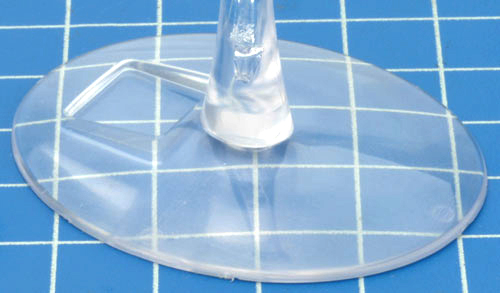 |
Step Two
Attach the stem to the flight stand base. The hard plastic of the flight stand will bond firmly with plastic cement, but you can also use superglue.
There are two sizes of stem; the standard practice is to use the shorter stem for helicopters and the tall stem for strike aircraft, to bolster the impression that they are flying at a higher altitude. But there's no reason you shouldn't use the tall stem for helicopters if you like how it looks.
Left: The stem attached to the base.
|
|
Step Three
Add the magnet cap to the top of the stem. The cap fits snugly to the top of the stem, so you will only need a small amount of glue to neatly secure the magnet cap in place.
|
Step Four
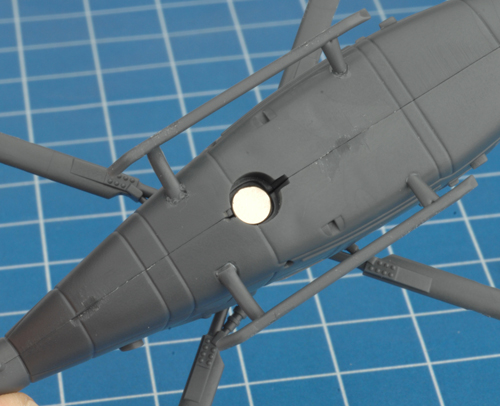
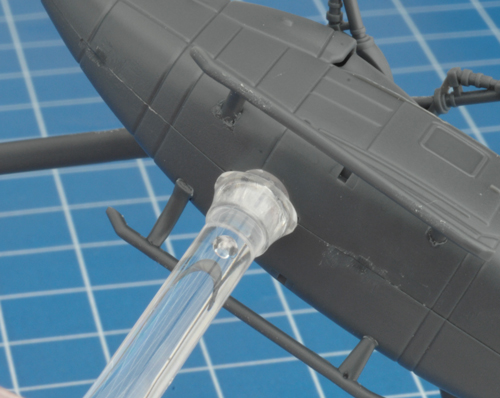
The cap has a recess to hold one of the supplied rare-earth magnets, to create a solid connection between the stand and the aircraft model. The tabs at the front and back help keep the aircraft pointing in the right direction. |
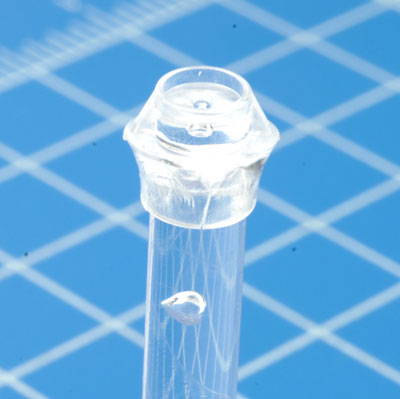 |
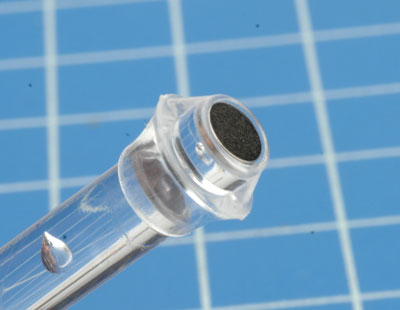 |
Step Five
Add a rare earth magnet to the flight stand recess in the belly of the Lynx. This will ensure a strong connection between the flight stand and the helicopter itself. |
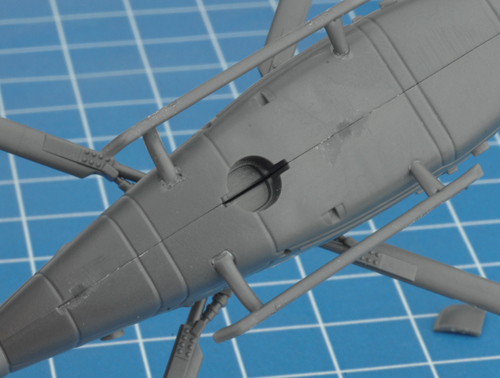 |
 |
| Below: The flight stand plugged into the belly of the Lynx. |
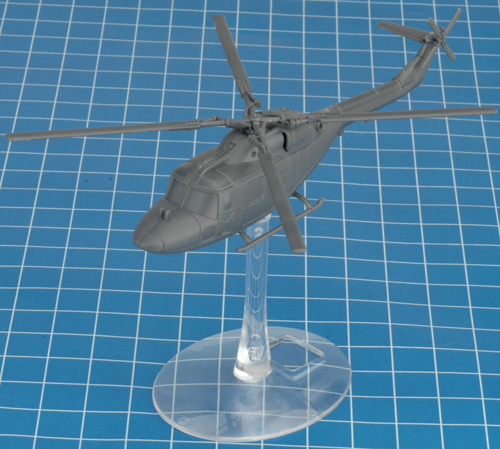
Below: The Lynx on the flight stand. |
 |
 |
| Assembling the Lynx HELARM Helicopter |
Components Required For The Lynx HELARM Helicopter
The components required to assemble the Lynx HELARM helicopter can be seen below highlighted in green on the two plastic frames below. |
 |
| Step 1. Assemble the Lynx HELARM helicopter as you would the Lynx Transport helicopter as seen here. |
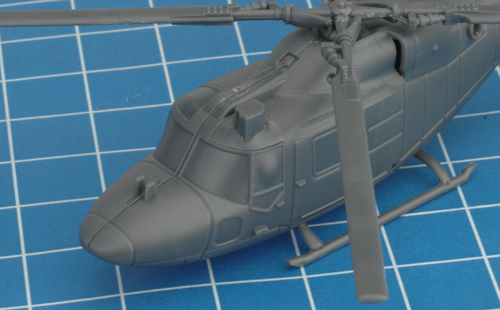
Step 2. Next, attach the roof-mounted sight to the top of the fuselage. |
 |
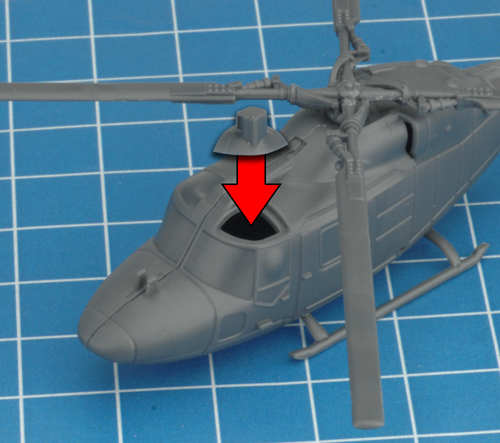 |
| Below: The roof-mounted sight attached correctly to the top of the fuselage. |
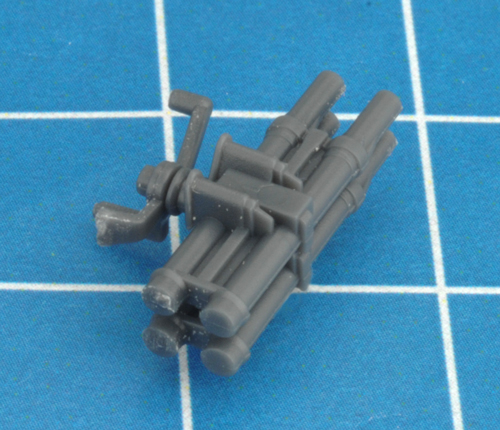
Step 3. Next, join the two halves of the TOW missile pods. |
 |
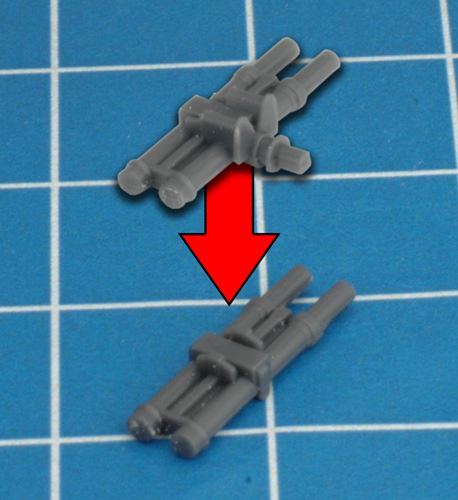 |
| Below: The assembled TOW missile pods. |
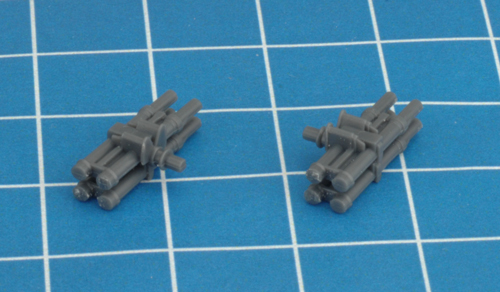
Step 4. Attach the weapons mounting brackets. |
 |
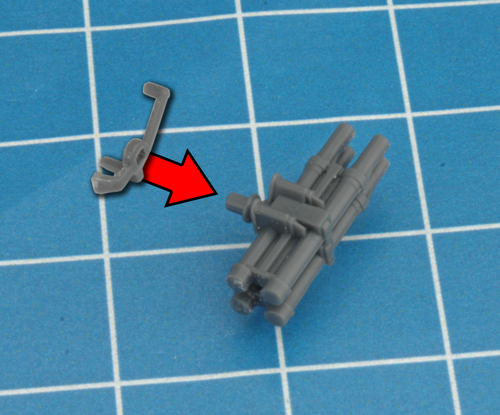 |
| Note: The longer arm of the mounting brackets should align with longer section of each TOW missile pod. |
Step 5. Next, attach the TOW missile pod with the mounting brackets to the side of the fuselage using the orientation points as seen in the image below. |
 |
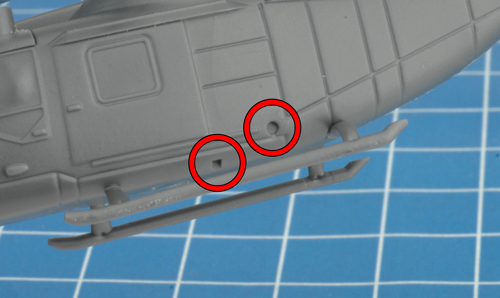 |
| Note: The longer arm of the mounting bracket pointing towards the tail boom of the Lynx. |
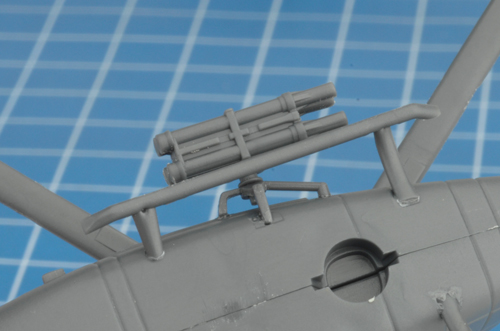
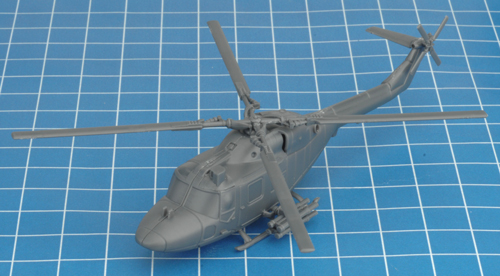
Below: With TOW missle pods in place, the Lynx HELARM helicopter is now fully assembled. |
 |
 |
|
|
|
| Find out how to paint the distinctive green and black camouflage pattern on British vehicles and helicopters as Aaron takes you through the process with the Chieftain tank. |
|
Last Updated On Monday, February 3, 2020 by Luke at Battlefront
|
|
|